Canon EOS C70 Instruction Manual - Page 21
Using the LCD Screen, you can al
 |
View all Canon EOS C70 manuals
Add to My Manuals
Save this manual to your list of manuals |
Page 21 highlights
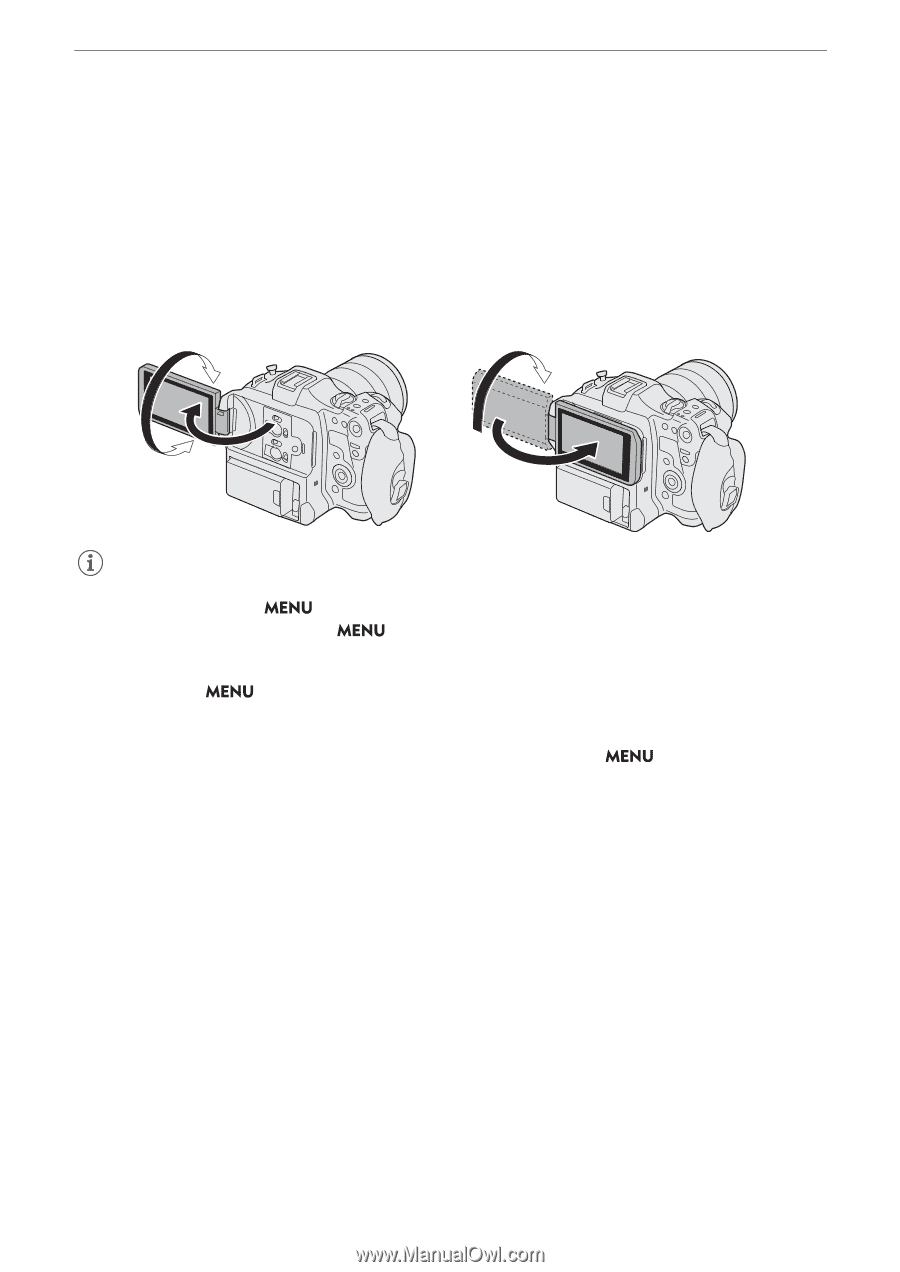
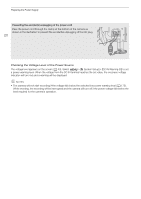
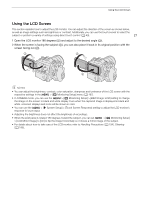
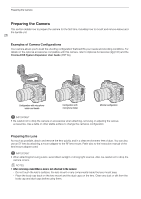
Using the LCD Screen Using the LCD Screen This section explains how to adjust the LCD monitor. You can adjust the direction of the screen as shown below, as well as image settings such as brightness or contrast. Additionally, you can use the touch screen to select the subject or perform a variety of settings using direct touch control (A 49). 21 1 Open the LCD monitor 180 degrees (ቢ) and adjust to the desired angle (ባ). 2 When the screen is facing the subject (ቤ), you can also place it back in its original position with the screen facing out (ብ). ባ ቤ ቢ ብ NOTES • You can adjust the brightness, contrast, color saturation, sharpness and luminance of the LCD screen with the respective settings in the > [¢ Monitoring Setup] menu (A 167). • In CAMERA mode, you can use the > [¢ Monitoring Setup] > [B&W Image: LCD] setting to change the image on the screen to black and white display. Even when the captured image is displayed in black and white, onscreen displays and icons will be shown in color. • You can use the > [B System Setup] > [Touch Screen Response] setting to adjust the LCD monitor's response to touch input. • Adjusting the brightness does not affect the brightness of recordings. • When the LCD panel is rotated 180 degrees toward the subject, you can set > [¢ Monitoring Setup] > [LCD Mirror Image] to [On] to flip the image horizontally so it shows a mirror image of the subject. • For details about how to take care of the LCD monitor, refer to Handling Precautions (A 194), Cleaning (A 196).
-
 1
1 -
2
-
3
-
4
-
5
-
6
-
7
-
8
-
9
-
10
-
11
-
12
-
13
-
14
-
15
-
 16
16 -
 17
17 -
 18
18 -
 19
19 -
 20
20 -
 21
21 -
 22
22 -
 23
23 -
 24
24 -
 25
25 -
 26
26 -
27
-
28
-
29
-
30
-
31
-
32
-
33
-
34
-
35
-
36
-
37
-
38
-
39
-
40
-
41
-
42
-
43
-
44
-
45
-
46
-
47
-
48
-
49
-
50
-
51
-
52
-
53
-
54
-
55
-
56
-
57
-
58
-
59
-
60
-
61
-
62
-
63
-
64
-
65
-
66
-
67
-
68
-
69
-
70
-
71
-
72
-
73
-
74
-
75
-
76
-
77
-
78
-
79
-
80
-
81
-
82
-
83
-
84
-
85
-
86
-
87
-
88
-
89
-
90
-
91
-
92
-
93
-
94
-
95
-
96
-
97
-
98
-
99
-
100
-
101
-
102
-
103
-
104
-
105
-
106
-
107
-
108
-
109
-
110
-
111
-
112
-
113
-
114
-
115
-
116
-
117
-
118
-
119
-
120
-
121
-
122
-
123
-
124
-
125
-
126
-
127
-
128
-
129
-
130
-
131
-
132
-
133
-
134
-
135
-
136
-
137
-
138
-
139
-
140
-
141
-
142
-
143
-
144
-
145
-
146
-
147
-
148
-
149
-
150
-
151
-
152
-
153
-
154
-
155
-
156
-
157
-
158
-
159
-
160
-
161
-
162
-
163
-
164
-
165
-
166
-
167
-
168
-
169
-
170
-
171
-
172
-
173
-
174
-
175
-
176
-
177
-
178
-
179
-
180
-
181
-
182
-
183
-
184
-
185
-
186
-
187
-
188
-
189
-
190
-
191
-
192
-
193
-
194
-
195
-
196
-
197
-
198
-
199
-
200
-
201
-
202
-
203
-
204
-
205
-
206
-
207
-
208
-
209
-
210
-
211
-
212
-
213
-
214
-
215
 |
 |