Canon PowerShot G1 X Mark III PowerShot G1X MarkIII Camera User Guide - Page 104
Configuring Touch & Drag AF
 |
View all Canon PowerShot G1 X Mark III manuals
Add to My Manuals
Save this manual to your list of manuals |
Page 104 highlights
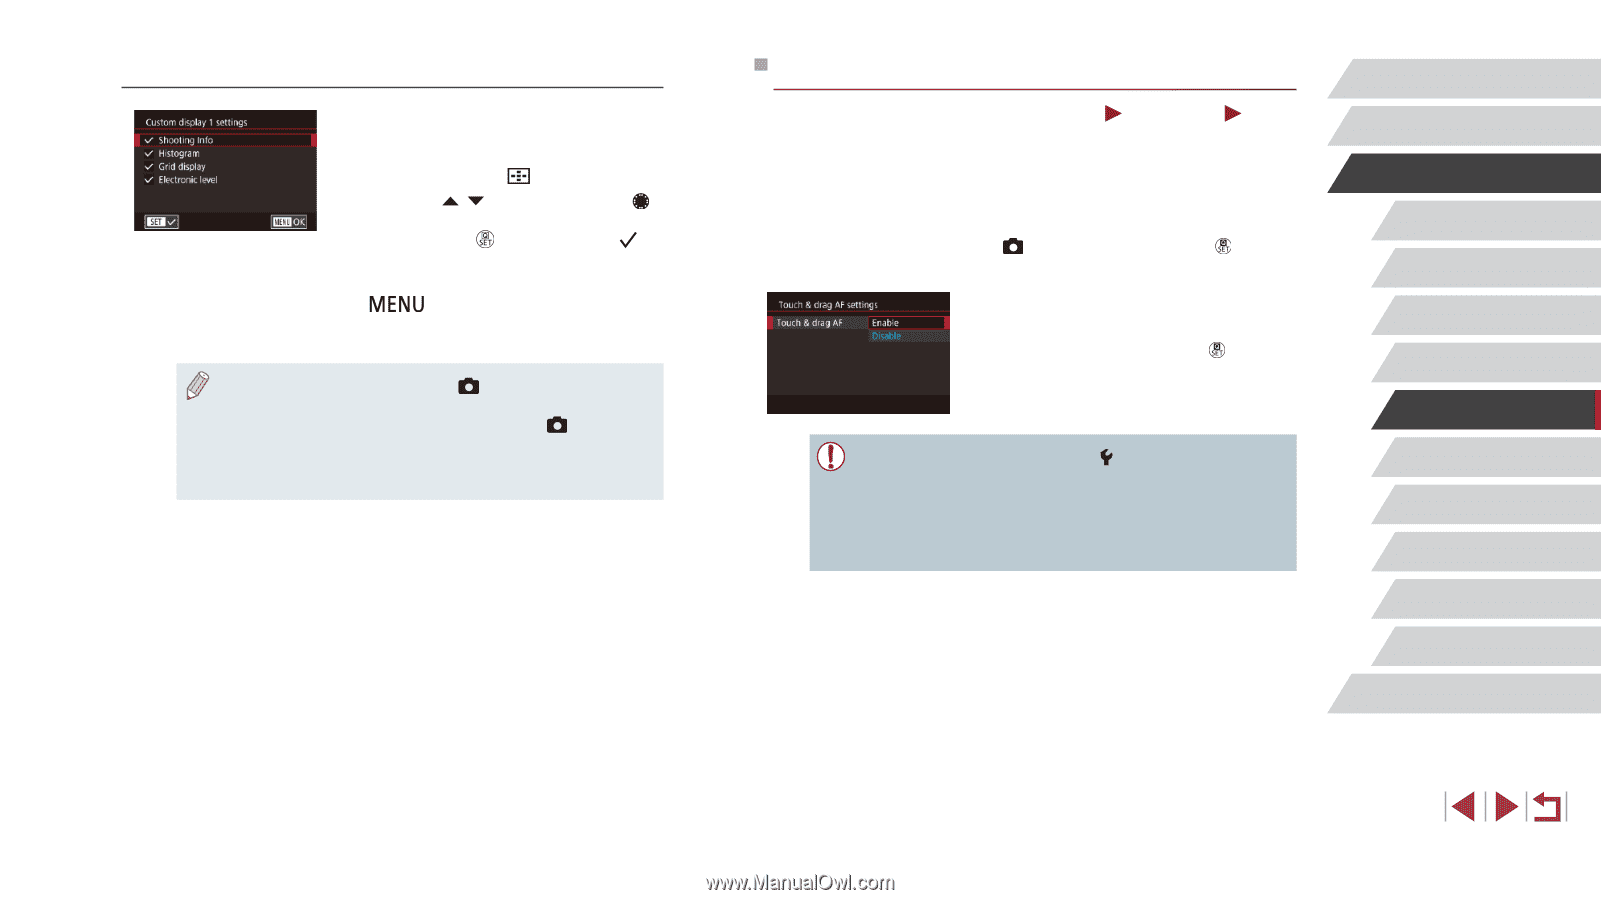
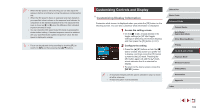
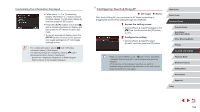
Customizing the Information Displayed zzFollow steps 1 - 2 in "Customizing Display Information" (= 103) to choose [Custom display 1] or [Custom display 2], and then press the [ ] button. zzPress the [ ][ ] buttons or turn the [ ] dial to choose information to display, and then press the [ ] button to add a [ ] mark. zzTo see an example of display, press the [ ] button to return to the [Screen info/ toggle settings] or [VF info/ toggle settings] screen. ●● For a smaller grid pattern, access [ 1] tab > [Shooting information display] > [Grid display]. ●● The following settings are available by choosing [ 1] tab > [Shooting information display] > [Histogram]. -- Switch from a brightness histogram to an RGB histogram. -- Reduce the size of the histogram displayed. Configuring Touch & Drag AF Still Images Movies With Touch & Drag AF, you can move the AF frame by touching or dragging the screen while looking through the viewfinder. 1 Access the setting screen. zzChoose [Touch & drag AF settings] on the [ 2] tab, and then press the [ ] button (= 31). 2 Configure the setting. zzChoose [Touch & drag AF], select [Enable], and then press the [ ] button. ● When you choose MENU (=31) > [ 4] tab > [Touch Operation] > [Disable], [Touch & drag AF] is set to [Disable] and cannot be changed. ●● AF frames may not be displayed correctly if you switch to viewfinder display while touching the screen. In this case, lift your finger and touch the screen again. Before Use Basic Guide Advanced Guide Camera Basics Auto Mode / Hybrid Auto Mode Other Shooting Modes P Mode Tv, Av, M, and C Mode Playback Mode Wireless Features Setting Menu Accessories Appendix Index 104
-
 1
1 -
2
-
3
-
4
-
5
-
6
-
7
-
8
-
9
-
10
-
11
-
12
-
13
-
14
-
15
-
16
-
17
-
18
-
19
-
20
-
21
-
22
-
23
-
24
-
25
-
26
-
27
-
28
-
29
-
30
-
31
-
32
-
33
-
34
-
35
-
36
-
37
-
38
-
39
-
40
-
41
-
42
-
43
-
44
-
45
-
46
-
47
-
48
-
49
-
50
-
51
-
52
-
53
-
54
-
55
-
56
-
57
-
58
-
59
-
60
-
61
-
62
-
63
-
64
-
65
-
66
-
67
-
68
-
69
-
70
-
71
-
72
-
73
-
74
-
75
-
76
-
77
-
78
-
79
-
80
-
81
-
82
-
83
-
84
-
85
-
86
-
87
-
88
-
89
-
90
-
91
-
92
-
93
-
94
-
95
-
96
-
97
-
98
-
 99
99 -
 100
100 -
 101
101 -
 102
102 -
 103
103 -
 104
104 -
 105
105 -
 106
106 -
 107
107 -
 108
108 -
 109
109 -
110
-
111
-
112
-
113
-
114
-
115
-
116
-
117
-
118
-
119
-
120
-
121
-
122
-
123
-
124
-
125
-
126
-
127
-
128
-
129
-
130
-
131
-
132
-
133
-
134
-
135
-
136
-
137
-
138
-
139
-
140
-
141
-
142
-
143
-
144
-
145
-
146
-
147
-
148
-
149
-
150
-
151
-
152
-
153
-
154
-
155
-
156
-
157
-
158
-
159
-
160
-
161
-
162
-
163
-
164
-
165
-
166
-
167
-
168
-
169
-
170
-
171
-
172
-
173
-
174
-
175
-
176
-
177
-
178
-
179
-
180
-
181
-
182
-
183
-
184
-
185
-
186
-
187
-
188
-
189
-
190
-
191
-
192
-
193
-
194
-
195
-
196
-
197
-
198
-
199
-
200
-
201
-
202
-
203
-
204
-
205
-
206
-
207
-
208
-
209
-
210
-
211
-
212
-
213
-
214
-
215
-
216
-
217
-
218
-
219
-
220
-
221
-
222
-
223
-
224
-
225
-
226
-
227
-
228
-
229
-
230
-
231
 |
 |