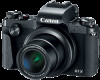
Canon PowerShot G1 X Mark III PowerShot G1X MarkIII Camera User Guide - Page 29
Shooting Display Options, Shooting Modes
 |
View all Canon PowerShot G1 X Mark III manuals
Add to My Manuals
Save this manual to your list of manuals |
Page 29 highlights
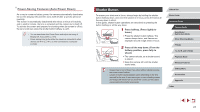
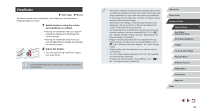
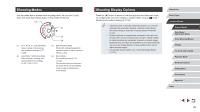
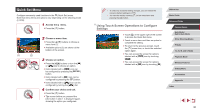
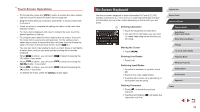
Shooting Modes Use the mode dial to access each shooting mode. As you turn it, hold down the mode dial release button in the middle of the dial. (1) (2) (1) P, Tv, Av, M, C1, and C2 Modes Take a variety of shots using your preferred settings (=77, = 99). (2) Auto Mode / Hybrid Auto Mode Fully automatic shooting, with camera-determined settings (=23, =35, =37). (3) (4) (3) Special Scene Mode Shoot with settings designed for specific scenes, or add a variety of effects (=56). (4) Movie Mode For shooting movies (=72, = 102). You can also shoot movies when the mode dial is not set to Movie mode, simply by pressing the movie button. Shooting Display Options Press the [ ] button to show or hide the grid lines and electronic level. To configure the on-screen display in greater detail, access [ 1] tab > [Shooting information display] (=103). ●● Open the screen to activate it when the camera is on. This will deactivate the viewfinder. Similarly, close the screen (facing the camera body) to deactivate it and activate the viewfinder (= 21). ●● Screen brightness is automatically increased by the night view function when you are shooting under low light, making it easier to check how shots are composed. However, on-screen image brightness may not match the brightness of your shots. Note that any on-screen image distortion or jerky subject motion will not affect recorded images. ●● For playback display options, see "Switching Display Modes" (= 113). Before Use Basic Guide Advanced Guide Camera Basics Auto Mode / Hybrid Auto Mode Other Shooting Modes P Mode Tv, Av, M, and C Mode Playback Mode Wireless Features Setting Menu Accessories Appendix Index 29
-
 1
1 -
2
-
3
-
4
-
5
-
6
-
7
-
8
-
9
-
10
-
11
-
12
-
13
-
14
-
15
-
16
-
17
-
18
-
19
-
20
-
21
-
22
-
23
-
 24
24 -
 25
25 -
 26
26 -
 27
27 -
 28
28 -
 29
29 -
 30
30 -
 31
31 -
 32
32 -
 33
33 -
 34
34 -
35
-
36
-
37
-
38
-
39
-
40
-
41
-
42
-
43
-
44
-
45
-
46
-
47
-
48
-
49
-
50
-
51
-
52
-
53
-
54
-
55
-
56
-
57
-
58
-
59
-
60
-
61
-
62
-
63
-
64
-
65
-
66
-
67
-
68
-
69
-
70
-
71
-
72
-
73
-
74
-
75
-
76
-
77
-
78
-
79
-
80
-
81
-
82
-
83
-
84
-
85
-
86
-
87
-
88
-
89
-
90
-
91
-
92
-
93
-
94
-
95
-
96
-
97
-
98
-
99
-
100
-
101
-
102
-
103
-
104
-
105
-
106
-
107
-
108
-
109
-
110
-
111
-
112
-
113
-
114
-
115
-
116
-
117
-
118
-
119
-
120
-
121
-
122
-
123
-
124
-
125
-
126
-
127
-
128
-
129
-
130
-
131
-
132
-
133
-
134
-
135
-
136
-
137
-
138
-
139
-
140
-
141
-
142
-
143
-
144
-
145
-
146
-
147
-
148
-
149
-
150
-
151
-
152
-
153
-
154
-
155
-
156
-
157
-
158
-
159
-
160
-
161
-
162
-
163
-
164
-
165
-
166
-
167
-
168
-
169
-
170
-
171
-
172
-
173
-
174
-
175
-
176
-
177
-
178
-
179
-
180
-
181
-
182
-
183
-
184
-
185
-
186
-
187
-
188
-
189
-
190
-
191
-
192
-
193
-
194
-
195
-
196
-
197
-
198
-
199
-
200
-
201
-
202
-
203
-
204
-
205
-
206
-
207
-
208
-
209
-
210
-
211
-
212
-
213
-
214
-
215
-
216
-
217
-
218
-
219
-
220
-
221
-
222
-
223
-
224
-
225
-
226
-
227
-
228
-
229
-
230
-
231
 |
 |
