Canon PowerShot G1 X Mark III PowerShot G1X MarkIII Camera User Guide - Page 25
Erasing Images
 |
View all Canon PowerShot G1 X Mark III manuals
Add to My Manuals
Save this manual to your list of manuals |
Page 25 highlights
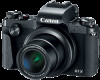
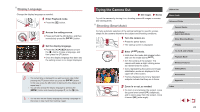
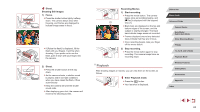
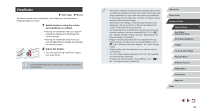
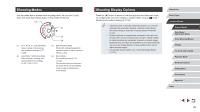
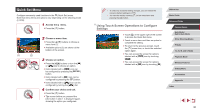
2 Choose images. zzTo view the previous image, press the [ ] button or turn the [ ] dial counterclockwise. To view the next image, press the [ ] button or turn the [ ] dial clockwise. zzPress and hold the [ ][ ] buttons to browse through images quickly. zzTo access this screen (Scroll Display mode), turn the [ ] dial rapidly. In this mode, turn the [ ] dial to browse through images. zzTo return to single-image display, press the [ ] button. zzMovies are identified by a [ To play movies, go to step 3. ] icon. 3 Play movies. zzPress the [ ] button, press the [ ][ ] buttons to choose [ ], and then press the [ ] button again. zzPlayback now begins, and after the movie is finished, [ ] is displayed. zzTo adjust the volume, press the [ ][ ] buttons during playback. ●● To switch to Shooting mode from Playback mode, press the shutter button halfway. ●● You can also start movie playback by touching [ ]. To adjust the volume, quickly drag up or down across the screen during playback. Erasing Images You can choose and erase unneeded images one by one. Be careful when erasing images, because they cannot be recovered. 1 Choose an image to erase. zzPress the [ ][ ] buttons or turn the [ ] dial to choose an image. 2 Erase the image. zzPress the [ ] button. zzAfter [Erase?] is displayed, press the [ ][ ] buttons or turn the [ ] dial to choose [Erase], and then press the [ ] button. zzThe current image is now erased. zzTo cancel erasure, press the [ ][ ] buttons or turn the [ ] dial to choose [Cancel], and then press the [ ] button. ●● You can choose multiple images to erase at once (=124). ●● You can also erase the current image by touching [Erase] on the screen in step 2. ●● Images can also be erased by using Touch Actions (=127). Before Use Basic Guide Advanced Guide Camera Basics Auto Mode / Hybrid Auto Mode Other Shooting Modes P Mode Tv, Av, M, and C Mode Playback Mode Wireless Features Setting Menu Accessories Appendix Index 25
-
 1
1 -
2
-
3
-
4
-
5
-
6
-
7
-
8
-
9
-
10
-
11
-
12
-
13
-
14
-
15
-
16
-
17
-
18
-
19
-
 20
20 -
 21
21 -
 22
22 -
 23
23 -
 24
24 -
 25
25 -
 26
26 -
 27
27 -
 28
28 -
 29
29 -
 30
30 -
31
-
32
-
33
-
34
-
35
-
36
-
37
-
38
-
39
-
40
-
41
-
42
-
43
-
44
-
45
-
46
-
47
-
48
-
49
-
50
-
51
-
52
-
53
-
54
-
55
-
56
-
57
-
58
-
59
-
60
-
61
-
62
-
63
-
64
-
65
-
66
-
67
-
68
-
69
-
70
-
71
-
72
-
73
-
74
-
75
-
76
-
77
-
78
-
79
-
80
-
81
-
82
-
83
-
84
-
85
-
86
-
87
-
88
-
89
-
90
-
91
-
92
-
93
-
94
-
95
-
96
-
97
-
98
-
99
-
100
-
101
-
102
-
103
-
104
-
105
-
106
-
107
-
108
-
109
-
110
-
111
-
112
-
113
-
114
-
115
-
116
-
117
-
118
-
119
-
120
-
121
-
122
-
123
-
124
-
125
-
126
-
127
-
128
-
129
-
130
-
131
-
132
-
133
-
134
-
135
-
136
-
137
-
138
-
139
-
140
-
141
-
142
-
143
-
144
-
145
-
146
-
147
-
148
-
149
-
150
-
151
-
152
-
153
-
154
-
155
-
156
-
157
-
158
-
159
-
160
-
161
-
162
-
163
-
164
-
165
-
166
-
167
-
168
-
169
-
170
-
171
-
172
-
173
-
174
-
175
-
176
-
177
-
178
-
179
-
180
-
181
-
182
-
183
-
184
-
185
-
186
-
187
-
188
-
189
-
190
-
191
-
192
-
193
-
194
-
195
-
196
-
197
-
198
-
199
-
200
-
201
-
202
-
203
-
204
-
205
-
206
-
207
-
208
-
209
-
210
-
211
-
212
-
213
-
214
-
215
-
216
-
217
-
218
-
219
-
220
-
221
-
222
-
223
-
224
-
225
-
226
-
227
-
228
-
229
-
230
-
231
 |
 |