Canon PowerShot G1 X Mark III PowerShot G1X MarkIII Camera User Guide - Page 50
Changing Image Quality
 |
View all Canon PowerShot G1 X Mark III manuals
Add to My Manuals
Save this manual to your list of manuals |
Page 50 highlights
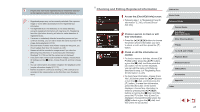
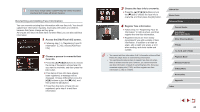
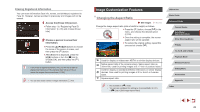
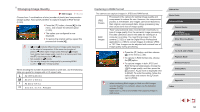
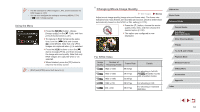
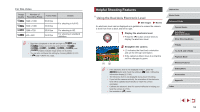
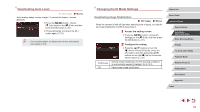
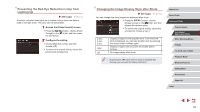
Changing Image Quality Still Images Movies Choose from 7 combinations of size (number of pixels) and compression (image quality). Also specify whether to capture images in RAW format (= 50). zzPress the [ ] button, choose [ ] in the menu, and choose the desired option (= 30). zzThe option you configured is now displayed. zzTo restore the original setting, repeat this process but choose [ ]. ●● [ ] and [ ] indicate different levels of image quality depending on the extent of compression. At the same size (number of pixels), [ ] offers higher image quality. Although [ ] images have slightly lower image quality, more fit on a memory card. Note that [ ]-size images are of [ ] quality. ●● Not available in [ ] mode. ●● You can also change the image quality by accessing MENU (=31) > [ 1] tab > [Image quality]. When deciding the number of pixels based on print size, use the following table as a guide for images with a 3:2 aspect ratio. A2 (16.5 x 23.4 in.) A3 (11.7 x 16.5 in.) A4 (8.3 x 11.7 in.) 3.5 x 5 in., 5 x 7 in., Postcard Capturing in RAW Format The camera can capture images in JPEG and RAW format. JPEG Images Processed in the camera for optimal image quality and compressed to reduce file size. However, the compression process is irreversible, and images cannot be restored to their original, unprocessed state. Image processing may also cause some loss of image quality. RAW Images "Raw" (unprocessed) data, recorded with essentially no loss of image quality from the camera's image processing. The data cannot be used in this state for viewing on a computer or printing. You must first process it on this camera (=132) or use the Digital Photo Professional application (=189) to convert images to ordinary JPEG or TIFF files. Images can be adjusted with minimal loss of image quality during processing. zzPress the [ ] button, and then choose [ ] in the menu (=30). zzTo capture in RAW format only, choose the [ ] option. zzTo capture images in both JPEG and RAW format simultaneously, choose the JPEG image quality, and then press the [ ] button. A [ ] mark is displayed next to [RAW]. To undo this setting, follow the same steps and remove the [ ] mark next to [RAW]. ●● When transferring RAW images (or RAW and JPEG images recorded together) to a computer, always use the dedicated software (=189). ●● Digital zoom (=42) is not available when capturing images in RAW format. Before Use Basic Guide Advanced Guide Camera Basics Auto Mode / Hybrid Auto Mode Other Shooting Modes P Mode Tv, Av, M, and C Mode Playback Mode Wireless Features Setting Menu Accessories Appendix Index 50
-
 1
1 -
2
-
3
-
4
-
5
-
6
-
7
-
8
-
9
-
10
-
11
-
12
-
13
-
14
-
15
-
16
-
17
-
18
-
19
-
20
-
21
-
22
-
23
-
24
-
25
-
26
-
27
-
28
-
29
-
30
-
31
-
32
-
33
-
34
-
35
-
36
-
37
-
38
-
39
-
40
-
41
-
42
-
43
-
44
-
 45
45 -
 46
46 -
 47
47 -
 48
48 -
 49
49 -
 50
50 -
 51
51 -
 52
52 -
 53
53 -
 54
54 -
 55
55 -
56
-
57
-
58
-
59
-
60
-
61
-
62
-
63
-
64
-
65
-
66
-
67
-
68
-
69
-
70
-
71
-
72
-
73
-
74
-
75
-
76
-
77
-
78
-
79
-
80
-
81
-
82
-
83
-
84
-
85
-
86
-
87
-
88
-
89
-
90
-
91
-
92
-
93
-
94
-
95
-
96
-
97
-
98
-
99
-
100
-
101
-
102
-
103
-
104
-
105
-
106
-
107
-
108
-
109
-
110
-
111
-
112
-
113
-
114
-
115
-
116
-
117
-
118
-
119
-
120
-
121
-
122
-
123
-
124
-
125
-
126
-
127
-
128
-
129
-
130
-
131
-
132
-
133
-
134
-
135
-
136
-
137
-
138
-
139
-
140
-
141
-
142
-
143
-
144
-
145
-
146
-
147
-
148
-
149
-
150
-
151
-
152
-
153
-
154
-
155
-
156
-
157
-
158
-
159
-
160
-
161
-
162
-
163
-
164
-
165
-
166
-
167
-
168
-
169
-
170
-
171
-
172
-
173
-
174
-
175
-
176
-
177
-
178
-
179
-
180
-
181
-
182
-
183
-
184
-
185
-
186
-
187
-
188
-
189
-
190
-
191
-
192
-
193
-
194
-
195
-
196
-
197
-
198
-
199
-
200
-
201
-
202
-
203
-
204
-
205
-
206
-
207
-
208
-
209
-
210
-
211
-
212
-
213
-
214
-
215
-
216
-
217
-
218
-
219
-
220
-
221
-
222
-
223
-
224
-
225
-
226
-
227
-
228
-
229
-
230
-
231
 |
 |