Canon PowerShot G1 X Mark III PowerShot G1X MarkIII Camera User Guide - Page 105
Assigning Functions to Controls
 |
View all Canon PowerShot G1 X Mark III manuals
Add to My Manuals
Save this manual to your list of manuals |
Page 105 highlights
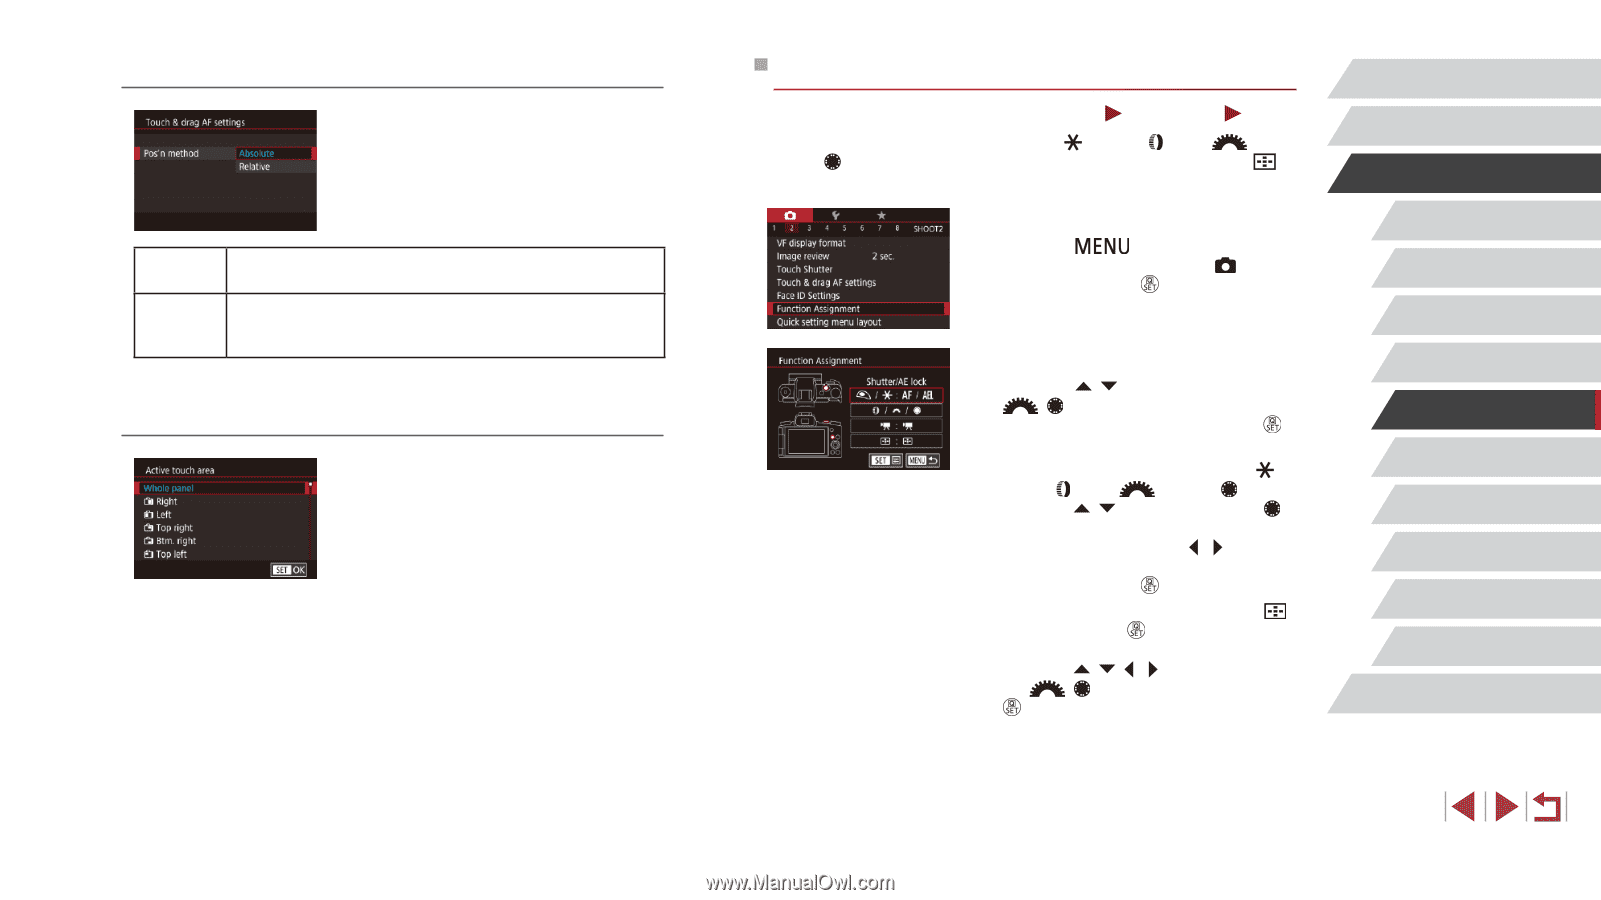
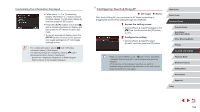
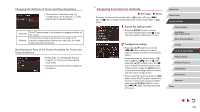
Changing the Settings of Touch and Drag Operations zzChoose [Pos'n method] in step 1 of "Configuring Touch & Drag AF" (= 104) and choose the desired option. Absolute Relative The AF frame moves to the touched or dragged position on the screen. The AF frame moves in the direction you drag, by an amount corresponding to the amount you drag, no matter where you touch the screen. Restricting the Area of the Screen Available for Touch and Drag Operations zzFollow step 1 in "Configuring Touch & Drag AF" (= 104) and choose [Active touch area]. zzChoose the area that will be available for this feature. Assigning Functions to Controls Still Images Movies Reassign functions of the shutter button, [ ] button, [ ] ring, [ ] dial, or [ ] dial, or assign common functions to the movie button or [ ] button. 1 Access the setting screen. zzPress the [ ] button, choose [Function Assignment] on the [ 2] tab, and then press the [ ] button (=31). 2 Configure the setting. zzPress the [ ][ ] buttons or turn the [ ][ ] dials to choose the dial or button to assign, and then press the [ ] button. zzWhen assigning the shutter button, [ ] button, [ ] ring, [ ] dial, or [ ] dial, press the [ ][ ] buttons or turn the [ ] dial to choose the shooting mode or the camera control, press the [ ][ ] buttons to choose the shooting mode or function, and then press the [ ] button. zzWhen assigning the movie button or [ ] button, press the [ ] button, choose the function on the screen displayed (either press the buttons or turn the [ ][ ] dials), and then press the [ ] button. Before Use Basic Guide Advanced Guide Camera Basics Auto Mode / Hybrid Auto Mode Other Shooting Modes P Mode Tv, Av, M, and C Mode Playback Mode Wireless Features Setting Menu Accessories Appendix Index 105
-
 1
1 -
2
-
3
-
4
-
5
-
6
-
7
-
8
-
9
-
10
-
11
-
12
-
13
-
14
-
15
-
16
-
17
-
18
-
19
-
20
-
21
-
22
-
23
-
24
-
25
-
26
-
27
-
28
-
29
-
30
-
31
-
32
-
33
-
34
-
35
-
36
-
37
-
38
-
39
-
40
-
41
-
42
-
43
-
44
-
45
-
46
-
47
-
48
-
49
-
50
-
51
-
52
-
53
-
54
-
55
-
56
-
57
-
58
-
59
-
60
-
61
-
62
-
63
-
64
-
65
-
66
-
67
-
68
-
69
-
70
-
71
-
72
-
73
-
74
-
75
-
76
-
77
-
78
-
79
-
80
-
81
-
82
-
83
-
84
-
85
-
86
-
87
-
88
-
89
-
90
-
91
-
92
-
93
-
94
-
95
-
96
-
97
-
98
-
99
-
 100
100 -
 101
101 -
 102
102 -
 103
103 -
 104
104 -
 105
105 -
 106
106 -
 107
107 -
 108
108 -
 109
109 -
 110
110 -
111
-
112
-
113
-
114
-
115
-
116
-
117
-
118
-
119
-
120
-
121
-
122
-
123
-
124
-
125
-
126
-
127
-
128
-
129
-
130
-
131
-
132
-
133
-
134
-
135
-
136
-
137
-
138
-
139
-
140
-
141
-
142
-
143
-
144
-
145
-
146
-
147
-
148
-
149
-
150
-
151
-
152
-
153
-
154
-
155
-
156
-
157
-
158
-
159
-
160
-
161
-
162
-
163
-
164
-
165
-
166
-
167
-
168
-
169
-
170
-
171
-
172
-
173
-
174
-
175
-
176
-
177
-
178
-
179
-
180
-
181
-
182
-
183
-
184
-
185
-
186
-
187
-
188
-
189
-
190
-
191
-
192
-
193
-
194
-
195
-
196
-
197
-
198
-
199
-
200
-
201
-
202
-
203
-
204
-
205
-
206
-
207
-
208
-
209
-
210
-
211
-
212
-
213
-
214
-
215
-
216
-
217
-
218
-
219
-
220
-
221
-
222
-
223
-
224
-
225
-
226
-
227
-
228
-
229
-
230
-
231
 |
 |