IBM 4846-545 Service Guide - Page 63
connectors
 |
View all IBM 4846-545 manuals
Add to My Manuals
Save this manual to your list of manuals |
Page 63 highlights
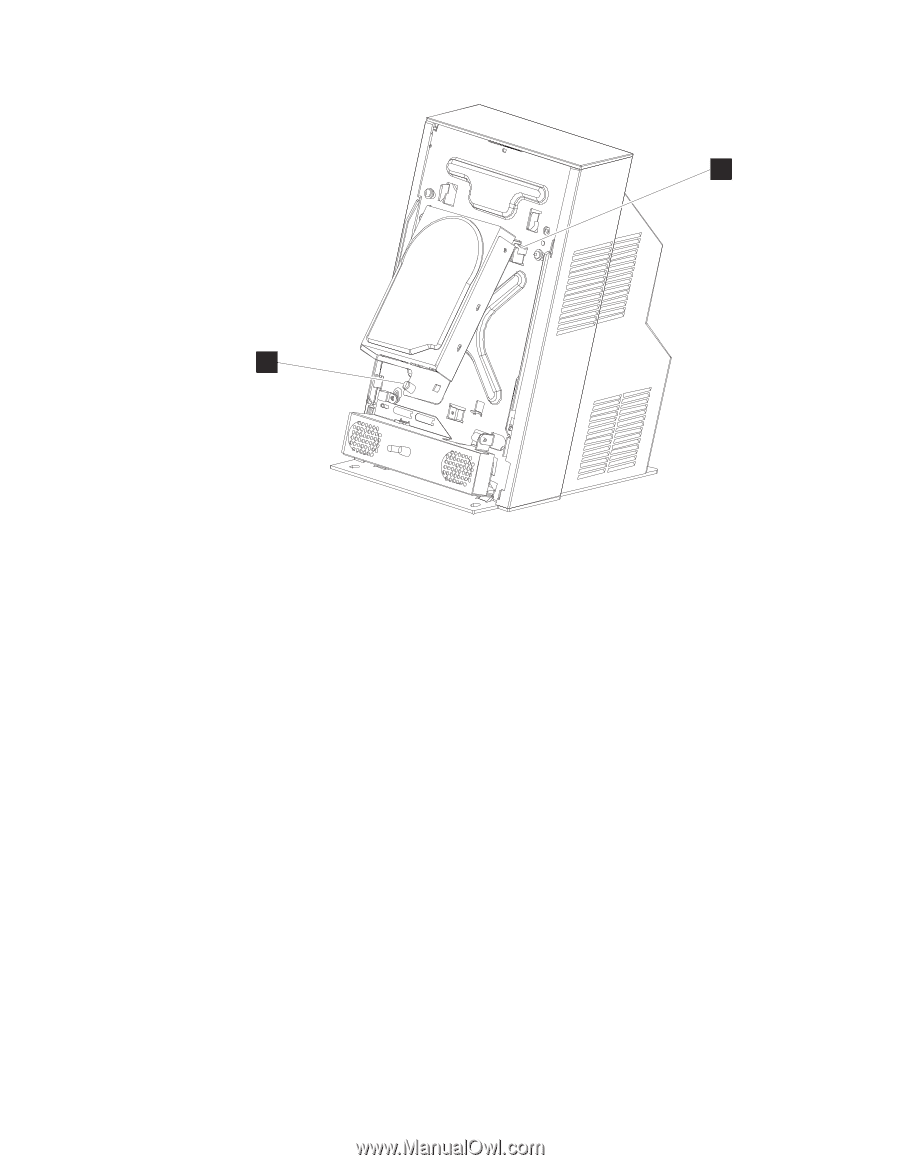
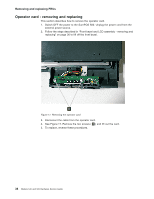
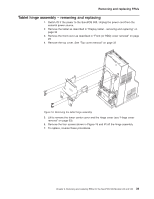
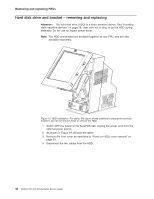
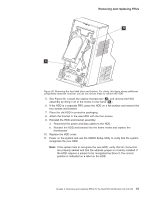
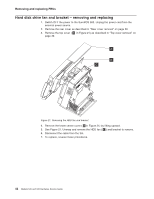
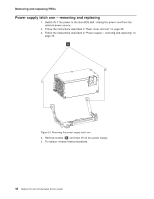
Removing and replacing FRUs B A Figure 20. Removing the hard disk drive and bracket. For clarity, this figure shows additional components removed; however, you do not remove these to remove the HDD. 5. See Figure 20. Loosen the captive thumbscrew ( A ) and remove the HDD assembly by lifting it off of the hooks on the frame ( B ). 6. If the HDD is a separate FRU, place the HDD on a flat surface and remove the four screws and bracket. 7. Place the old HDD in protective packaging. 8. Attach the bracket to the new HDD with the four screws. 9. Reinstall the HDD and bracket assembly: a. Reconnect the power and data cables to the HDD. b. Reinsert the HDD and bracket into the frame hooks and replace the thumbscrew 10. Replace the HDD cover. 11. Power on the system and use the CMOS Setup Utility to verify that the system recognizes the new HDD. Note: If the system fails to recognize the new HDD, verify that all connectors are properly seated and that the address jumper is correctly installed. If the HDD requires a jumper to be recognized as Drive 0, the correct position is indicated on a label on the HDD. Chapter 3. Removing and replacing FRUs for the SurePOS 500 Models 545 and 565 41
-
 1
1 -
2
-
3
-
4
-
5
-
6
-
7
-
8
-
9
-
10
-
11
-
12
-
13
-
14
-
15
-
16
-
17
-
18
-
19
-
20
-
21
-
22
-
23
-
24
-
25
-
26
-
27
-
28
-
29
-
30
-
31
-
32
-
33
-
34
-
35
-
36
-
37
-
38
-
39
-
40
-
41
-
42
-
43
-
44
-
45
-
46
-
47
-
48
-
49
-
50
-
51
-
52
-
53
-
54
-
55
-
56
-
57
-
 58
58 -
 59
59 -
 60
60 -
 61
61 -
 62
62 -
 63
63 -
 64
64 -
 65
65 -
 66
66 -
 67
67 -
 68
68 -
69
-
70
-
71
-
72
-
73
-
74
-
75
-
76
-
77
-
78
-
79
-
80
-
81
-
82
-
83
-
84
-
85
-
86
-
87
-
88
-
89
-
90
-
91
-
92
-
93
-
94
-
95
-
96
-
97
-
98
-
99
-
100
-
101
-
102
-
103
-
104
-
105
-
106
-
107
-
108
-
109
-
110
-
111
-
112
-
113
-
114
-
115
-
116
-
117
-
118
-
119
-
120
-
121
-
122
-
123
-
124
-
125
-
126
-
127
-
128
-
129
-
130
-
131
-
132
-
133
-
134
-
135
-
136
-
137
-
138
-
139
-
140
-
141
-
142
-
143
-
144
-
145
-
146
-
147
-
148
-
149
-
150
-
151
-
152
-
153
-
154
-
155
-
156
-
157
-
158
-
159
-
160
-
161
-
162
-
163
-
164
-
165
-
166
-
167
-
168
-
169
-
170
-
171
-
172
-
173
-
174
-
175
-
176
-
177
-
178
-
179
-
180
-
181
-
182
-
183
-
184
-
185
-
186
-
187
-
188
-
189
-
190
-
191
-
192
-
193
-
194
-
195
-
196
 |
 |