IBM 4846-545 Service Guide - Page 86
Integrated, customer, display, removing, replacing
 |
View all IBM 4846-545 manuals
Add to My Manuals
Save this manual to your list of manuals |
Page 86 highlights
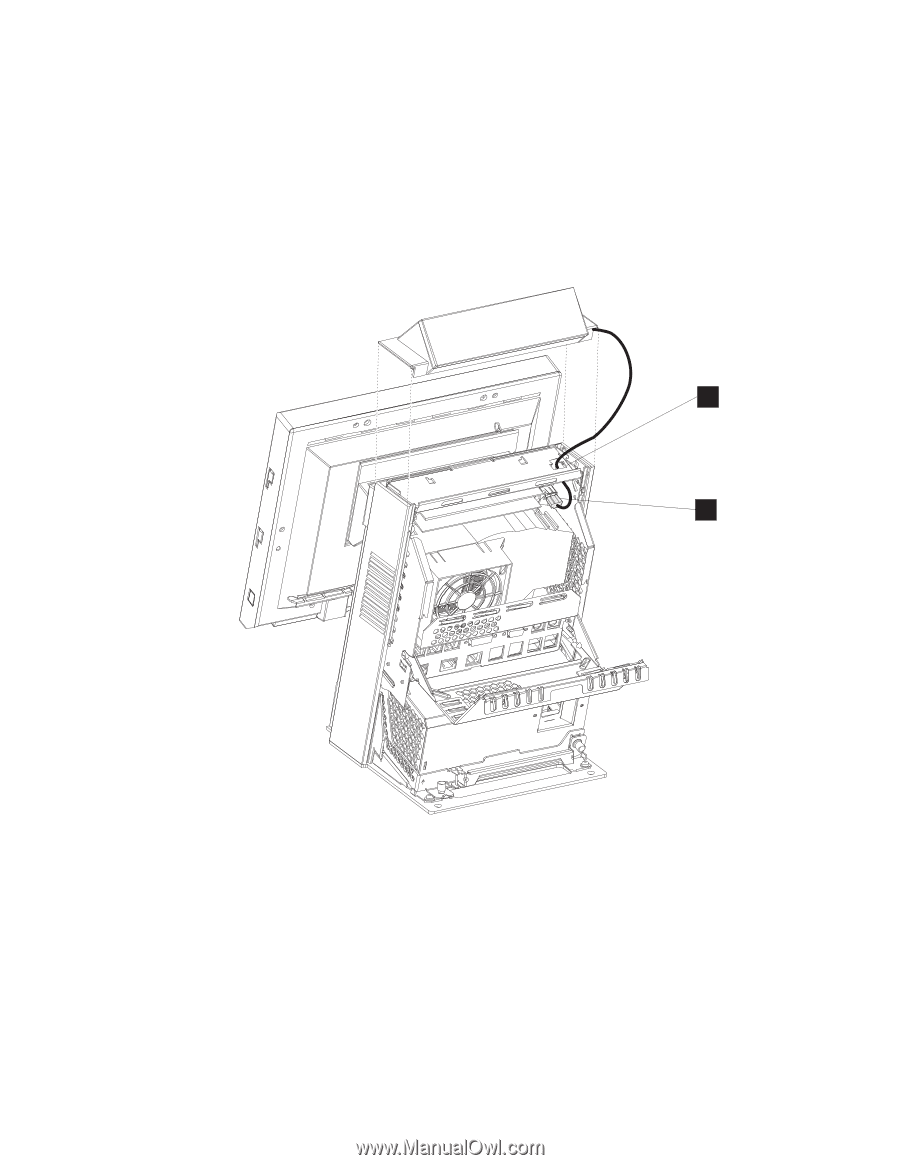
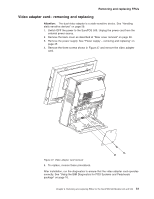
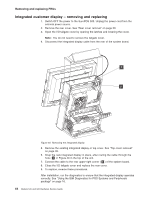
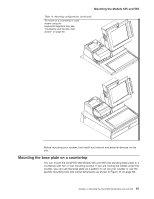
Removing and replacing FRUs Integrated customer display - removing and replacing 1. Switch OFF the power to the SurePOS 500. Unplug the power cord from the external power source. 2. Remove the rear cover. See "Rear cover removal" on page 30. 3. Open the I/O tailgate cover by opening the latches and lowering the cover. Note: You do not need to remove the tailgate cover. 4. Disconnect the integrated display cable from the rear of the system board. A B Figure 40. Removing the integrated display 5. Remove the existing integrated display or top cover. See "Top cover removal" on page 32. 6. Snap the new integrated display in place, after routing the cable through the hole ( A in Figure 40 in the top of the unit. 7. Connect the cable to the rear upper-right corner ( B ) of the system board. 8. Close the I/O tailgate cover and replace the rear cover. 9. To replace, reverse these procedures. After installation, run the diagnostics to ensure that the integrated display operates correctly. See "Using the IBM Diagnostics for POS Systems and Peripherals package" on page 16. 64 Models 545 and 565 Hardware Service Guide
-
 1
1 -
2
-
3
-
4
-
5
-
6
-
7
-
8
-
9
-
10
-
11
-
12
-
13
-
14
-
15
-
16
-
17
-
18
-
19
-
20
-
21
-
22
-
23
-
24
-
25
-
26
-
27
-
28
-
29
-
30
-
31
-
32
-
33
-
34
-
35
-
36
-
37
-
38
-
39
-
40
-
41
-
42
-
43
-
44
-
45
-
46
-
47
-
48
-
49
-
50
-
51
-
52
-
53
-
54
-
55
-
56
-
57
-
58
-
59
-
60
-
61
-
62
-
63
-
64
-
65
-
66
-
67
-
68
-
69
-
70
-
71
-
72
-
73
-
74
-
75
-
76
-
77
-
78
-
79
-
80
-
 81
81 -
 82
82 -
 83
83 -
 84
84 -
 85
85 -
 86
86 -
 87
87 -
 88
88 -
 89
89 -
 90
90 -
 91
91 -
92
-
93
-
94
-
95
-
96
-
97
-
98
-
99
-
100
-
101
-
102
-
103
-
104
-
105
-
106
-
107
-
108
-
109
-
110
-
111
-
112
-
113
-
114
-
115
-
116
-
117
-
118
-
119
-
120
-
121
-
122
-
123
-
124
-
125
-
126
-
127
-
128
-
129
-
130
-
131
-
132
-
133
-
134
-
135
-
136
-
137
-
138
-
139
-
140
-
141
-
142
-
143
-
144
-
145
-
146
-
147
-
148
-
149
-
150
-
151
-
152
-
153
-
154
-
155
-
156
-
157
-
158
-
159
-
160
-
161
-
162
-
163
-
164
-
165
-
166
-
167
-
168
-
169
-
170
-
171
-
172
-
173
-
174
-
175
-
176
-
177
-
178
-
179
-
180
-
181
-
182
-
183
-
184
-
185
-
186
-
187
-
188
-
189
-
190
-
191
-
192
-
193
-
194
-
195
-
196
 |
 |