Pioneer AVIC-X850BT Operation Manual - Page 14
Protecting your product, against theft, Basic operation
 |
View all Pioneer AVIC-X850BT manuals
Add to My Manuals
Save this manual to your list of manuals |
Page 14 highlights
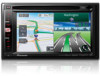
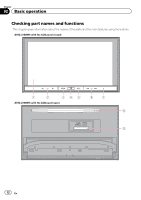
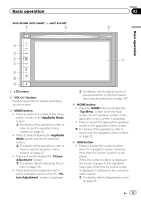
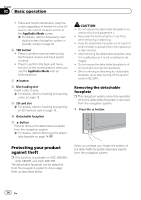
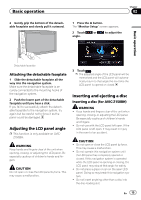
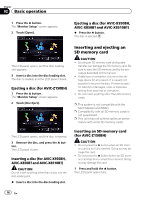
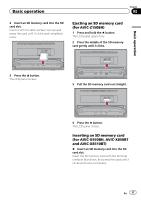
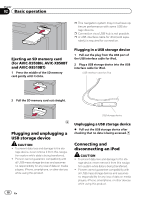
Chapter 02 Basic operation ! Press and hold to temporarily clear the screen regardless of whether it is the AV source, the current location screen or the AppRadio Mode screen. = For details, refer to Temporarily clearing the screen (navigation system in standby mode) on page 20. 6 TRK button ! Press to perform manual seek tuning, fast forward, reverse and track search controls. ! Press to perform the back and menu function of the Android device when you use the AppRadio Mode with an Android device. 7 h button 8 Disc-loading slot Insert a disc to play. = For details, refer to Inserting and ejecting a disc on page 15. 9 SD card slot = For details, refer to Inserting and ejecting an SD memory card on page 16. a Detachable faceplate b button Press to remove the detachable faceplate from the navigation system. = For details, refer to Removing the detachable faceplate on page 14. CAUTION ! Do not expose the detachable faceplate to ex- cessive shock or disassemble it. ! Never grip the buttons tightly or use force when removing or attaching. ! Keep the detachable faceplate out of reach of small children to prevent them from placing it in their mouths. ! After removing the detachable faceplate, keep it in a safe place so it is not scratched or damaged. ! Do not expose the detachable faceplate to direct sunlight and high temperatures. ! When removing or attaching the detachable faceplate, do so after turning off the ignition switch (ACC OFF). Removing the detachable faceplate p The navigation system cannot be operated while the detachable faceplate is removed from the navigation system. 1 Press the button. Protecting your product against theft p This function is available on AVIC-X950BH, AVIC-X850BT, and AVIC-X8510BT. The detachable faceplate can be detached from the navigation system to discourage theft, as described below. When you release your finger, the bottom of the detachable faceplate separates slightly from the navigation system. 14 En
-
 1
1 -
2
-
3
-
4
-
5
-
6
-
7
-
8
-
 9
9 -
 10
10 -
 11
11 -
 12
12 -
 13
13 -
 14
14 -
 15
15 -
 16
16 -
 17
17 -
 18
18 -
 19
19 -
20
-
21
-
22
-
23
-
24
-
25
-
26
-
27
-
28
-
29
-
30
-
31
-
32
-
33
-
34
-
35
-
36
-
37
-
38
-
39
-
40
-
41
-
42
-
43
-
44
-
45
-
46
-
47
-
48
-
49
-
50
-
51
-
52
-
53
-
54
-
55
-
56
-
57
-
58
-
59
-
60
-
61
-
62
-
63
-
64
-
65
-
66
-
67
-
68
-
69
-
70
-
71
-
72
-
73
-
74
-
75
-
76
-
77
-
78
-
79
-
80
-
81
-
82
-
83
-
84
-
85
-
86
-
87
-
88
-
89
-
90
-
91
-
92
-
93
-
94
-
95
-
96
-
97
-
98
-
99
-
100
-
101
-
102
-
103
-
104
-
105
-
106
-
107
-
108
-
109
-
110
-
111
-
112
-
113
-
114
-
115
-
116
-
117
-
118
-
119
-
120
-
121
-
122
-
123
-
124
-
125
-
126
-
127
-
128
-
129
-
130
-
131
-
132
-
133
-
134
-
135
-
136
-
137
-
138
-
139
-
140
-
141
-
142
-
143
-
144
-
145
-
146
-
147
-
148
-
149
-
150
-
151
-
152
-
153
-
154
-
155
-
156
-
157
-
158
-
159
-
160
-
161
-
162
-
163
-
164
-
165
-
166
-
167
-
168
-
169
-
170
-
171
-
172
-
173
-
174
-
175
-
176
-
177
-
178
-
179
-
180
-
181
-
182
-
183
-
184
-
185
-
186
-
187
-
188
-
189
-
190
-
191
-
192
-
193
-
194
-
195
-
196
-
197
-
198
-
199
-
200
-
201
-
202
-
203
-
204
 |
 |