Pioneer AVIC-X850BT Operation Manual - Page 33
Switching the view mode, Switching the map orientation, How to use the map - camera
 |
View all Pioneer AVIC-X850BT manuals
Add to My Manuals
Save this manual to your list of manuals |
Page 33 highlights
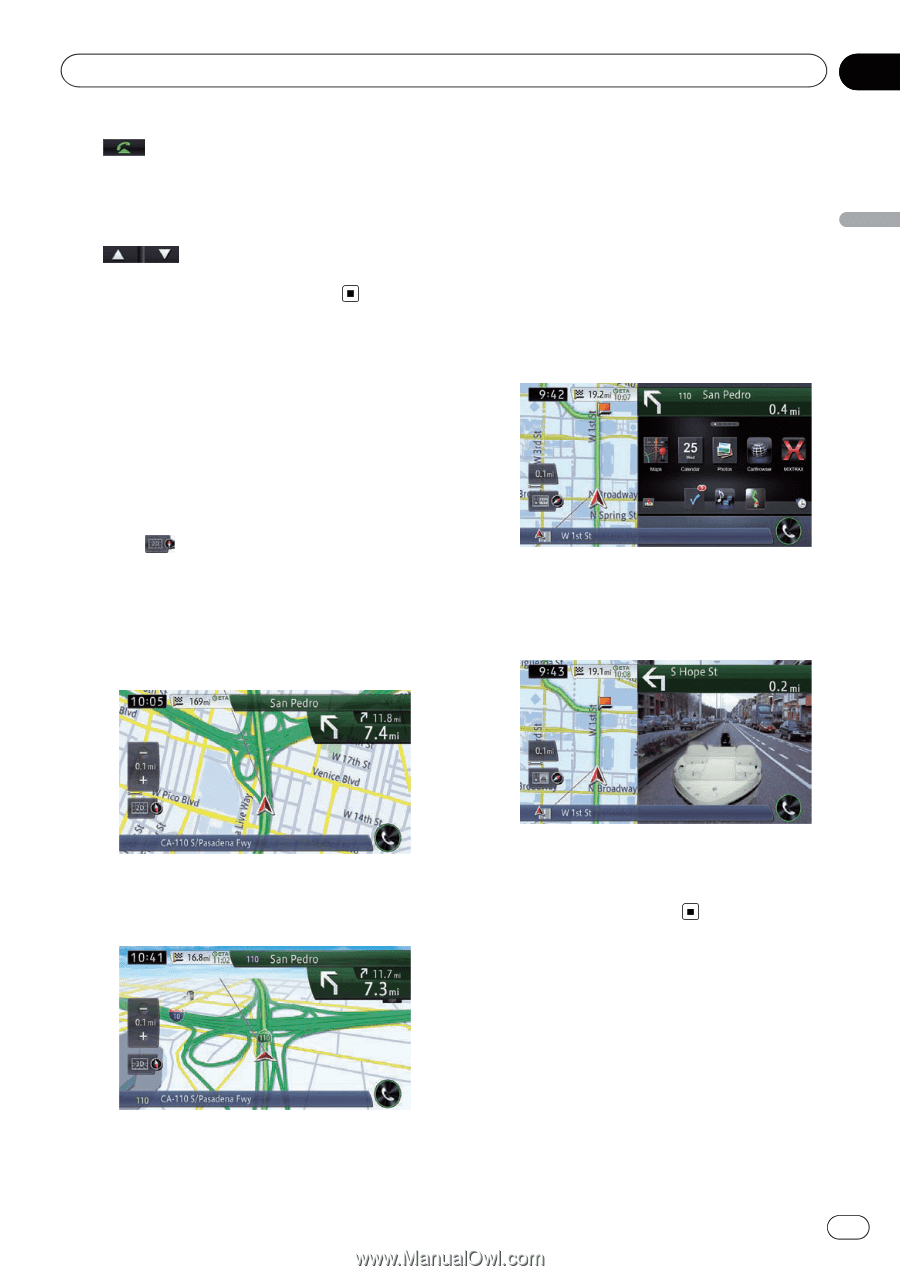
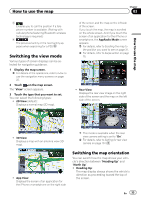
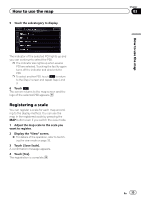
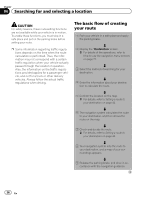
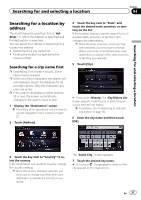
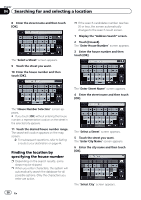
How to use the map Chapter 03 How to use the map 3 Enables you to call the position if a telephone number is available. (Pairing with cellular phone featuring Bluetooth wireless technology is required.) 4 The previous facility or the next facility appears when searching for a POI. Switching the view mode Various types of screen displays can be selected for navigation guidance. 1 Display the map screen. = For details of the operations, refer to How to use the navigation menu screens on page 22. 2 Touch on the map screen. The "View" screen appears. 3 Touch the type that you want to set. You can select the following types: ! 2D View (default): Displays a normal map (2D map). of the screen and the map on the left side of the screen. If you touch the map, the map is scrolled on the whole screen. And if you touch the screen of an application for the iPhone or smartphone, the AppRadio Mode screen appears. = For details, refer to Scrolling the map to the position you want to see on page 31. = For details, refer to Swipe action on page 25. ! Rear View: Displays the rear view image on the right side of the screen and the map on the left side of the screen. ! 3D View: Displays a map with an antenna view (3D map). ! App View: Displays the screen of an application for the iPhone or smartphone on the right side p This mode is available when the rear view camera setting is set to "On". = For details, refer to Setting for rear view camera on page 161. Switching the map orientation You can switch how the map shows your vehicle's direction between "Heading Up" and "North Up". ! Heading Up: The map display always shows the vehicle's direction as proceeding toward the top of the screen. En 33
-
 1
1 -
2
-
3
-
4
-
5
-
6
-
7
-
8
-
9
-
10
-
11
-
12
-
13
-
14
-
15
-
16
-
17
-
18
-
19
-
20
-
21
-
22
-
23
-
24
-
25
-
26
-
27
-
 28
28 -
 29
29 -
 30
30 -
 31
31 -
 32
32 -
 33
33 -
 34
34 -
 35
35 -
 36
36 -
 37
37 -
 38
38 -
39
-
40
-
41
-
42
-
43
-
44
-
45
-
46
-
47
-
48
-
49
-
50
-
51
-
52
-
53
-
54
-
55
-
56
-
57
-
58
-
59
-
60
-
61
-
62
-
63
-
64
-
65
-
66
-
67
-
68
-
69
-
70
-
71
-
72
-
73
-
74
-
75
-
76
-
77
-
78
-
79
-
80
-
81
-
82
-
83
-
84
-
85
-
86
-
87
-
88
-
89
-
90
-
91
-
92
-
93
-
94
-
95
-
96
-
97
-
98
-
99
-
100
-
101
-
102
-
103
-
104
-
105
-
106
-
107
-
108
-
109
-
110
-
111
-
112
-
113
-
114
-
115
-
116
-
117
-
118
-
119
-
120
-
121
-
122
-
123
-
124
-
125
-
126
-
127
-
128
-
129
-
130
-
131
-
132
-
133
-
134
-
135
-
136
-
137
-
138
-
139
-
140
-
141
-
142
-
143
-
144
-
145
-
146
-
147
-
148
-
149
-
150
-
151
-
152
-
153
-
154
-
155
-
156
-
157
-
158
-
159
-
160
-
161
-
162
-
163
-
164
-
165
-
166
-
167
-
168
-
169
-
170
-
171
-
172
-
173
-
174
-
175
-
176
-
177
-
178
-
179
-
180
-
181
-
182
-
183
-
184
-
185
-
186
-
187
-
188
-
189
-
190
-
191
-
192
-
193
-
194
-
195
-
196
-
197
-
198
-
199
-
200
-
201
-
202
-
203
-
204
 |
 |