Pioneer AVIC-X850BT Operation Manual - Page 151
Adjusting loudness, Using the equalizer - auto equalizer
 |
View all Pioneer AVIC-X850BT manuals
Add to My Manuals
Save this manual to your list of manuals |
Page 151 highlights
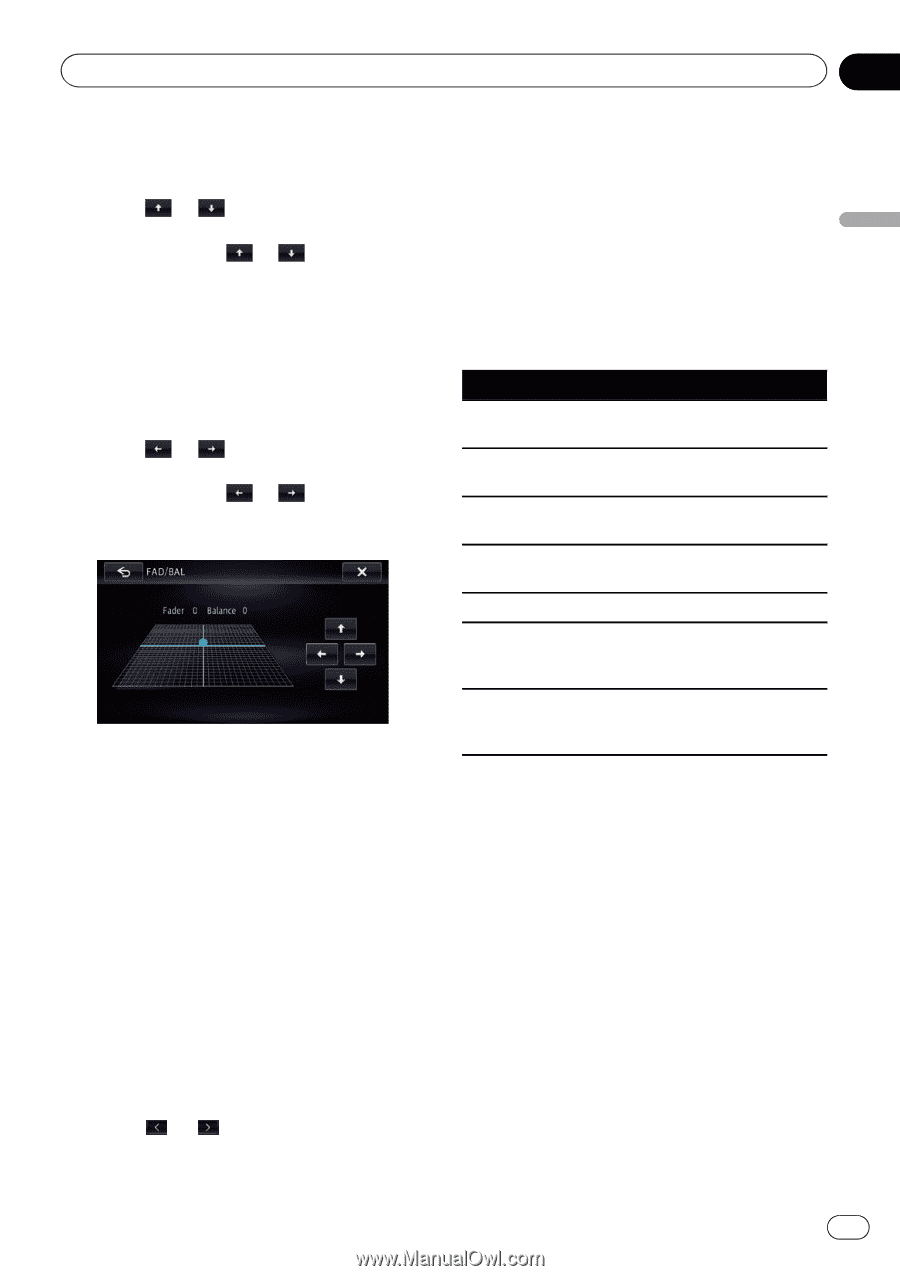
Customizing preferences Chapter 27 Customizing preferences = For details, refer to Setting the rear output on page 158. 3 Touch or to adjust front/rear speaker balance. Each time you touch or , the front/rear speaker balance moves towards the front or rear. "Front 15" to "Rear 15" is displayed as the front/rear speaker balance moves from the front to rear. Set "Front" and "Rear" to "0" when using a dual speaker system. 4 Touch or to adjust the left/right speaker balance. Each time you touch or , the left/right speaker balance moves towards the left or right. "Left 15" to "Right 15" is displayed as the left/ right speaker balance moves from left to right. Adjusting loudness Loudness compensates for deficiencies in the low- and high-sound ranges at low volumes. 1 Display the "AV Sound Settings" screen. = For details, refer to Displaying the screen for AV sound settings on page 150. 2 Touch [Loudness]. 3 Touch [On]. # If you touch [Off], the setting is turned off. 4 Touch or , and select the level you want to set. Low - Mid - High Using the equalizer The equalizer lets you adjust equalization to match the vehicle interior acoustic characteristics as desired. Recalling equalizer curves There are seven stored equalizer curves that you can easily recall at any time. Here is a list of the equalizer curves: Equalizer curve S.Bass (Super Bass) is a curve in which only lowpitched sound is boosted. Powerful is a curve in which low- and high-pitched sounds are boosted. Natural is a curve in which low- and high-pitched sounds are slightly boosted. Vocal is a curve in which the midrange, which is the human vocal range, is boosted. Flat is a flat curve in which nothing is boosted. Custom1 is an adjusted equalizer curve that you create. A separate custom curve can be created for each source. Custom2 is an adjusted equalizer curve that you create. If you select this curve, the effect is reflected all AV source. p When "Flat" is selected, no supplement or correction is made to the sound. This is useful to check the effect of the equalizer curves by switching alternatively between "Flat" and a set equalizer curve. p You cannot select "Custom1" and "Custom2" when "Auto EQ" is "On". = For details, refer to Using the auto-adjusted equalizer on page 153. 1 Display the "AV Sound Settings" screen. = For details, refer to Displaying the screen for AV sound settings on page 150. En 151
-
 1
1 -
2
-
3
-
4
-
5
-
6
-
7
-
8
-
9
-
10
-
11
-
12
-
13
-
14
-
15
-
16
-
17
-
18
-
19
-
20
-
21
-
22
-
23
-
24
-
25
-
26
-
27
-
28
-
29
-
30
-
31
-
32
-
33
-
34
-
35
-
36
-
37
-
38
-
39
-
40
-
41
-
42
-
43
-
44
-
45
-
46
-
47
-
48
-
49
-
50
-
51
-
52
-
53
-
54
-
55
-
56
-
57
-
58
-
59
-
60
-
61
-
62
-
63
-
64
-
65
-
66
-
67
-
68
-
69
-
70
-
71
-
72
-
73
-
74
-
75
-
76
-
77
-
78
-
79
-
80
-
81
-
82
-
83
-
84
-
85
-
86
-
87
-
88
-
89
-
90
-
91
-
92
-
93
-
94
-
95
-
96
-
97
-
98
-
99
-
100
-
101
-
102
-
103
-
104
-
105
-
106
-
107
-
108
-
109
-
110
-
111
-
112
-
113
-
114
-
115
-
116
-
117
-
118
-
119
-
120
-
121
-
122
-
123
-
124
-
125
-
126
-
127
-
128
-
129
-
130
-
131
-
132
-
133
-
134
-
135
-
136
-
137
-
138
-
139
-
140
-
141
-
142
-
143
-
144
-
145
-
 146
146 -
 147
147 -
 148
148 -
 149
149 -
 150
150 -
 151
151 -
 152
152 -
 153
153 -
 154
154 -
 155
155 -
 156
156 -
157
-
158
-
159
-
160
-
161
-
162
-
163
-
164
-
165
-
166
-
167
-
168
-
169
-
170
-
171
-
172
-
173
-
174
-
175
-
176
-
177
-
178
-
179
-
180
-
181
-
182
-
183
-
184
-
185
-
186
-
187
-
188
-
189
-
190
-
191
-
192
-
193
-
194
-
195
-
196
-
197
-
198
-
199
-
200
-
201
-
202
-
203
-
204
 |
 |