Pioneer AVIC-X850BT Operation Manual - Page 66
Deleting registered contacts
 |
View all Pioneer AVIC-X850BT manuals
Add to My Manuals
Save this manual to your list of manuals |
Page 66 highlights
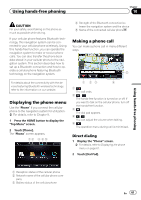
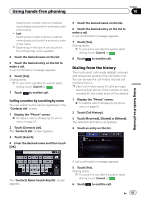
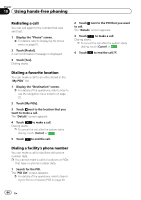
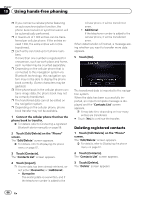
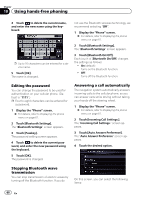
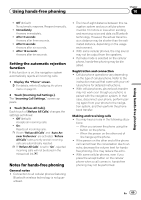
Chapter 10 Using hands-free phoning p If you connect a cellular phone featuring an auto-synchronization function, the phone book transfer or synchronization will be automatically performed. p A maximum of 1 000 entries can be transferred per cellular phone. If the entries exceed 1 000, the extra entries will not be transferred. p Each entry can hold up to 5 phone numbers. If more than one number is registered for one person, such as work place and home, each number may be counted separately. p Depending on the cellular phone that is connected to this navigation system via Bluetooth technology, this navigation system may not be able to display the phone book correctly. (Some characters may be garbled.) p If the phone book in the cellular phone contains image data, the phone book may not be correctly transferred. p The transferred data cannot be edited on the navigation system. p Depending on the cellular phone, phone book transfer may not be available. 1 Connect the cellular phone that has the phone book to transfer. = For details, refer to Connecting a registered Bluetooth device manually on page 59. 2 Touch [Edit/Delete] on the "Phone" screen. The "Edit/Delete" screen appears. = For details, refer to Displaying the phone menu on page 61. 3 Touch [Contacts]. The "Contacts List" screen appears. 4 Touch [Import]. p If some data has been already retrieved, select either [Overwrite] or [Additional]. ! Overwrite: The existing date is overwritten, and if the telephone number is added to the cellular phone, it will be transferred anew. ! Additional: If the telephone number is added to the cellular phone, it will be transferred anew. When data transfer is finished, a message asking whether you want to transfer more data appears. 5 Touch [No]. The transferred data is imported to the navigation system. When the data has been successfully imported, an import complete message is displayed and the "Contacts List" screen appears. p It may take time depending on how many entries are transferred. # Touch [Yes] to continue the transfer. Deleting registered contacts 1 Touch [Edit/Delete] on the "Phone" screen. The "Edit/Delete" screen appears. = For details, refer to Displaying the phone menu on page 61. 2 Touch [Contacts]. The "Contacts List" screen appears. 3 Touch [Delete]. The "Delete" screen appears. 66 En
-
 1
1 -
2
-
3
-
4
-
5
-
6
-
7
-
8
-
9
-
10
-
11
-
12
-
13
-
14
-
15
-
16
-
17
-
18
-
19
-
20
-
21
-
22
-
23
-
24
-
25
-
26
-
27
-
28
-
29
-
30
-
31
-
32
-
33
-
34
-
35
-
36
-
37
-
38
-
39
-
40
-
41
-
42
-
43
-
44
-
45
-
46
-
47
-
48
-
49
-
50
-
51
-
52
-
53
-
54
-
55
-
56
-
57
-
58
-
59
-
60
-
 61
61 -
 62
62 -
 63
63 -
 64
64 -
 65
65 -
 66
66 -
 67
67 -
 68
68 -
 69
69 -
 70
70 -
 71
71 -
72
-
73
-
74
-
75
-
76
-
77
-
78
-
79
-
80
-
81
-
82
-
83
-
84
-
85
-
86
-
87
-
88
-
89
-
90
-
91
-
92
-
93
-
94
-
95
-
96
-
97
-
98
-
99
-
100
-
101
-
102
-
103
-
104
-
105
-
106
-
107
-
108
-
109
-
110
-
111
-
112
-
113
-
114
-
115
-
116
-
117
-
118
-
119
-
120
-
121
-
122
-
123
-
124
-
125
-
126
-
127
-
128
-
129
-
130
-
131
-
132
-
133
-
134
-
135
-
136
-
137
-
138
-
139
-
140
-
141
-
142
-
143
-
144
-
145
-
146
-
147
-
148
-
149
-
150
-
151
-
152
-
153
-
154
-
155
-
156
-
157
-
158
-
159
-
160
-
161
-
162
-
163
-
164
-
165
-
166
-
167
-
168
-
169
-
170
-
171
-
172
-
173
-
174
-
175
-
176
-
177
-
178
-
179
-
180
-
181
-
182
-
183
-
184
-
185
-
186
-
187
-
188
-
189
-
190
-
191
-
192
-
193
-
194
-
195
-
196
-
197
-
198
-
199
-
200
-
201
-
202
-
203
-
204
 |
 |