Samsung SCD6040 User Manual (user Manual) (English, Spanish) - Page 102
Viewing a Still Image using the Quick Review, Setting the Q.View Duration
 |
View all Samsung SCD6040 manuals
Add to My Manuals
Save this manual to your list of manuals |
Page 102 highlights
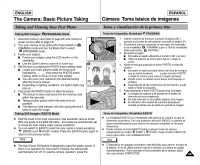
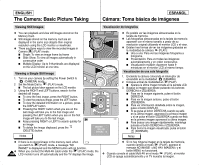
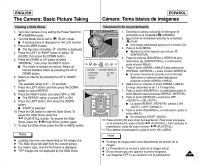
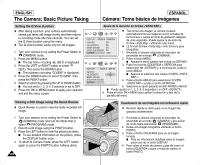
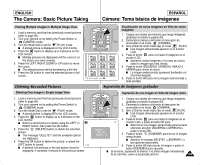
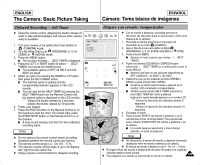
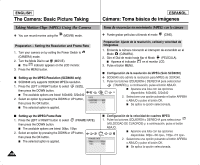
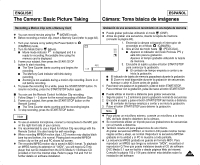
ENGLISH The Camera: Basic Picture Taking ESPAÑOL Cámara: Toma básica de imágenes Setting the Q.View Duration ✤ After taking a picture, your camera automatically shows just taken still image shortly and then returns to recording mode after few seconds. You can set the Q.View duration using this menu. ✤ The Q.View function works only for still images. 1. Turn your camera on by setting the Power Switch to (CAMERA) mode. 2. Press the MENU button. I The top menu including (SET) is displayed. 3. Press the LEFT or RIGHT button to select (SET), then press the DOWN button. I The submenu including "Q.VIEW" is displayed. 4. Press the DOWN button to select "Q.VIEW", then press the RIGHT button. 5. Select an option by pressing the UP or DOWN button. I You can set to 1, 2, 3, 4, 5 seconds or set to OFF. 6. Press the OK or MENU button to apply your selection and exit the menu screen. Ajuste de la duración de Q.View ✤ Tras tomar una imagen, la cámara muestra automáticamente las imágenes recién tomadas de forma breve y vuelve al modo de grabación después MOVE: CHANGE: de unos segundos. Puede ajustar la duración de IMPRINT WL.REMOTE BEEP SOUND SHUTTER SOUND Q.VIEW OFF ON ON ON 1 SEC Q.View utilizando este menú. ✤ La función Q.View sólo funciona para fotografías. 1. Encienda la cámara colocando el interruptor de encendido en el modo (CÁMARA). 2. Pulse el botón MENU. I Aparece el menú superior que incluye (DEFINIR). 3. Pulse los botones IZQUIERDA o DERECHA para BACK: SET: OK IMPRINT WL.REMOTE 1 SEC seleccionar (DEFINIR) y, a continuación, pulse el botón ABAJO. I Aparece el submenú que incluye Q.VIEW . SHUTTER SOUND 4. Pulse el botón ABAJO para seleccionar Q.VIEW Q.VIEW y pulse el botón DERECHA. 5. Seleccione su opción pulsando el botón ARRIBA o ABAJO. I Puede ajustar en 1, 2, 3, 4, 5 segundos o en OFF . 6. Pulse el botón OK o MENU para aplicar la selección y salir de la pantalla del menú. Viewing a Still Image using the Quick Review ✤ Quick Review is used to view the lastly recorded still image. Visualización de una fotografía con la Revisión rápida ✤ Revisión rápida se utiliza para ver la imagen fija grabada recientemente. 1. Turn your camera on by setting the Power Switch to (CAMERA) mode and turn the Mode Dial to select (PROGRAM) mode. 2. Record a still image using the PHOTO button. 3. Press the LEFT button to view the picture just taken. I To see detailed information on the picture, press the DISPLAY button once. 4. To return to Camera mode, press the LEFT button again or press the PHOTO button halfway down. 102 1. Encienda la cámara colocando el interruptor de encendido en el modo (CÁMARA) y gire el Dial de modo hasta seleccionar (PROGRAMA). 2. Grabe una imagen fotográfica utilizando el botón PHOTO. 3. Pulse el botón IZQUIERDA para ver la imagen tomada. I Para ver información detallada sobre la imagen, pulse una vez el botón DISPLAY. 4. Para volver al modo de cámara, pulse de nuevo el botón IZQUIERDA o pulse a mitad de camino el botón PHOTO.
-
 1
1 -
2
-
3
-
4
-
5
-
6
-
7
-
8
-
9
-
10
-
11
-
12
-
13
-
14
-
15
-
16
-
17
-
18
-
19
-
20
-
21
-
22
-
23
-
24
-
25
-
26
-
27
-
28
-
29
-
30
-
31
-
32
-
33
-
34
-
35
-
36
-
37
-
38
-
39
-
40
-
41
-
42
-
43
-
44
-
45
-
46
-
47
-
48
-
49
-
50
-
51
-
52
-
53
-
54
-
55
-
56
-
57
-
58
-
59
-
60
-
61
-
62
-
63
-
64
-
65
-
66
-
67
-
68
-
69
-
70
-
71
-
72
-
73
-
74
-
75
-
76
-
77
-
78
-
79
-
80
-
81
-
82
-
83
-
84
-
85
-
86
-
87
-
88
-
89
-
90
-
91
-
92
-
93
-
94
-
95
-
96
-
 97
97 -
 98
98 -
 99
99 -
 100
100 -
 101
101 -
 102
102 -
 103
103 -
 104
104 -
 105
105 -
 106
106 -
 107
107 -
108
-
109
-
110
-
111
-
112
-
113
-
114
-
115
-
116
-
117
-
118
-
119
-
120
-
121
-
122
-
123
-
124
-
125
-
126
-
127
-
128
-
129
-
130
-
131
-
132
-
133
-
134
-
135
-
136
-
137
-
138
-
139
-
140
-
141
-
142
-
143
-
144
-
145
-
146
-
147
-
148
-
149
-
150
-
151
-
152
-
153
-
154
-
155
-
156
-
157
-
158
-
159
-
160
-
161
-
162
-
163
-
164
-
165
-
166
 |
 |
