Samsung SCD6040 User Manual (user Manual) (English, Spanish) - Page 137
Información diversa, Miscellaneous Information
 |
View all Samsung SCD6040 manuals
Add to My Manuals
Save this manual to your list of manuals |
Page 137 highlights
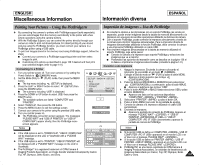
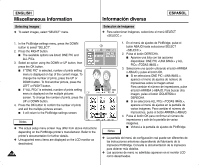
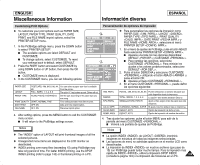
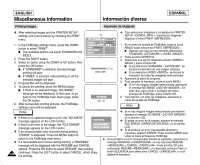
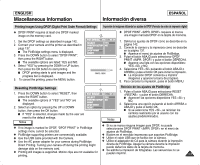
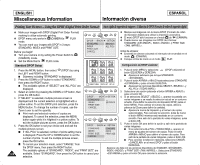
ENGLISH Miscellaneous Information Información diversa ESPAÑOL Printing Your Pictures - Using the PictBridgeTM ✤ By connecting the camera to printers with PictBridge support (sold separately), you can send images from the memory card directly to the printer with a few simple operations using the camera buttons. ✤ With the PictBridge Support, you can control the printer directly through your camera in order to print out stored pictures. For direct printing of your stored pictures using the PictBridge function, you must connect your camera to a PictBridge printer using a USB cable. ✤ To print out images stored in the memory card using PictBridge support, follow the steps: I Connect your camera to a PictBridge supporting printer and then select images to print. I Customize print options as described in page 139 if desired and then print your selected images (refer to page 141). Connecting To a Printer 1. Turn your printer power off. Turn your camera on by setting the Power Switch to (CAMERA) mode. 2. Set the Mode DIAL to (PLAY) mode, then press the MENU button. I The top menu including (SETUP) is displayed. 3. Press the LEFT or RIGHT button to select (SETUP) then press the DOWN button. I The submenu including "USB" is displayed. 4. Press the DOWN or UP button to select USB, then press the RIGHT button. I The available options are listed: "COMPUTER" and "PRINTER". 5. Select "PRINTER", then press the OK button. 6. Press the MENU button to exit the settings screen. 7. Connect your camera to the printer using the provided USB cable. 8. Turn your printer power on. I The PictBridge connection screen appears. The messages "PLEASE WAIT" and "USB I/F PRINTER" (or "USB I/F COMPUTER") appear shortly, then the PictBridge menu screen appears. Notes ✤ If the USB option is set to "COMPUTER", "USB I/F COMPUTER" will be displayed on the LCD or Viewfinder with a "PLEASE WAIT" message. ✤ If the USB option is set to "PRINTER", "USB I/F PRINTER" will be displayed with a "PLEASE WAIT" message on the LCD or Viewfinder. ✤ The PictBridgeTM is a registered trademark of CIPA(Camera & Imaging Products Association), an image transfer standard developed by Canon, Fuji, HP, Olympus, Seiko Epson, and Sony. Impresión de imágenes - Uso de PictBridge ✤ Al conectar la cámara a las impresoras con el soporte PictBridge (se vende por separado), puede enviar imágenes desde la tarjeta de memoria directamente a la impresora con una serie de sencillas operaciones utilizando los botones de cámara. ✤ Con el soporte PictBridge, puede controlar la impresora directamente a través de la cámara para imprimir imágenes almacenadas. Para la impresión directa de imágenes almacenadas utilizando la función PictBridge, debe conectar la cámara a una impresora PictBridge utilizando un cable USB. ✤ Para imprimir imágenes almacenadas en la tarjeta de memoria utilizando el soporte PictBridge, siga estos pasos: I Conecte la cámara a la impresora que soporta PictBridge y seleccione las imágenes que va a imprimir. I Personalice las opciones de impresión como se describe en la página 139 si lo desea e imprima las imágenes seleccionadas (consulte la página 141). Conexión a una impresora 1. Apague la impresora. Encienda la cámara colocando el interruptor de encendido en el modo (CÁMARA). 2. Coloque el Dial de modo en (PLAY) y pulse el botón MENU. I Aparece el menú superior que incluye (CONFIGURACIÓN). 3. Pulse los botones IZQUIERDA o DERECHA para seleccionar (CONFIGURACIÓN) y, a continuación, pulse el botón ABAJO. I Aparece el submenú que incluye "USB". 4. Pulse el botón ARRIBA o ABAJO hasta seleccionar USB y pulse el botón DERECHA. I Aparece una lista con las opciones disponibles: "COMPUTER" y "PRINTER" . 5. Seleccione "PRINTER" y pulse el botón OK. 6. Pulse el botón MENU para salir de la pantalla de ajustes. 7. Conecte la cámara a la impresora utilizando el cable USB suministrado. 8. Encienda la impresora. I Aparece la pantalla de conexión de PictBridge. Aparece el mensaje "PLEASE WAIT" Y "USB I/F PRINTER" (o "USB I/F COMPUTER" ) brevemente y aparece la pantalla de menús de PictBridge. Notas ✤ Si la opción USB se define en COMPUTER , USB I/F COMPUTER aparecerá en el monitor LCD o en el Visor con el mensaje "PLEASE WAIT" . ✤ Si la opción USB se define en PRINTER , USB I/F PRINTER aparecerá en el monitor LCD o en el Visor con el mensaje PLEASE WAIT . ✤ PictBridgeTM es una marca registrada de CIPA(Camera & Imaging Products Association), un estándar de transferencia de imágenes desarrollado por Canon, Fuji, HP, Olympus, Seiko Epson y Sony. 137
-
 1
1 -
2
-
3
-
4
-
5
-
6
-
7
-
8
-
9
-
10
-
11
-
12
-
13
-
14
-
15
-
16
-
17
-
18
-
19
-
20
-
21
-
22
-
23
-
24
-
25
-
26
-
27
-
28
-
29
-
30
-
31
-
32
-
33
-
34
-
35
-
36
-
37
-
38
-
39
-
40
-
41
-
42
-
43
-
44
-
45
-
46
-
47
-
48
-
49
-
50
-
51
-
52
-
53
-
54
-
55
-
56
-
57
-
58
-
59
-
60
-
61
-
62
-
63
-
64
-
65
-
66
-
67
-
68
-
69
-
70
-
71
-
72
-
73
-
74
-
75
-
76
-
77
-
78
-
79
-
80
-
81
-
82
-
83
-
84
-
85
-
86
-
87
-
88
-
89
-
90
-
91
-
92
-
93
-
94
-
95
-
96
-
97
-
98
-
99
-
100
-
101
-
102
-
103
-
104
-
105
-
106
-
107
-
108
-
109
-
110
-
111
-
112
-
113
-
114
-
115
-
116
-
117
-
118
-
119
-
120
-
121
-
122
-
123
-
124
-
125
-
126
-
127
-
128
-
129
-
130
-
131
-
 132
132 -
 133
133 -
 134
134 -
 135
135 -
 136
136 -
 137
137 -
 138
138 -
 139
139 -
 140
140 -
 141
141 -
 142
142 -
143
-
144
-
145
-
146
-
147
-
148
-
149
-
150
-
151
-
152
-
153
-
154
-
155
-
156
-
157
-
158
-
159
-
160
-
161
-
162
-
163
-
164
-
165
-
166
 |
 |
