Samsung SCD6040 User Manual (user Manual) (English, Spanish) - Page 39
Setting the DATE/TIME, Ajuste de fecha y hora
 |
View all Samsung SCD6040 manuals
Add to My Manuals
Save this manual to your list of manuals |
Page 39 highlights
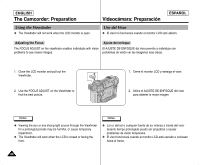
ENGLISH The Camcorder: Functions Setting the DATE/TIME ✤ Displays the DATE / TIME on the LCD monitor while recording or playing a tape. ✤ The DATE / TIME setting works in both REC and PLAY modes. 1. Turn on your camcorder by setting the Power Switch to REC mode. 2. Press the MENU button. I The top menu including "VIEWER" is displayed. 3. Press the DOWN button to select "VIEWER", then press the OK button. I The submenu including "DATE/TIME" is displayed. 4. Press the DOWN button to select "DATE/TIME", then press the OK button. I The options available for DATE/TIME display are listed. 5. Select an option using the DOWN or UP button, then press the OK button. I The selected option is applied. 6. Press the MENU button to exit the menu screen. Notes ✤ Date and Time information is automatically recorded on a special data area of the tape. ✤ The DATE/TIME will read "- - -" under the following conditions: During playback of a blank section of a tape. If the tape was recorded before setting the clock in Camcorder mode. When the Lithium battery becomes weak or dead. ✤ Before setting the DATE/TIME, be sure to set the CLOCK. Refer to Setting the Clock in page 38. Videocámara: Funciones ESPAÑOL Ajuste de fecha y hora ✤ Muestra la fecha y hora en el monitor LCD mientras graba o reproduce una cinta. ✤ El ajuste de fecha y hora funciona en los Modos REC y PLAY. 1. Encienda la videocámara colocando el interruptor de encendido en el Modo REC. 2. Pulse el botón MENU. I Aparece el menú superior que incluye "VIEWER" . 3. Pulse el botón ABAJO para seleccionar "VIEWER" y pulse el botón OK. I Aparece el submenú que incluye "DATE/TIME" . 4. Pulse el botón ABAJO para seleccionar "DATE/TIME" y pulse el botón OK. I Aparece una lista con las opciones disponibles de DATE/TIME
-
 1
1 -
2
-
3
-
4
-
5
-
6
-
7
-
8
-
9
-
10
-
11
-
12
-
13
-
14
-
15
-
16
-
17
-
18
-
19
-
20
-
21
-
22
-
23
-
24
-
25
-
26
-
27
-
28
-
29
-
30
-
31
-
32
-
33
-
 34
34 -
 35
35 -
 36
36 -
 37
37 -
 38
38 -
 39
39 -
 40
40 -
 41
41 -
 42
42 -
 43
43 -
 44
44 -
45
-
46
-
47
-
48
-
49
-
50
-
51
-
52
-
53
-
54
-
55
-
56
-
57
-
58
-
59
-
60
-
61
-
62
-
63
-
64
-
65
-
66
-
67
-
68
-
69
-
70
-
71
-
72
-
73
-
74
-
75
-
76
-
77
-
78
-
79
-
80
-
81
-
82
-
83
-
84
-
85
-
86
-
87
-
88
-
89
-
90
-
91
-
92
-
93
-
94
-
95
-
96
-
97
-
98
-
99
-
100
-
101
-
102
-
103
-
104
-
105
-
106
-
107
-
108
-
109
-
110
-
111
-
112
-
113
-
114
-
115
-
116
-
117
-
118
-
119
-
120
-
121
-
122
-
123
-
124
-
125
-
126
-
127
-
128
-
129
-
130
-
131
-
132
-
133
-
134
-
135
-
136
-
137
-
138
-
139
-
140
-
141
-
142
-
143
-
144
-
145
-
146
-
147
-
148
-
149
-
150
-
151
-
152
-
153
-
154
-
155
-
156
-
157
-
158
-
159
-
160
-
161
-
162
-
163
-
164
-
165
-
166
 |
 |
