Samsung SCD6040 User Manual (user Manual) (English, Spanish) - Page 103
Supresión de imágenes grabadas, Deleting Recorded Pictures
 |
View all Samsung SCD6040 manuals
Add to My Manuals
Save this manual to your list of manuals |
Page 103 highlights
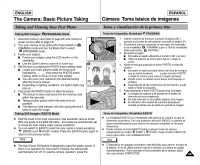
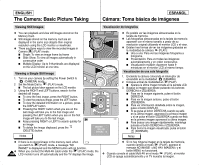
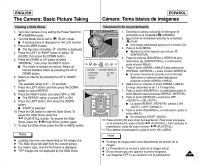
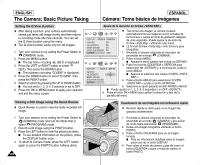
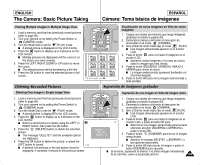
ENGLISH The Camera: Basic Picture Taking ESPAÑOL Cámara: Toma básica de imágenes Viewing Multiple Images in Multiple Image View 1. Load a memory card that has previously stored pictures (refer to page 83). 2. Turn your camera on by setting the Power Switch to (CAMERA) mode. 3. Turn the Mode Dial to set the (PLAY) mode. I A stored picture is displayed on the LCD monitor. 4. Press the button to display up to 9 pictures on the LCD monitor. I Multiple pictures are displayed and the cursor is on the picture you were viewing. 5. Press the LEFT, RIGHT, DOWN or UP button to move the cursor. I The selected picture will be bordered by a thin line. 6. Press the OK button to view the selected picture in full screen. Deleting Recorded Pictures Deleting One Image in Single Image View 1. Load a memory card that has previously stored pictures (refer to page 83). 2. Turn your camera on by setting the Power Switch to (CAMERA) mode. 3. Turn the Mode Dial to set the (PLAY) mode. I A stored picture is displayed on the LCD monitor. 4. Press the button to display up to 9 pictures on the LCD monitor. I Select a stored picture to delete using the LEFT or RIGHT button, then press the OK button. 5. Press the (DELETE) button to delete the selected picture. I The message "DELETE?" and the available options are displayed. 6. Press the OK button to delete the picture, or press the LEFT button to cancel. I If deleted, the previous or the last picture stored is displayed. If canceled, it returns to the previous screen. Visualización de varias imágenes en Vista de varias imágenes MOVE: EXIT: 1. Cargue una tarjeta de memoria que tenga imágenes grabadas (consulte la página 83). 2. Encienda la cámara colocando el interruptor de encendido en el modo (CÁMARA). 3. Gire el Dial de modo hasta fijar el modo (PLAY). I Una imagen almacenada aparece en el monitor LCD. 4. Pulse el botón para ver hasta 9 imágenes en el monitor LCD. I Aparecen varias imágenes y el cursor se coloca sobre la imagen que está viendo. 5. Pulse el botón IZQUIERDA, DERECHA, ABAJO U ARRIBA para mover el cursor. I La imagen seleccionada aparecerá bordeada con una línea delgada. 6. Pulse el botón OK para ver la imagen seleccionada a toda pantalla. Supresión de imágenes grabadas Supresión de una imagen en Vista de imagen única DELETE ? DEL : OK CANCEL : I 1. Cargue una tarjeta de memoria que tenga imágenes grabadas (consulte la página 83). 2. Encienda la cámara colocando el interruptor de encendido en el modo (CÁMARA). 3. Gire el Dial de modo hasta fijar el modo (PLAY). I Una imagen almacenada aparece en el monitor LCD. 4. Pulse el botón para ver hasta 9 imágenes en el 2/33 monitor LCD, y pulse el botón OK para. I Seleccione una imagen almacenada para borrarla utilizando el botón IZQUIERDA o DERECHA y pulse el botón OK. 5. Pulse el botón (ELIMINAR) para borrar la imagen seleccionada. I Aparece el mensaje DELETE? y las opciones disponibles. 6. Pulse el botón OK para borrar la imagen o pulse el botón IZQUIERDA para cancelar. Si se borra, aparecerá la anterior o la última imagen almacenada. Si se cancela, vuelve a la pantalla anterior. 103
-
 1
1 -
2
-
3
-
4
-
5
-
6
-
7
-
8
-
9
-
10
-
11
-
12
-
13
-
14
-
15
-
16
-
17
-
18
-
19
-
20
-
21
-
22
-
23
-
24
-
25
-
26
-
27
-
28
-
29
-
30
-
31
-
32
-
33
-
34
-
35
-
36
-
37
-
38
-
39
-
40
-
41
-
42
-
43
-
44
-
45
-
46
-
47
-
48
-
49
-
50
-
51
-
52
-
53
-
54
-
55
-
56
-
57
-
58
-
59
-
60
-
61
-
62
-
63
-
64
-
65
-
66
-
67
-
68
-
69
-
70
-
71
-
72
-
73
-
74
-
75
-
76
-
77
-
78
-
79
-
80
-
81
-
82
-
83
-
84
-
85
-
86
-
87
-
88
-
89
-
90
-
91
-
92
-
93
-
94
-
95
-
96
-
97
-
 98
98 -
 99
99 -
 100
100 -
 101
101 -
 102
102 -
 103
103 -
 104
104 -
 105
105 -
 106
106 -
 107
107 -
 108
108 -
109
-
110
-
111
-
112
-
113
-
114
-
115
-
116
-
117
-
118
-
119
-
120
-
121
-
122
-
123
-
124
-
125
-
126
-
127
-
128
-
129
-
130
-
131
-
132
-
133
-
134
-
135
-
136
-
137
-
138
-
139
-
140
-
141
-
142
-
143
-
144
-
145
-
146
-
147
-
148
-
149
-
150
-
151
-
152
-
153
-
154
-
155
-
156
-
157
-
158
-
159
-
160
-
161
-
162
-
163
-
164
-
165
-
166
 |
 |
