Samsung SCD6040 User Manual (user Manual) (English, Spanish) - Page 140
Impresión de imágenes, Printing Images
 |
View all Samsung SCD6040 manuals
Add to My Manuals
Save this manual to your list of manuals |
Page 140 highlights
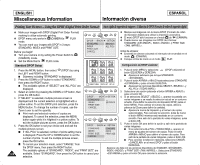
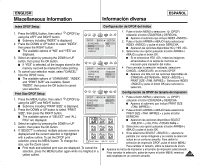
ENGLISH Miscellaneous Information Printing Images ✤ After selecting images and the PRINTER SETUP settings, print your pictures by choosing the PRINT menu. 1. In the PictBridge settings menu, press the DOWN button to select "PRINT". I The available options are listed: STANDARD and INDEX. 2. Press the RIGHT button. 3. Select an option using the DOWN or UP button, then press the OK button. I If "STANDARD" is selected, standard image printing will start. I If "INDEX" is selected, index printing on all the selected images will start. 4. Progress Bar will be displayed. 5. To cancel the printing, press the MENU button. I If there is no selected image, "NO IMAGE" message will be displayed. In that case, to go back to the PictBridge main menu page, press the OK button. 6. After successfully printing pictures, the PictBridge settings menu will be displayed. Notes ✤ If there is no selected image to print, the "NO IMAGE" message appears on the LCD monitor. ✤ If there is an error in the image, the "FILE ERROR" message appears on the LCD monitor. ✤ If an unrecoverable error occurred during printing, "ERROR" is displayed. Press the MENU button to return to the PictBridge main menu. ✤ If a recoverable error occurs during printing, a "WARNING" message will be displayed with the RESUME and CANCEL options. Press the OK button to select RESUME, then printing 140 continues. Press the LEFT button to select CANCEL, which stops the printing. Información diversa ESPAÑOL Impresión de imágenes ✤ Tras seleccionar imágenes y los ajustes de PRINTER SETUP , imprima las imágenes eligiendo el menú PRINT . 1. En el menú de ajustes de PictBridge, pulse el botón ABAJO hasta seleccionar PRINT . I Aparece una lista con las opciones disponibles: STANDARD e INDEX . 2. Pulse el botón DERECHA. 3. Seleccione una opción utilizando el botón ARRIBA o ABAJO y pulse el botón OK. I Si se selecciona STANDARD < ESTÁNDAR>, se iniciará la impresión de una imagen estándar. I Si se selecciona INDEX , se iniciará la impresión de todas las imágenes seleccionadas. 4. Aparecerá la barra de progreso. 5. Para cancelar la impresión, pulse el botón MENU. I Si no hay ninguna imagen seleccionada, aparecerá el mensaje NO IMAGE . En este caso, para volver a la página del menú principal de PictBridge, pulse el botón OK. 6. Tras imprimir con éxito las imágenes, aparecerá el menú de ajustes de PictBridge. Notas ✤ Si no hay ninguna imagen seleccionada que imprimir, aparece el mensaje NO IMAGE en el monitor LCD. ✤ Si existe un error en la imagen, aparece el mensaje FILE ERROR en el monitor LCD. ✤ Si se produce un error irrecuperable durante la impresión, aparece ERROR. Pulse el botón MENU para volver al menú principal de PictBridge. ✤ Si se produce un error irrecuperable durante la impresión, aparecerá el mensaje WARNING con las opciones RESUME y CANCEL . Pulse el botón OK para seleccionar RESUME y la impresión continúa Pulse el botón IZQUIERDA para seleccionar CANCEL , lo cual detiene la impresión.
-
 1
1 -
2
-
3
-
4
-
5
-
6
-
7
-
8
-
9
-
10
-
11
-
12
-
13
-
14
-
15
-
16
-
17
-
18
-
19
-
20
-
21
-
22
-
23
-
24
-
25
-
26
-
27
-
28
-
29
-
30
-
31
-
32
-
33
-
34
-
35
-
36
-
37
-
38
-
39
-
40
-
41
-
42
-
43
-
44
-
45
-
46
-
47
-
48
-
49
-
50
-
51
-
52
-
53
-
54
-
55
-
56
-
57
-
58
-
59
-
60
-
61
-
62
-
63
-
64
-
65
-
66
-
67
-
68
-
69
-
70
-
71
-
72
-
73
-
74
-
75
-
76
-
77
-
78
-
79
-
80
-
81
-
82
-
83
-
84
-
85
-
86
-
87
-
88
-
89
-
90
-
91
-
92
-
93
-
94
-
95
-
96
-
97
-
98
-
99
-
100
-
101
-
102
-
103
-
104
-
105
-
106
-
107
-
108
-
109
-
110
-
111
-
112
-
113
-
114
-
115
-
116
-
117
-
118
-
119
-
120
-
121
-
122
-
123
-
124
-
125
-
126
-
127
-
128
-
129
-
130
-
131
-
132
-
133
-
134
-
 135
135 -
 136
136 -
 137
137 -
 138
138 -
 139
139 -
 140
140 -
 141
141 -
 142
142 -
 143
143 -
 144
144 -
 145
145 -
146
-
147
-
148
-
149
-
150
-
151
-
152
-
153
-
154
-
155
-
156
-
157
-
158
-
159
-
160
-
161
-
162
-
163
-
164
-
165
-
166
 |
 |
