Samsung SCD6040 User Manual (user Manual) (English, Spanish) - Page 130
Resizing a Stored Picture, Cambio de tamaño de una imagen almacenada
 |
View all Samsung SCD6040 manuals
Add to My Manuals
Save this manual to your list of manuals |
Page 130 highlights
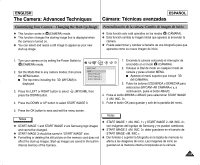
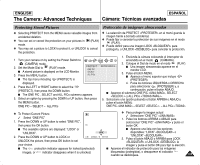
ENGLISH The Camera: Advanced Techniques ESPAÑOL Cámara: Técnicas avanzadas Resizing a Stored Picture Cambio de tamaño de una imagen almacenada ✤ This function works only in the Camera (PLAY) mode. ✤ This function works only for still images recorded onto the memory card. ✤ Only downsizing is available. Enlarging low resolution pictures into higher resolutions is not available. ✤ Choose this option to scale down your stored pictures. ✤ This function utilizes JPEG technology. ✤ Esta función sólo está operativa en el modo de cámara (PLAY). ✤ Esta función sólo está operativa para fotografías grabadas en la tarjeta de memoria. ✤ Sólo es posible reducir el tamaño. Ampliar imágenes de baja resolución a resoluciones más altas no es posible. ✤ Elija esta opción para reducir la escala de las imágenes almacenadas. ✤ Esta función utiliza la tecnología JPEG. 1. Encienda la cámara colocando el interruptor de 1. Turn on your camera by setting the Power Switch to encendido en el Modo (CÁMARA). (CAMERA) mode. 2. Coloque el Dial de modo en el modo (PLAY). 2. Set the Mode Dial to (PLAY) mode. I Una imagen almacenada aparece en el monitor I A stored picture is displayed on the LCD monitor. LCD. 3. Press the LEFT or RIGHT button to locate the picture 3. Pulse el botón IZQUIERDA o DERECHA para 4. 5. you wish to resize. Press the MENU button. I The top menu including (RESIZE) is displayed. Press the LEFT or RIGHT button to select (RESIZE), then press the DOWN button. localizar la imagen en la que desea cambiar el tamaño. 4. Pulse el botón MENU. (2272X1704: SCD6050 only) I Aparece el menú superior que incluye (CAMBIAR TAMAÑO). 5. Pulse los botones IZQUIERDA o DERECHA para seleccionar I Available image resolutions are listed. (CAMBIAR TAMAÑO) y, a continuación, pulse el botón ABAJO. 6. Select an option by pressing the DOWN or UP button, then press the I Se incluye una lista con las resoluciones de imagen disponibles. OK button. 6. Seleccione una opción pulsando el botón ARRIBA o ABAJO y pulse el I The selected option is applied and automatically exits from the botón OK. menu screen. I Se aplica la opción seleccionada y sale automáticamente de la I Select START IMAGE if you want to save the image as START pantalla de menú. IMAGE 3. I Seleccione START IMAGE si quiere guardar la imagen como START IMAGE 3 . Notes Notas ✤ You can select and resize a still image to appear as your new start-up image. ✤ Resizing for the START IMAGE size saves a new picture to the camcorder's internal memory, not to the memory card. ✤ Only JPEG file types can be resized. TIFF and motion clips cannot be resized. ✤ Only downsizing is supported. Enlarging a picture is not supported. ✤ Resizing does not delete the original picture. An additional resized picture is saved on the memory card. ✤ If there is no space for the additional resized picture, it is not saved and the message "CARD FULL!" appears. 130 ✤ Puede seleccionar y cambiar el tamaño de una fotografía para que aparezca como su nueva imagen de inicio. ✤ Cambiar el tamaño de START IMAGE guarda una nueva imagen en la memoria interna de la videocámara, no en la tarjeta de memoria. ✤ Sólo es posible cambiar el tamaño en el tipo de archivo JPEG. No es posible cambiar el tamaño de TIFF ni de secuencias. ✤ Sólo es posible reducir el tamaño. No se admite la ampliación de una imagen. ✤ El cambio de tamaño no suprime la imagen original. Se guarda en la tarjeta de memoria una imagen adicional con el tamaño modificado. ✤ Si no hay espacio para la imagen adicional modificada en tamaño, no se guarda y aparece el mensaje "CARD FULL!" .
-
 1
1 -
2
-
3
-
4
-
5
-
6
-
7
-
8
-
9
-
10
-
11
-
12
-
13
-
14
-
15
-
16
-
17
-
18
-
19
-
20
-
21
-
22
-
23
-
24
-
25
-
26
-
27
-
28
-
29
-
30
-
31
-
32
-
33
-
34
-
35
-
36
-
37
-
38
-
39
-
40
-
41
-
42
-
43
-
44
-
45
-
46
-
47
-
48
-
49
-
50
-
51
-
52
-
53
-
54
-
55
-
56
-
57
-
58
-
59
-
60
-
61
-
62
-
63
-
64
-
65
-
66
-
67
-
68
-
69
-
70
-
71
-
72
-
73
-
74
-
75
-
76
-
77
-
78
-
79
-
80
-
81
-
82
-
83
-
84
-
85
-
86
-
87
-
88
-
89
-
90
-
91
-
92
-
93
-
94
-
95
-
96
-
97
-
98
-
99
-
100
-
101
-
102
-
103
-
104
-
105
-
106
-
107
-
108
-
109
-
110
-
111
-
112
-
113
-
114
-
115
-
116
-
117
-
118
-
119
-
120
-
121
-
122
-
123
-
124
-
 125
125 -
 126
126 -
 127
127 -
 128
128 -
 129
129 -
 130
130 -
 131
131 -
 132
132 -
 133
133 -
 134
134 -
 135
135 -
136
-
137
-
138
-
139
-
140
-
141
-
142
-
143
-
144
-
145
-
146
-
147
-
148
-
149
-
150
-
151
-
152
-
153
-
154
-
155
-
156
-
157
-
158
-
159
-
160
-
161
-
162
-
163
-
164
-
165
-
166
 |
 |
