Samsung SCD6040 User Manual (user Manual) (English, Spanish) - Page 105
Disparo con retardo: Temporizador, Delayed Recording - Self Timer
 |
View all Samsung SCD6040 manuals
Add to My Manuals
Save this manual to your list of manuals |
Page 105 highlights
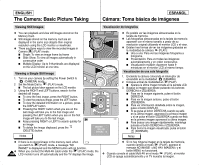
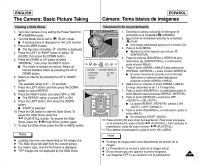
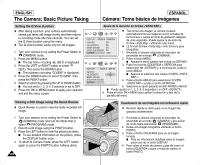
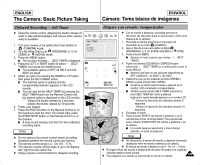
ENGLISH The Camera: Basic Picture Taking ESPAÑOL Cámara: Toma básica de imágenes Delayed Recording - Self Timer ✤ Using the remote control, delaying the shutter release (in order to take self-photography and various other camera uses) is available. 1. Turn your camera on by setting the Power Switch to (CAMERA) mode. 2. Turn the Mode Dial to set (PROGRAM), A, S, M, SCENE or (MOVIE) mode. 3. Press the MENU button. I The top menu including (SELF TIMER) is displayed. 4. Press the LEFT or RIGHT button to select (SELF TIMER), then press the DOWN button. I The available options of OFF, 2s SELF and 10s SELF are listed. 5. Select an option by pressing the DOWN or UP button, then press the OK or MENU button. I The selected option is applied and the corresponding indicator appears on the LCD monitor. I You can also set the SELF TIMER by pressing the SELF TIMER button on the Remote Control until the desired option is displayed on the LCD monitor. : Delays the shutter release by 2 seconds. : Delays the shutter release by 10 seconds. 6. Frame your subject. 7. Press the PHOTO button on the Remote Control or on the Camera to start the timer. For motion clips, press the START/STOP button on the Remote Control or on the Camera. I A beep sound will play and after the time indicated, recording starts. SELF TIMER OFF 2s SELF 10s SELF 2S Notes ✤ Do not obstruct the remote control sensor by putting obstacles between the remote control and camera. ✤ The remote control range is 4 ~ 5m (13 ~ 17 ft). ✤ The effective remote control angle is up to 30 degrees left / right from the center line. ✤ Using a tripod is recommended for delayed recording. Disparo con retardo: Temporizador SET 2 2272 ✤ Con el mando a distancia, es posible demorar la liberación del obturador (para un autorretrato y otros usos diversos de la cámara). 1. Encienda la cámara colocando el interruptor de encendido en el modo (CÁMARA). 2. Gire el Dial de modo para definir el Modo (PROGRAMA), A, S, M, SCENE o (CINE). 3. Pulse el botón MENU. I Aparece el menú superior que incluye (SELF TIMER). 4. Pulse los botones IZQUIERDA o DERECHA para seleccionar (SELF TIMER) y, a continuación, pulse el botón ABAJO. I Aparece una lista con las opciones disponibles de OFF , 2s SELF y 10s SELF. 5. Seleccione una opción pulsando el botón ARRIBA o ABAJO y pulse el botón OK o MENU. I Se aplica la opción seleccionada y aparece en el monitor LCD el indicador correspondiente. I También puede ajustar SELF TIMER pulsando el botón SELF TIMER del mando a distancia hasta que la opción deseada aparezca en el monitor LCD. : Demora la liberación del obturador durante 2 segundos. : Demora la liberación del obturador durante 10 segundos. 6. Encuadre al sujeto. 7. Pulse el botón PHOTO del mando a distancia o en la cámara para iniciar el temporizador. Para secuencias, pulse el botón START/STOP del mando a distancia o de la cámara. I Un sonido beep se reproducirá y tras el tiempo indicado, se inicia la grabación. Notas ✤ No obstaculice el sensor del mando a distancia colocando obstáculos entre el mando a distancia y la cámara. ✤ El alcance del mando a distancia es de 4 ~ 5m (13 ~ 17 pies). ✤ El ángulo eficaz del mando a distancia es de hasta 30 grados a la izquierda /derecha desde la línea central. ✤ Para disparos con retardo se recomienda el uso de un trípode. 105
-
 1
1 -
2
-
3
-
4
-
5
-
6
-
7
-
8
-
9
-
10
-
11
-
12
-
13
-
14
-
15
-
16
-
17
-
18
-
19
-
20
-
21
-
22
-
23
-
24
-
25
-
26
-
27
-
28
-
29
-
30
-
31
-
32
-
33
-
34
-
35
-
36
-
37
-
38
-
39
-
40
-
41
-
42
-
43
-
44
-
45
-
46
-
47
-
48
-
49
-
50
-
51
-
52
-
53
-
54
-
55
-
56
-
57
-
58
-
59
-
60
-
61
-
62
-
63
-
64
-
65
-
66
-
67
-
68
-
69
-
70
-
71
-
72
-
73
-
74
-
75
-
76
-
77
-
78
-
79
-
80
-
81
-
82
-
83
-
84
-
85
-
86
-
87
-
88
-
89
-
90
-
91
-
92
-
93
-
94
-
95
-
96
-
97
-
98
-
99
-
 100
100 -
 101
101 -
 102
102 -
 103
103 -
 104
104 -
 105
105 -
 106
106 -
 107
107 -
 108
108 -
 109
109 -
 110
110 -
111
-
112
-
113
-
114
-
115
-
116
-
117
-
118
-
119
-
120
-
121
-
122
-
123
-
124
-
125
-
126
-
127
-
128
-
129
-
130
-
131
-
132
-
133
-
134
-
135
-
136
-
137
-
138
-
139
-
140
-
141
-
142
-
143
-
144
-
145
-
146
-
147
-
148
-
149
-
150
-
151
-
152
-
153
-
154
-
155
-
156
-
157
-
158
-
159
-
160
-
161
-
162
-
163
-
164
-
165
-
166
 |
 |
