Samsung SM-T807P User Manual Spt Tab S Sm-t807p Kit Kat English User Manual Ve - Page 34
Contacts, Get Started with Contacts, Add a Contact
 |
View all Samsung SM-T807P manuals
Add to My Manuals
Save this manual to your list of manuals |
Page 34 highlights
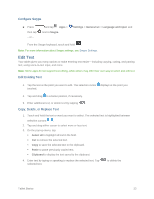
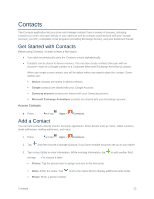
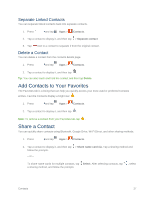
Contacts The Contacts application lets you store and manage contacts from a variety of sources, including contacts you enter and save directly in your tablet as well as contacts synchronized with your Google Account, your PC, compatible email programs (including Exchange Server), and your Facebook friends. Get Started with Contacts Before using Contacts, it's best to learn a few basics. ● Your tablet automatically sorts the Contacts entries alphabetically. ● Contacts can be stored in device memory. You can also create contacts that sync with an account-such as a Google contact or a Corporate (Microsoft Exchange ActiveSync) contact. When you create a new contact, you will be asked where you want to store the contact. Some options are: Device contacts are stored in device memory. Google contacts are shared with your Google Account. Samsung account contacts are shared with your Samsung account. Microsoft Exchange ActiveSync contacts are shared with your Exchange account. Access Contacts ■ Press and tap Apps > Contacts. Add a Contact You can add contacts directly into the Contacts application. Enter details such as name, tablet numbers, email addresses, mailing addresses, and more. 1. Press and tap Apps > Contacts. 2. Tap , and then choose a storage account, if you have multiple accounts set up on your tablet. 3. Tap contact fields to enter information. While entering information, tap and tap to choose a label. Picture: Tap the picture icon to assign a picture to the new entry. to add another field, Name: Enter the name. Tap next to the Name field to display additional name fields. Phone: Enter a phone number. Contacts 25
-
 1
1 -
2
-
3
-
4
-
5
-
6
-
7
-
8
-
9
-
10
-
11
-
12
-
13
-
14
-
15
-
16
-
17
-
18
-
19
-
20
-
21
-
22
-
23
-
24
-
25
-
26
-
27
-
28
-
 29
29 -
 30
30 -
 31
31 -
 32
32 -
 33
33 -
 34
34 -
 35
35 -
 36
36 -
 37
37 -
 38
38 -
 39
39 -
40
-
41
-
42
-
43
-
44
-
45
-
46
-
47
-
48
-
49
-
50
-
51
-
52
-
53
-
54
-
55
-
56
-
57
-
58
-
59
-
60
-
61
-
62
-
63
-
64
-
65
-
66
-
67
-
68
-
69
-
70
-
71
-
72
-
73
-
74
-
75
-
76
-
77
-
78
-
79
-
80
-
81
-
82
-
83
-
84
-
85
-
86
-
87
-
88
-
89
-
90
-
91
-
92
-
93
-
94
-
95
-
96
-
97
-
98
-
99
-
100
-
101
-
102
-
103
-
104
-
105
-
106
-
107
-
108
-
109
-
110
-
111
-
112
-
113
-
114
 |
 |