Kyocera Ai2310 3010/2310 Instruction Handbook - Page 24
Names Of Parts, Nomenclature
 |
View all Kyocera Ai2310 manuals
Add to My Manuals
Save this manual to your list of manuals |
Page 24 highlights
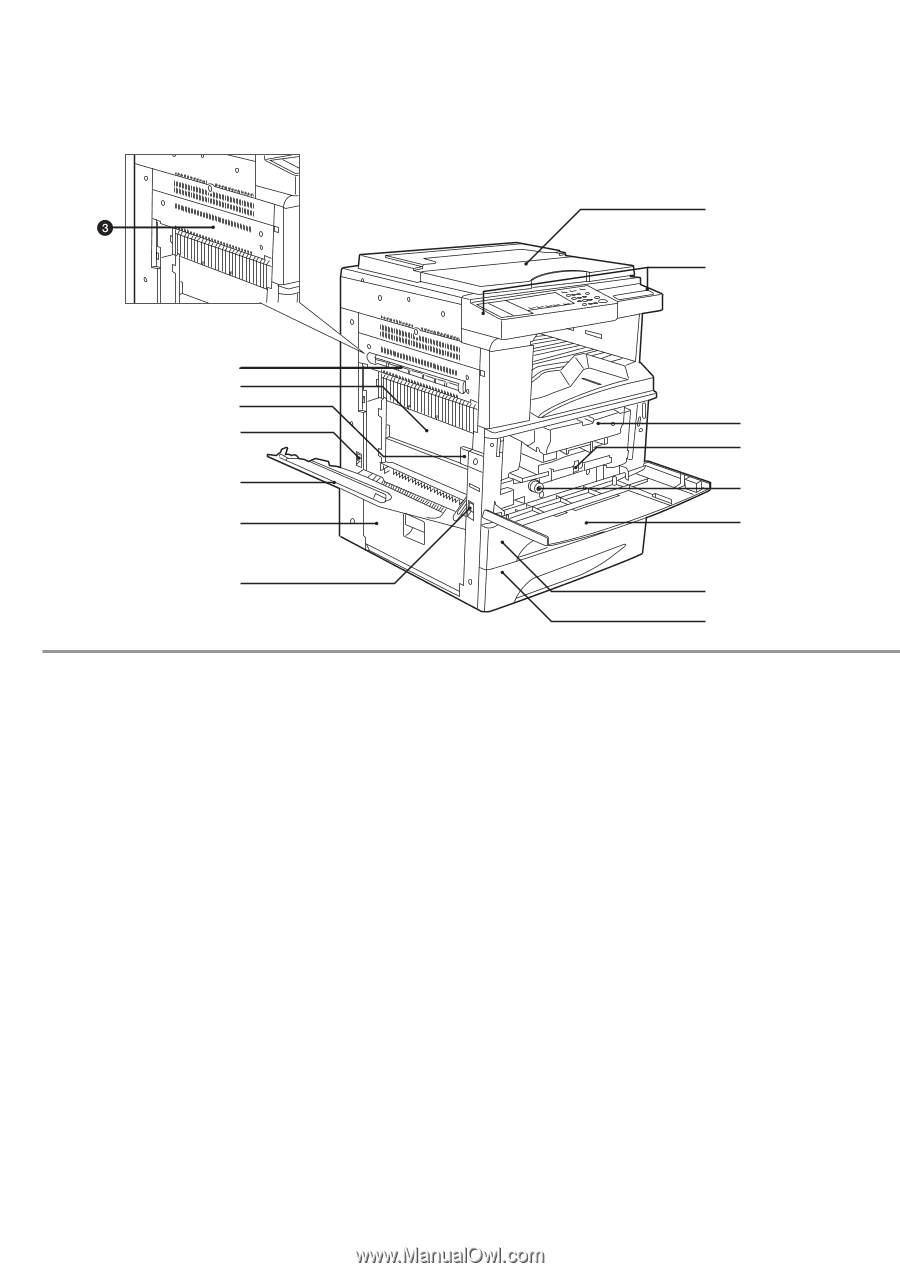
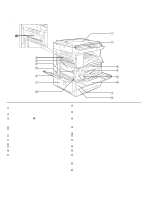
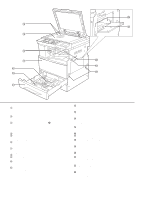
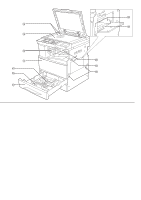
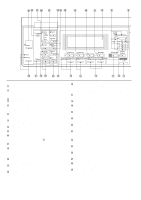
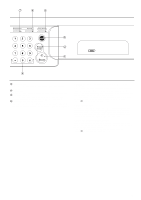
NAMES OF PARTS NOMENCLATURE 1 2 3 4 5 ‹ 8 9 6 0 7 ! ‹ @ # (1) Main body 1 Original cover (Open/close to set the original on the platen. It has a pocket for holding originals on the top.) 2 Operation panel (Contains the keys and controls for operating the copier.) 3 Ejection unit (or branch unit 3) (Pull out when a paper misfeed occurs in the ejection section. The copier is equipped with a branch unit when the optional duplex unit or finisher is installed.) 4 Paper transfer section cover 5 Paper transfer section cover release lever (Operate when a paper misfeed occurs in the paper transfer section.) 6 Left 1 cover (Open when a paper misfeed occurs in the paper feed section.) 7 Left 2 cover (Open when a paper misfeed occurs in the paper feed section.) 8 Toner cartridge 9 Toner cartridge release lever (Operate to replace the toner cartridge.) 0 Paper feed section knob (Operate to remove paper misfed in the paper feed section.) ! Front cover (Open to replace the toner cartridge or to remove misfed paper.) @ Drawer 1 (Holds up to 550 sheets of standard paper [standard paper specified by our company].) # Drawer 2 (Holds up to 550 sheets of standard paper [standard paper specified by our company].) $ Platen (Set originals here for copying. Lay originals face-down with the edges aligned with the size scales on the left and rear sides of the platen.) % Original size scales (Be sure to align the original with these when setting the original on the platen.) ^ Ejection section & Length adjustment plate (Adjust with the length of the paper to be set in the drawer.) * Width adjustment lever (Hold the lever and adjust the width guide with the width of the paper to be set in the drawer.) ( Main switch (Turn ON ( | ) before trying to copy.) ) Copy store section (Copied paper is stored here.) ⁄ Multi-Bypass (Load paper here when copying onto small-size paper or transparencies. 11" x 81/2" size or smaller paper can be copied without opening the multi-bypass.) ¤ Insert guides (Be sure to set the paper width when loading paper on the multi- bypass.) ‹ Handles for transport (Pull out, then it becomes handle. The copier has four handles.) 19
-
 1
1 -
2
-
3
-
4
-
5
-
6
-
7
-
8
-
9
-
10
-
11
-
12
-
13
-
14
-
15
-
16
-
17
-
18
-
 19
19 -
 20
20 -
 21
21 -
 22
22 -
 23
23 -
 24
24 -
 25
25 -
 26
26 -
 27
27 -
 28
28 -
 29
29 -
30
-
31
-
32
-
33
-
34
-
35
-
36
-
37
-
38
-
39
-
40
-
41
-
42
-
43
-
44
-
45
-
46
-
47
-
48
-
49
-
50
-
51
-
52
-
53
-
54
-
55
-
56
-
57
-
58
-
59
-
60
-
61
-
62
-
63
-
64
-
65
-
66
-
67
-
68
-
69
-
70
-
71
-
72
-
73
-
74
-
75
-
76
-
77
-
78
-
79
-
80
-
81
-
82
-
83
-
84
-
85
-
86
-
87
-
88
-
89
-
90
-
91
-
92
-
93
-
94
-
95
-
96
-
97
-
98
-
99
-
100
-
101
-
102
-
103
-
104
-
105
-
106
-
107
-
108
-
109
-
110
-
111
-
112
-
113
-
114
-
115
-
116
-
117
-
118
-
119
-
120
-
121
-
122
-
123
-
124
-
125
-
126
-
127
-
128
-
129
-
130
-
131
-
132
-
133
-
134
-
135
-
136
-
137
-
138
-
139
-
140
-
141
-
142
-
143
-
144
-
145
-
146
-
147
-
148
-
149
-
150
-
151
-
152
-
153
-
154
-
155
-
156
-
157
-
158
-
159
-
160
-
161
-
162
-
163
-
164
-
165
-
166
-
167
-
168
-
169
-
170
-
171
-
172
-
173
-
174
-
175
-
176
-
177
-
178
-
179
-
180
-
181
-
182
-
183
-
184
 |
 |