Kyocera KM-3035 Kyocera Extended Driver 4.0 User Guide Rev-2.1 - Page 101
Scan a Document into a Print Box, Document Management, Synergy Print Box, Document reg, Change name
 |
View all Kyocera KM-3035 manuals
Add to My Manuals
Save this manual to your list of manuals |
Page 101 highlights
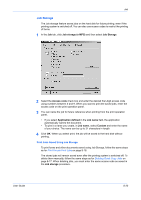
Job Scan a Document into a Print Box 1 At the printing system's operation panel, press the Document Management key. 1 2 The Document Management menu appears. Under Synergy Print Box, select Document reg. 2 3 Select a print box from the list. 3 User Guide 4 (Optional) To give a custom name to the document, touch Change name, and then enter the name on the typepad that appears. Click End to confirm the new name and return to the Document reg menu. 4 5 Place the original document on the document feeder or on the glass. 5 6 Hit the Start key. 6 The document is now stored in the print box. Documents stored by this method are treated as single-sided documents. 8-22
-
 1
1 -
2
-
3
-
4
-
5
-
6
-
7
-
8
-
9
-
10
-
11
-
12
-
13
-
14
-
15
-
16
-
17
-
18
-
19
-
20
-
21
-
22
-
23
-
24
-
25
-
26
-
27
-
28
-
29
-
30
-
31
-
32
-
33
-
34
-
35
-
36
-
37
-
38
-
39
-
40
-
41
-
42
-
43
-
44
-
45
-
46
-
47
-
48
-
49
-
50
-
51
-
52
-
53
-
54
-
55
-
56
-
57
-
58
-
59
-
60
-
61
-
62
-
63
-
64
-
65
-
66
-
67
-
68
-
69
-
70
-
71
-
72
-
73
-
74
-
75
-
76
-
77
-
78
-
79
-
80
-
81
-
82
-
83
-
84
-
85
-
86
-
87
-
88
-
89
-
90
-
91
-
92
-
93
-
94
-
95
-
 96
96 -
 97
97 -
 98
98 -
 99
99 -
 100
100 -
 101
101 -
 102
102 -
 103
103 -
 104
104 -
 105
105 -
 106
106 -
107
-
108
-
109
-
110
-
111
-
112
-
113
-
114
-
115
-
116
-
117
-
118
-
119
-
120
-
121
-
122
-
123
-
124
-
125
-
126
-
127
 |
 |
Job
User Guide
8-22
Scan a Document into a Print Box
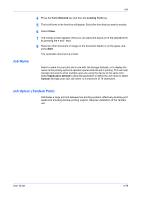
1
At the printing system’s operation panel, press the
Document Management
key.
1
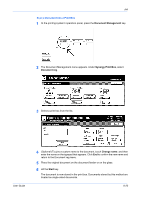
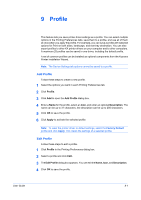
2
The Document Management menu appears. Under
Synergy Print Box
, select
Document reg
.
2
3
Select a print box from the list.
3
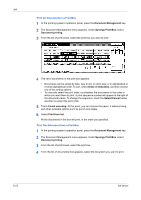
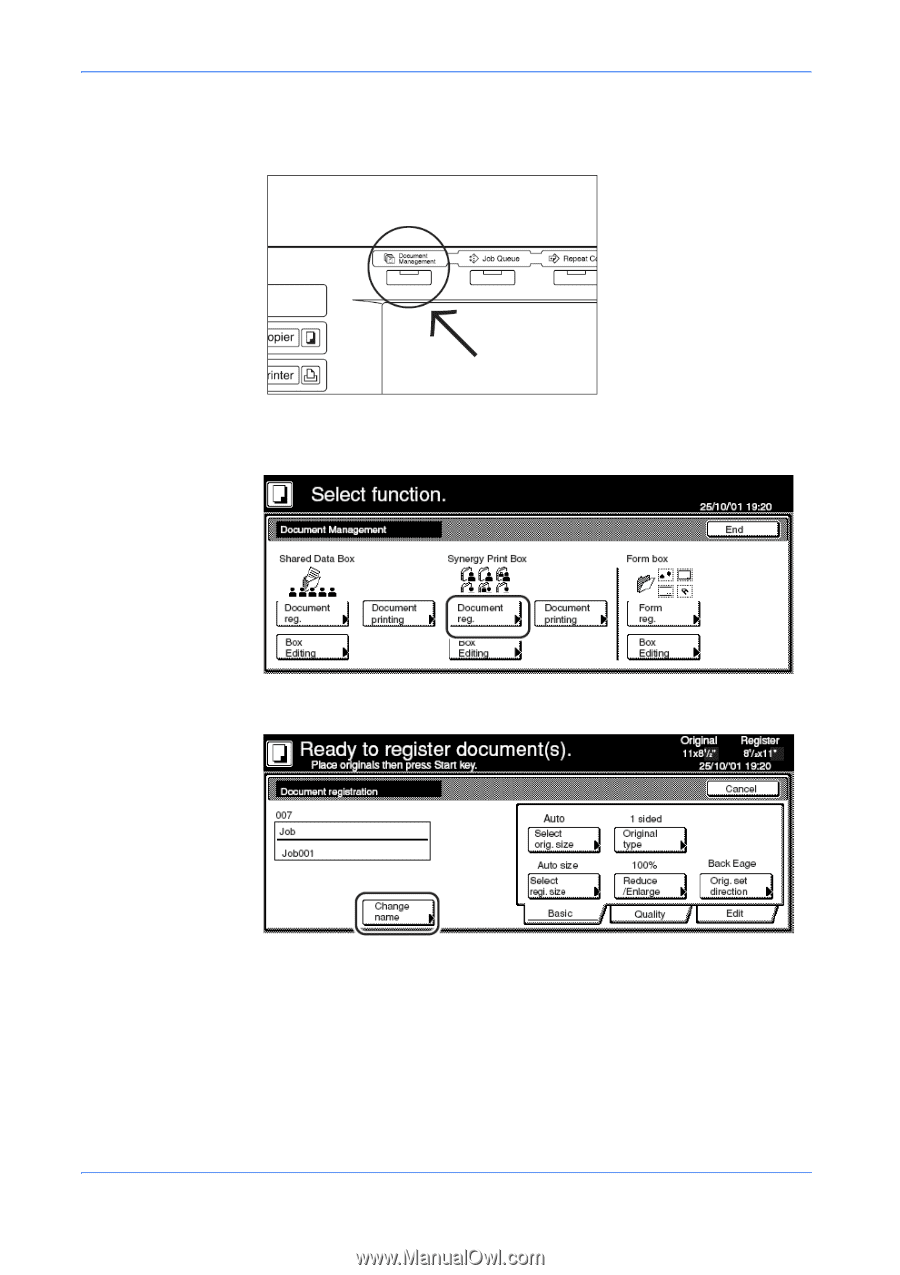
4
(Optional) To give a custom name to the document, touch
Change name
, and then
enter the name on the typepad that appears. Click
End
to confirm the new name and
return to the Document reg menu.
4
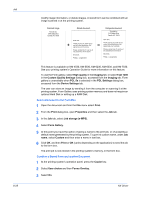
5
Place the original document on the document feeder or on the glass.
5
6
Hit the
Start
key.
6
The document is now stored in the print box. Documents stored by this method are
treated as single-sided documents.