Kyocera KM-3035 Kyocera Extended Driver 4.0 User Guide Rev-2.1 - Page 89
Properties, Device, Settings, Hard Disk, Hard Disk Settings, Mailbox name, Defined Names
 |
View all Kyocera KM-3035 manuals
Add to My Manuals
Save this manual to your list of manuals |
Page 89 highlights
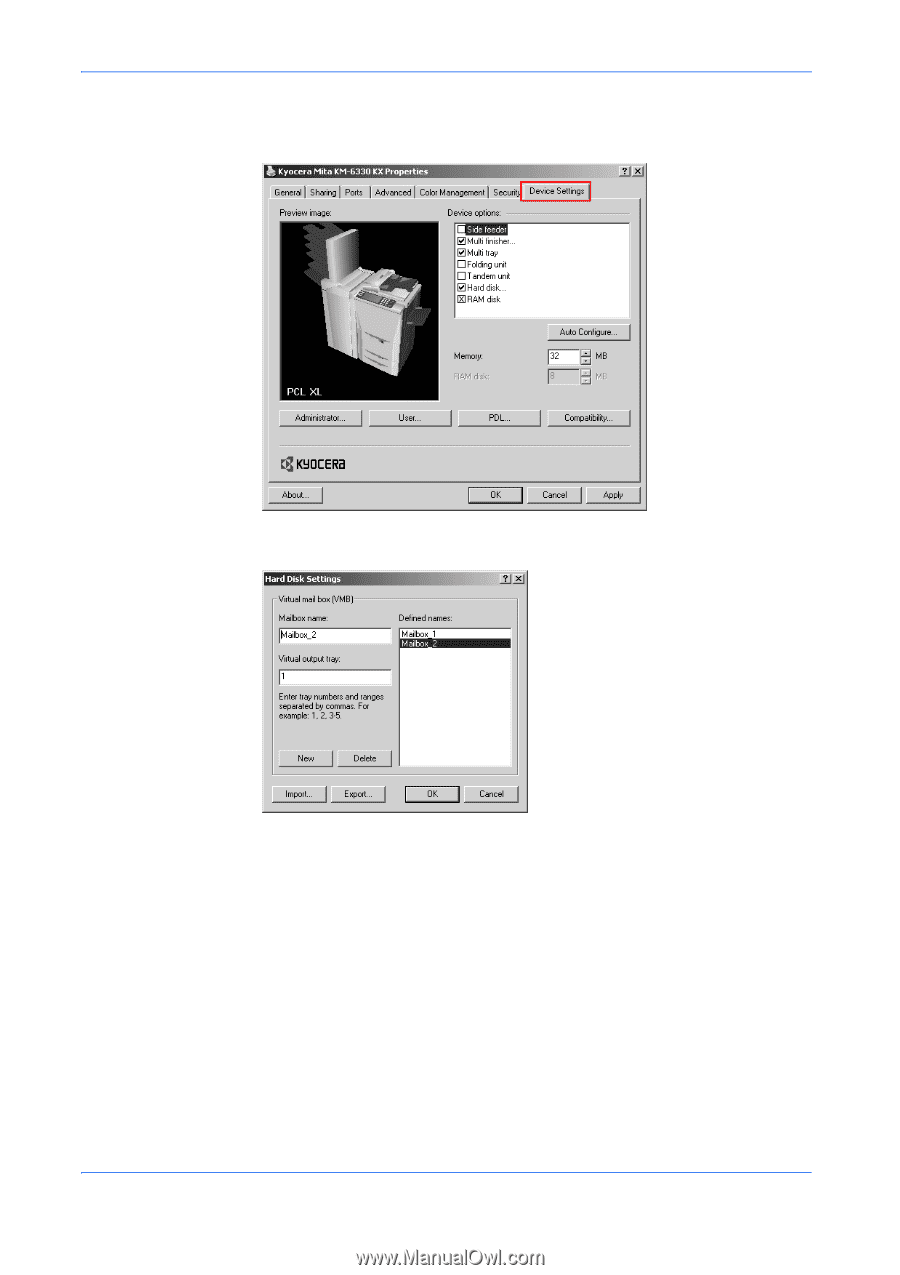
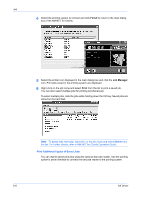
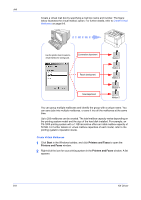
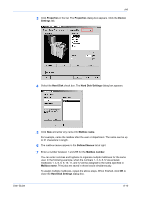
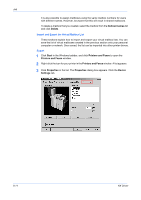
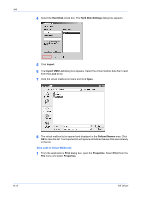
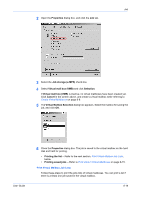
Job 3 Click Properties in the list. The Properties dialog box appears. Click the Device Settings tab. 3 4 Select the Hard Disk check box. The Hard Disk Settings dialog box appears. 4 User Guide 5 Click New and enter any name into Mailbox name. 5 For example, name the mailbox after the user or department. The name can be up to 31 characters in length. 6 The mailbox names appear in the Defined Names list at right. 6 7 Enter a number between 1 and 255 for the Mailbox number. 7 You can enter commas and hyphens to organize multiple mailboxes for the same user. In the following example, when the numbers 1, 3, 6, 8-12 are entered, mailboxes 1, 3, 6, 8, 9, 10, 11, and 12 will be assigned to the name specified in Mailbox name. Print jobs are saved in those boxes simultaneously. To assign multiple mailboxes, repeat the above steps. When finished, click OK to close the Hard Disk Settings dialog box. 8-10
-
 1
1 -
2
-
3
-
4
-
5
-
6
-
7
-
8
-
9
-
10
-
11
-
12
-
13
-
14
-
15
-
16
-
17
-
18
-
19
-
20
-
21
-
22
-
23
-
24
-
25
-
26
-
27
-
28
-
29
-
30
-
31
-
32
-
33
-
34
-
35
-
36
-
37
-
38
-
39
-
40
-
41
-
42
-
43
-
44
-
45
-
46
-
47
-
48
-
49
-
50
-
51
-
52
-
53
-
54
-
55
-
56
-
57
-
58
-
59
-
60
-
61
-
62
-
63
-
64
-
65
-
66
-
67
-
68
-
69
-
70
-
71
-
72
-
73
-
74
-
75
-
76
-
77
-
78
-
79
-
80
-
81
-
82
-
83
-
 84
84 -
 85
85 -
 86
86 -
 87
87 -
 88
88 -
 89
89 -
 90
90 -
 91
91 -
 92
92 -
 93
93 -
 94
94 -
95
-
96
-
97
-
98
-
99
-
100
-
101
-
102
-
103
-
104
-
105
-
106
-
107
-
108
-
109
-
110
-
111
-
112
-
113
-
114
-
115
-
116
-
117
-
118
-
119
-
120
-
121
-
122
-
123
-
124
-
125
-
126
-
127
 |
 |