Kyocera KM-3035 Kyocera Extended Driver 4.0 User Guide Rev-2.1 - Page 112
Additional Text Options, Count, Spacing, User Settings, Device Settings, Position, Angle
 |
View all Kyocera KM-3035 manuals
Add to My Manuals
Save this manual to your list of manuals |
Page 112 highlights
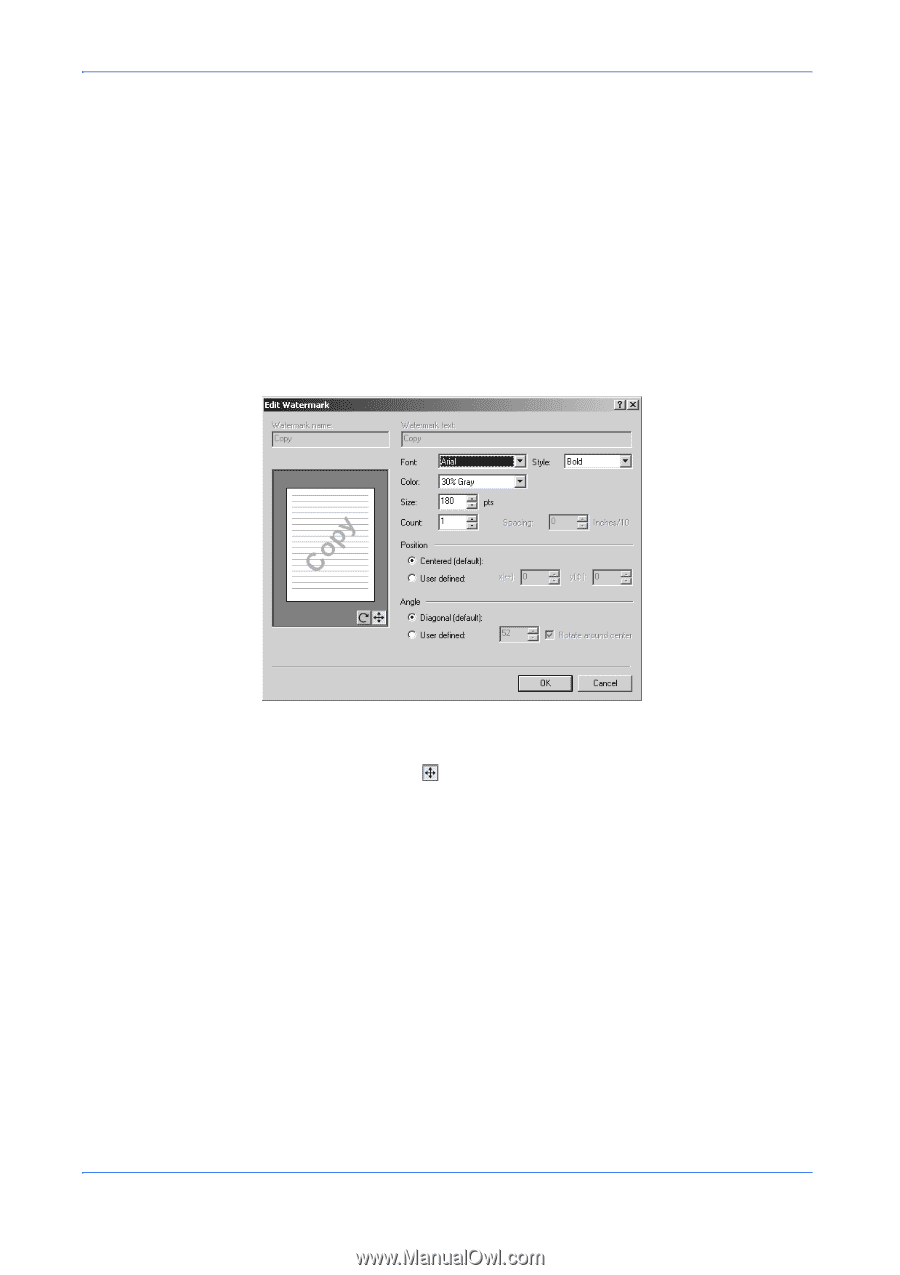
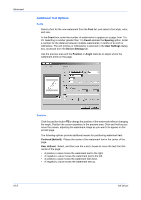
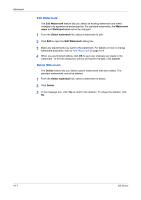
Advanced Additional Text Options Fonts Select a font for the new watermark from the Font list, and select a font style, color, and size. In the Count box, enter the number of watermarks to appear on a page, from 1 to 20. Selecting a number greater than 1 in Count enables the Spacing option. Enter a number for the distance between multiple watermarks, in tenths of an inch or millimeters. The unit (inches or millimeters) is selected in the User Settings dialog box, accessed from the Device Settings tab. Use the preview area and the Position or Angle features to adjust where the watermark prints on the page. Position Click the position button to change the position of the watermark without changing the angle. Position the cursor anywhere in the preview area. Click and hold as you move the mouse, adjusting the watermark image as you want it to appear on the printed page. The following options provide additional means for positioning watermark text: Centered [default]: Places the center of the watermark text in the center of the page. User defined: Select, and then use the x and y boxes to move the text from the center of the page: • A positive x value moves the watermark text to the right. • A negative x value moves the watermark text to the left. • A positive y value moves the watermark text down. • A negative y value moves the watermark text up. 10-5 KX Driver
-
 1
1 -
2
-
3
-
4
-
5
-
6
-
7
-
8
-
9
-
10
-
11
-
12
-
13
-
14
-
15
-
16
-
17
-
18
-
19
-
20
-
21
-
22
-
23
-
24
-
25
-
26
-
27
-
28
-
29
-
30
-
31
-
32
-
33
-
34
-
35
-
36
-
37
-
38
-
39
-
40
-
41
-
42
-
43
-
44
-
45
-
46
-
47
-
48
-
49
-
50
-
51
-
52
-
53
-
54
-
55
-
56
-
57
-
58
-
59
-
60
-
61
-
62
-
63
-
64
-
65
-
66
-
67
-
68
-
69
-
70
-
71
-
72
-
73
-
74
-
75
-
76
-
77
-
78
-
79
-
80
-
81
-
82
-
83
-
84
-
85
-
86
-
87
-
88
-
89
-
90
-
91
-
92
-
93
-
94
-
95
-
96
-
97
-
98
-
99
-
100
-
101
-
102
-
103
-
104
-
105
-
106
-
 107
107 -
 108
108 -
 109
109 -
 110
110 -
 111
111 -
 112
112 -
 113
113 -
 114
114 -
 115
115 -
 116
116 -
 117
117 -
118
-
119
-
120
-
121
-
122
-
123
-
124
-
125
-
126
-
127
 |
 |