Kyocera KM-3035 Kyocera Extended Driver 4.0 User Guide Rev-2.1 - Page 82
Print and Save Temporary and Permanent Jobs, Use KM-NET for Clients to Print Saved Jobs Again, Print
 |
View all Kyocera KM-3035 manuals
Add to My Manuals
Save this manual to your list of manuals |
Page 82 highlights
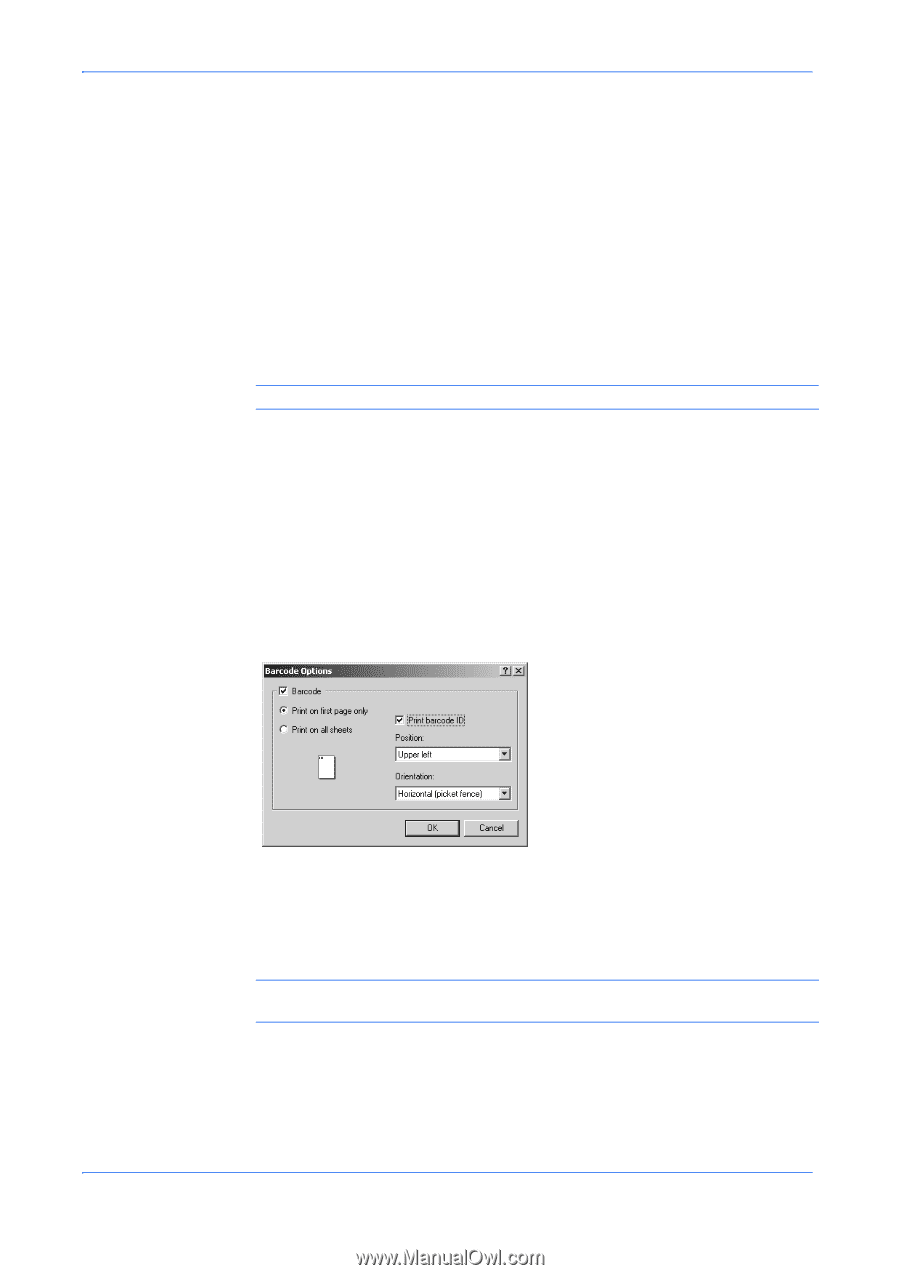
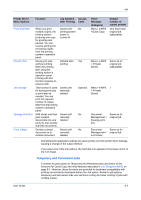
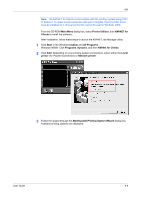
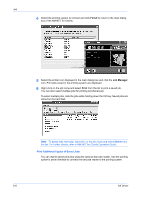
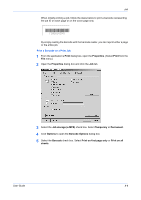
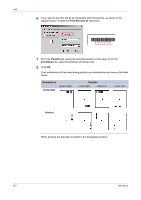
Job The features are listed below: • Jobs are managed internally with job IDs and printed after saving by an application (KM-NETJob Manager). • Barcode print output is supported and facilitates future printing with an optional barcode reader. • Both types of jobs are saved on the hard disk, up to the user-defined capacity. However, temporary jobs are automatically deleted if the defined capacity is reached. Permanent jobs remain saved until removed by the user. Print and Save Temporary and Permanent Jobs Note: Check that your printing system has an optional hard disk installed. 1 From the application's Print dialog box, open the Properties. (Select Print from the File menu). 1 2 Open the Properties dialog box, and click the Job tab. 2 3 Select the Job Storage (e-MPS) check box. 3 4 Select Temporary or Permanent. 4 5 When printing a job with a job ID barcode, click Options to open the Barcode Options dialog box and make the appropriate settings. 5 For further details, refer to Print a Barcode on a Print Job on page 8-6. 6 Click OK on Barcode Options and then in the Job tab to return to the Print dialog box. While printing, the job will be simultaneously saved on the hard disk as either a temporary or permanent job. 6 Note: To reprint temporary or permanent jobs, the dedicated KM-NET for Clients Job Manager utility is required. Use KM-NET for Clients to Print Saved Jobs Again To print out jobs, the KM-NET for Clients utility must first be installed on your computer. The utility is located on the supplied Kyocera Software Library CD-ROM. 8-3 KX Driver
-
 1
1 -
2
-
3
-
4
-
5
-
6
-
7
-
8
-
9
-
10
-
11
-
12
-
13
-
14
-
15
-
16
-
17
-
18
-
19
-
20
-
21
-
22
-
23
-
24
-
25
-
26
-
27
-
28
-
29
-
30
-
31
-
32
-
33
-
34
-
35
-
36
-
37
-
38
-
39
-
40
-
41
-
42
-
43
-
44
-
45
-
46
-
47
-
48
-
49
-
50
-
51
-
52
-
53
-
54
-
55
-
56
-
57
-
58
-
59
-
60
-
61
-
62
-
63
-
64
-
65
-
66
-
67
-
68
-
69
-
70
-
71
-
72
-
73
-
74
-
75
-
76
-
 77
77 -
 78
78 -
 79
79 -
 80
80 -
 81
81 -
 82
82 -
 83
83 -
 84
84 -
 85
85 -
 86
86 -
 87
87 -
88
-
89
-
90
-
91
-
92
-
93
-
94
-
95
-
96
-
97
-
98
-
99
-
100
-
101
-
102
-
103
-
104
-
105
-
106
-
107
-
108
-
109
-
110
-
111
-
112
-
113
-
114
-
115
-
116
-
117
-
118
-
119
-
120
-
121
-
122
-
123
-
124
-
125
-
126
-
127
 |
 |