Samsung SM-G900AZ User Manual Crt S5 Sm-g900az Kit Kat English User Manual Ver - Page 162
Air view, User and Backup, Accounts, Adding an Account, Synchronizing Accounts
 |
View all Samsung SM-G900AZ manuals
Add to My Manuals
Save this manual to your list of manuals |
Page 162 highlights
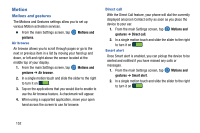
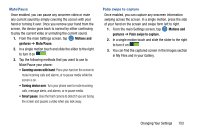
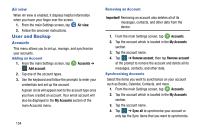
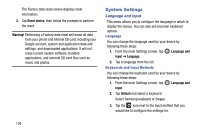
Air view When Air view is enabled, it displays helpful information when you hover your finger over the screen. 1. From the main Settings screen, tap Air view. 2. Follow the onscreen instructions. User and Backup Accounts This menu allows you to set up, manage, and synchronize your accounts. Adding an Account 1. From the main Settings screen, tap Accounts ➔ Add account. 2. Tap one of the account types. 3. Use the keyboard and follow the prompts to enter your credentials and set up the account. A green circle will appear next to the account type once you have created an account. Your email account will also be displayed in the My Accounts section of the main Accounts menu. 154 Removing an Account Important! Removing an account also deletes all of its messages, contacts, and other data from the device. 1. From the main Settings screen, tap Accounts. 2. Tap the account which is located in the My Accounts section. 3. Tap the account name. 4. Tap ➔ Remove account, then tap Remove account at the prompt to remove the account and delete all its messages, contacts, and other data. Synchronizing Accounts Select the items you want to synchronize on your account such as Books, Calendar, Contacts, and more. 1. From the main Settings screen, tap Accounts. 2. Tap the account which is located in the My Accounts section. 3. Tap the account name. 4. Tap ➔ Sync all to synchronize your account or only tap the Sync items that you want to synchronize.
-
 1
1 -
2
-
3
-
4
-
5
-
6
-
7
-
8
-
9
-
10
-
11
-
12
-
13
-
14
-
15
-
16
-
17
-
18
-
19
-
20
-
21
-
22
-
23
-
24
-
25
-
26
-
27
-
28
-
29
-
30
-
31
-
32
-
33
-
34
-
35
-
36
-
37
-
38
-
39
-
40
-
41
-
42
-
43
-
44
-
45
-
46
-
47
-
48
-
49
-
50
-
51
-
52
-
53
-
54
-
55
-
56
-
57
-
58
-
59
-
60
-
61
-
62
-
63
-
64
-
65
-
66
-
67
-
68
-
69
-
70
-
71
-
72
-
73
-
74
-
75
-
76
-
77
-
78
-
79
-
80
-
81
-
82
-
83
-
84
-
85
-
86
-
87
-
88
-
89
-
90
-
91
-
92
-
93
-
94
-
95
-
96
-
97
-
98
-
99
-
100
-
101
-
102
-
103
-
104
-
105
-
106
-
107
-
108
-
109
-
110
-
111
-
112
-
113
-
114
-
115
-
116
-
117
-
118
-
119
-
120
-
121
-
122
-
123
-
124
-
125
-
126
-
127
-
128
-
129
-
130
-
131
-
132
-
133
-
134
-
135
-
136
-
137
-
138
-
139
-
140
-
141
-
142
-
143
-
144
-
145
-
146
-
147
-
148
-
149
-
150
-
151
-
152
-
153
-
154
-
155
-
156
-
 157
157 -
 158
158 -
 159
159 -
 160
160 -
 161
161 -
 162
162 -
 163
163 -
 164
164 -
 165
165 -
 166
166 -
 167
167 -
168
-
169
-
170
-
171
-
172
-
173
-
174
-
175
-
176
-
177
-
178
-
179
-
180
-
181
-
182
-
183
-
184
-
185
-
186
-
187
-
188
-
189
-
190
-
191
-
192
-
193
-
194
-
195
-
196
-
197
-
198
-
199
-
200
 |
 |