Acer Altos easyStore M2 User Manual - Page 173
Expanding the FileSafe Server backup space, Deleting backup spaces
 |
View all Acer Altos easyStore M2 manuals
Add to My Manuals
Save this manual to your list of manuals |
Page 173 highlights
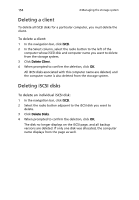
151 Expanding the FileSafe Server backup space To expand the FileSafe Server backup space: 1 In the navigation bar, click Backups. 2 In the left pane, click FileSafe Server Space. The FileSafe Server Space page displays the current amount of space allocated for the FileSafe server and the amount of space used for backup. 3 Specify the amount of disk space to allocate, then click Apply. Enter a whole number up to the maximum available space. It is recommended that you limit expansion to 20 GB at a time due to the extensive processing time required for large expansions. To allocate additional space, select the Specify disk space radio button and specify 1 GB or higher. You can specify only whole numbers. 4 Click OK through the confirmation message. Deleting backup spaces 1 In the navigation bar, click Backups. 2 In the left pane, select Filesafe User Cleanup. 3 In Users list, select the user that you want to delete, then click Remove. 4 Click OK to confirm the deletion. The user name no longer displays in the Filesafe User cleanup page. All backup data is lost but the user account on the Users page is still present. Notes: • In Local authentication mode, when a CIFS user account is removed, the user data is automatically cleaned up at the same time. Therefore, you will no longer see the user account displayed in FileSafe User Cleanup page. • In Active Directory authentication mode, when you removed the AD user, the user data won't be cleaned up. So if you have made sure that the account won't be used, for the next step, please also remove the data from FileSafe User Cleanup page manually.
-
 1
1 -
2
-
3
-
4
-
5
-
6
-
7
-
8
-
9
-
10
-
11
-
12
-
13
-
14
-
15
-
16
-
17
-
18
-
19
-
20
-
21
-
22
-
23
-
24
-
25
-
26
-
27
-
28
-
29
-
30
-
31
-
32
-
33
-
34
-
35
-
36
-
37
-
38
-
39
-
40
-
41
-
42
-
43
-
44
-
45
-
46
-
47
-
48
-
49
-
50
-
51
-
52
-
53
-
54
-
55
-
56
-
57
-
58
-
59
-
60
-
61
-
62
-
63
-
64
-
65
-
66
-
67
-
68
-
69
-
70
-
71
-
72
-
73
-
74
-
75
-
76
-
77
-
78
-
79
-
80
-
81
-
82
-
83
-
84
-
85
-
86
-
87
-
88
-
89
-
90
-
91
-
92
-
93
-
94
-
95
-
96
-
97
-
98
-
99
-
100
-
101
-
102
-
103
-
104
-
105
-
106
-
107
-
108
-
109
-
110
-
111
-
112
-
113
-
114
-
115
-
116
-
117
-
118
-
119
-
120
-
121
-
122
-
123
-
124
-
125
-
126
-
127
-
128
-
129
-
130
-
131
-
132
-
133
-
134
-
135
-
136
-
137
-
138
-
139
-
140
-
141
-
142
-
143
-
144
-
145
-
146
-
147
-
148
-
149
-
150
-
151
-
152
-
153
-
154
-
155
-
156
-
157
-
158
-
159
-
160
-
161
-
162
-
163
-
164
-
165
-
166
-
167
-
 168
168 -
 169
169 -
 170
170 -
 171
171 -
 172
172 -
 173
173 -
 174
174 -
 175
175 -
 176
176 -
 177
177 -
 178
178 -
179
-
180
-
181
-
182
-
183
-
184
-
185
-
186
-
187
-
188
-
189
-
190
-
191
-
192
-
193
-
194
-
195
-
196
-
197
-
198
-
199
-
200
-
201
-
202
-
203
-
204
-
205
-
206
-
207
-
208
-
209
-
210
-
211
-
212
-
213
-
214
-
215
-
216
-
217
-
218
-
219
-
220
-
221
-
222
-
223
-
224
-
225
-
226
-
227
-
228
-
229
-
230
-
231
-
232
-
233
-
234
-
235
-
236
-
237
-
238
-
239
-
240
-
241
-
242
-
243
-
244
-
245
-
246
-
247
-
248
-
249
-
250
-
251
-
252
-
253
-
254
-
255
-
256
-
257
-
258
-
259
-
260
-
261
-
262
-
263
-
264
-
265
-
266
-
267
-
268
-
269
-
270
-
271
-
272
-
273
-
274
-
275
-
276
-
277
-
278
-
279
-
280
-
281
-
282
-
283
-
284
-
285
-
286
-
287
-
288
-
289
-
290
-
291
-
292
-
293
-
294
-
295
-
296
-
297
-
298
 |
 |
