Acer Altos easyStore M2 User Manual - Page 242
Expanding an iSCSI virtual disk
 |
View all Acer Altos easyStore M2 manuals
Add to My Manuals
Save this manual to your list of manuals |
Page 242 highlights
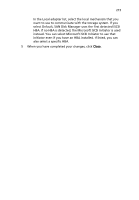
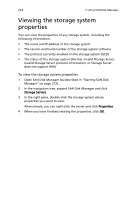
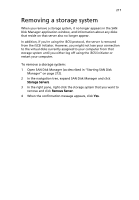
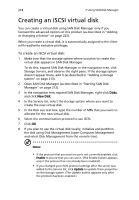
220 7 Using SAN Disk Manager Expanding an iSCSI virtual disk You can expand a virtual disk using SAN Disk Manager only if you licensed the advanced options of this product (as described in "Adding or changing a license" on page 225). Most virtual disks can be expanded as more storage space is needed. Only virtual disks that were imported on the storage system cannot be expanded. To expand an iSCSI virtual disk: 1 Open SAN Disk Manager (as described in "Starting SAN Disk Manager" on page 212). 2 In the navigation tree, expand SAN Disk Manager and click Disks. 3 In the right pane, right-click the virtual disk that you want to expand and click Expand Disk. Note: If the disk that you want to expand does not appear in the right pane, click Storage Servers in the navigation tree and make sure that the storage system appears in the right pane. If it doesn't, add it (as described in "Adding a storage system" on page 213) and try again. 4 In the Expand Size (MB) text box, type the number of megabytes to add to this disk. 5 Click OK. The number in the Capacity column reflects the new disk size. If you did not previously initialize and partition the virtual disk, the expanded disk space is added to the original unallocated space, and you can initialize and partition the entire disk using Disk Management. If you previously initialized and partitioned the virtual disk, the expanded disk space is treated as additional unallocated space, and you can partition it using Disk Management. If you would like to add the expanded disk space to your existing volume, you must use a third-party application such as DiskPart, Norton PartitionMagic™, or VERITAS™ Volume Manager™.
-
 1
1 -
2
-
3
-
4
-
5
-
6
-
7
-
8
-
9
-
10
-
11
-
12
-
13
-
14
-
15
-
16
-
17
-
18
-
19
-
20
-
21
-
22
-
23
-
24
-
25
-
26
-
27
-
28
-
29
-
30
-
31
-
32
-
33
-
34
-
35
-
36
-
37
-
38
-
39
-
40
-
41
-
42
-
43
-
44
-
45
-
46
-
47
-
48
-
49
-
50
-
51
-
52
-
53
-
54
-
55
-
56
-
57
-
58
-
59
-
60
-
61
-
62
-
63
-
64
-
65
-
66
-
67
-
68
-
69
-
70
-
71
-
72
-
73
-
74
-
75
-
76
-
77
-
78
-
79
-
80
-
81
-
82
-
83
-
84
-
85
-
86
-
87
-
88
-
89
-
90
-
91
-
92
-
93
-
94
-
95
-
96
-
97
-
98
-
99
-
100
-
101
-
102
-
103
-
104
-
105
-
106
-
107
-
108
-
109
-
110
-
111
-
112
-
113
-
114
-
115
-
116
-
117
-
118
-
119
-
120
-
121
-
122
-
123
-
124
-
125
-
126
-
127
-
128
-
129
-
130
-
131
-
132
-
133
-
134
-
135
-
136
-
137
-
138
-
139
-
140
-
141
-
142
-
143
-
144
-
145
-
146
-
147
-
148
-
149
-
150
-
151
-
152
-
153
-
154
-
155
-
156
-
157
-
158
-
159
-
160
-
161
-
162
-
163
-
164
-
165
-
166
-
167
-
168
-
169
-
170
-
171
-
172
-
173
-
174
-
175
-
176
-
177
-
178
-
179
-
180
-
181
-
182
-
183
-
184
-
185
-
186
-
187
-
188
-
189
-
190
-
191
-
192
-
193
-
194
-
195
-
196
-
197
-
198
-
199
-
200
-
201
-
202
-
203
-
204
-
205
-
206
-
207
-
208
-
209
-
210
-
211
-
212
-
213
-
214
-
215
-
216
-
217
-
218
-
219
-
220
-
221
-
222
-
223
-
224
-
225
-
226
-
227
-
228
-
229
-
230
-
231
-
232
-
233
-
234
-
235
-
236
-
 237
237 -
 238
238 -
 239
239 -
 240
240 -
 241
241 -
 242
242 -
 243
243 -
 244
244 -
 245
245 -
 246
246 -
 247
247 -
248
-
249
-
250
-
251
-
252
-
253
-
254
-
255
-
256
-
257
-
258
-
259
-
260
-
261
-
262
-
263
-
264
-
265
-
266
-
267
-
268
-
269
-
270
-
271
-
272
-
273
-
274
-
275
-
276
-
277
-
278
-
279
-
280
-
281
-
282
-
283
-
284
-
285
-
286
-
287
-
288
-
289
-
290
-
291
-
292
-
293
-
294
-
295
-
296
-
297
-
298
 |
 |
