Canon MultiPASS C635 User Manual - Page 126
Automatic Batch Scanning, To save Output Device settings
 |
View all Canon MultiPASS C635 manuals
Add to My Manuals
Save this manual to your list of manuals |
Page 126 highlights
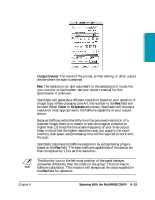
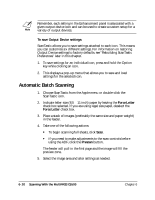
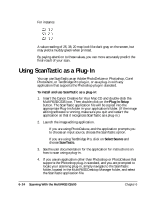
N Remember, each setting in the Enhancement panel is associated with a given output device icon and can be used to create a custom setup for a variety of output devices. To save Output Device settings: ScanTastic allows you to save settings attached to each icon. This means you can customize six different settings. For information on restoring Output Device settings to factory defaults, see "Rebuilding ScanTastic Preferences" later in this chapter. 1. To save settings for an individual icon, press and hold the Option key while clicking an icon. 2. This displays a pop-up menu that allows you to save and load settings for the selected icon. Automatic Batch Scanning 1. Choose ScanTastic from the Apple menu or double-click the ScanTastic icon. 2. Indicate letter size (8.5 × 11 inch) paper by leaving the Force Letter check box selected. If you are using legal size paper, deselect the Force Letter check box. 3. Place a stack of images (preferably the same size and paper weight) in the feeder. 4. Take one of the following actions: • To begin scanning full sheets, click Scan. • If you need to make adjustments to the scan controls before using the ADF, click the Prescan button. The feeder will pull in the first page and the image will fill the preview zone. 5. Select the image area and alter settings as needed. 6-20 Scanning With the MultiPASS C5500 Chapter 6
-
 1
1 -
2
-
3
-
4
-
5
-
6
-
7
-
8
-
9
-
10
-
11
-
12
-
13
-
14
-
15
-
16
-
17
-
18
-
19
-
20
-
21
-
22
-
23
-
24
-
25
-
26
-
27
-
28
-
29
-
30
-
31
-
32
-
33
-
34
-
35
-
36
-
37
-
38
-
39
-
40
-
41
-
42
-
43
-
44
-
45
-
46
-
47
-
48
-
49
-
50
-
51
-
52
-
53
-
54
-
55
-
56
-
57
-
58
-
59
-
60
-
61
-
62
-
63
-
64
-
65
-
66
-
67
-
68
-
69
-
70
-
71
-
72
-
73
-
74
-
75
-
76
-
77
-
78
-
79
-
80
-
81
-
82
-
83
-
84
-
85
-
86
-
87
-
88
-
89
-
90
-
91
-
92
-
93
-
94
-
95
-
96
-
97
-
98
-
99
-
100
-
101
-
102
-
103
-
104
-
105
-
106
-
107
-
108
-
109
-
110
-
111
-
112
-
113
-
114
-
115
-
116
-
117
-
118
-
119
-
120
-
 121
121 -
 122
122 -
 123
123 -
 124
124 -
 125
125 -
 126
126 -
 127
127 -
 128
128 -
 129
129 -
 130
130 -
 131
131 -
132
-
133
-
134
-
135
-
136
-
137
-
138
-
139
-
140
-
141
-
142
-
143
-
144
-
145
-
146
-
147
-
148
-
149
-
150
-
151
-
152
-
153
-
154
-
155
-
156
-
157
-
158
-
159
-
160
-
161
-
162
-
163
-
164
-
165
-
166
-
167
-
168
-
169
-
170
-
171
-
172
-
173
-
174
-
175
-
176
-
177
-
178
-
179
-
180
-
181
-
182
-
183
-
184
-
185
-
186
-
187
-
188
-
189
-
190
-
191
-
192
-
193
-
194
-
195
-
196
-
197
-
198
-
199
-
200
-
201
-
202
-
203
-
204
-
205
-
206
-
207
-
208
-
209
-
210
-
211
-
212
-
213
-
214
-
215
-
216
 |
 |
