Canon MultiPASS C635 User Manual - Page 127
Add Paper, Cancel, Scan More, Print
 |
View all Canon MultiPASS C635 manuals
Add to My Manuals
Save this manual to your list of manuals |
Page 127 highlights
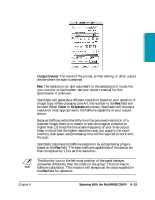
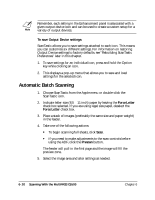
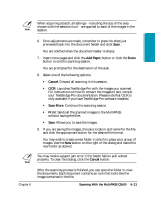
N When acquiring a batch, all settings-including the size of the area chosen with the selection tool-are applied to each of the images in the session. Scanning 6. Once adjustments are made, remember to place the sheet just previewed back into the document feeder and click Scan. You are notified when the document feeder is empty. 7. Insert more pages and click the Add Paper button or click the Done button to end the scanning session. You are prompted for the destination of the scan. 8. Select one of the following options: • Cancel: Discard all scanning in this session. • OCR: Launches TextBridge Pro with the images you scanned. For instructions on how to convert the images to text, consult your TextBridge Pro documentation. Please note that OCR is only available if you have TextBridge Pro software installed. • Scan More: Continue the scanning session. • Print: Sends all the scanned images to the MultiPASS without saving the files. • Save: Allows you to save the images. 9. If you are saving the images, choose a location and name for the file and click the appropriate button for the desired file format. You may wish to create a new folder in which to place your group of images. Use the New button on the right of the dialog and name the new folder as desired. N You may receive a paper jam error if the feeder fails to pull a sheet properly. To clear this dialog, click the Cancel button. Chapter 6 After the scanning process is finished, you can open the folder to view the documents. Each document contains an icon that looks like the image contained in the file. Scanning With the MultiPASS C5500 6-21
-
 1
1 -
2
-
3
-
4
-
5
-
6
-
7
-
8
-
9
-
10
-
11
-
12
-
13
-
14
-
15
-
16
-
17
-
18
-
19
-
20
-
21
-
22
-
23
-
24
-
25
-
26
-
27
-
28
-
29
-
30
-
31
-
32
-
33
-
34
-
35
-
36
-
37
-
38
-
39
-
40
-
41
-
42
-
43
-
44
-
45
-
46
-
47
-
48
-
49
-
50
-
51
-
52
-
53
-
54
-
55
-
56
-
57
-
58
-
59
-
60
-
61
-
62
-
63
-
64
-
65
-
66
-
67
-
68
-
69
-
70
-
71
-
72
-
73
-
74
-
75
-
76
-
77
-
78
-
79
-
80
-
81
-
82
-
83
-
84
-
85
-
86
-
87
-
88
-
89
-
90
-
91
-
92
-
93
-
94
-
95
-
96
-
97
-
98
-
99
-
100
-
101
-
102
-
103
-
104
-
105
-
106
-
107
-
108
-
109
-
110
-
111
-
112
-
113
-
114
-
115
-
116
-
117
-
118
-
119
-
120
-
121
-
 122
122 -
 123
123 -
 124
124 -
 125
125 -
 126
126 -
 127
127 -
 128
128 -
 129
129 -
 130
130 -
 131
131 -
 132
132 -
133
-
134
-
135
-
136
-
137
-
138
-
139
-
140
-
141
-
142
-
143
-
144
-
145
-
146
-
147
-
148
-
149
-
150
-
151
-
152
-
153
-
154
-
155
-
156
-
157
-
158
-
159
-
160
-
161
-
162
-
163
-
164
-
165
-
166
-
167
-
168
-
169
-
170
-
171
-
172
-
173
-
174
-
175
-
176
-
177
-
178
-
179
-
180
-
181
-
182
-
183
-
184
-
185
-
186
-
187
-
188
-
189
-
190
-
191
-
192
-
193
-
194
-
195
-
196
-
197
-
198
-
199
-
200
-
201
-
202
-
203
-
204
-
205
-
206
-
207
-
208
-
209
-
210
-
211
-
212
-
213
-
214
-
215
-
216
 |
 |