Canon MultiPASS C635 User Manual - Page 161
Memory Considerations, Step 5. Reset Hardware and Check Printer Connections
 |
View all Canon MultiPASS C635 manuals
Add to My Manuals
Save this manual to your list of manuals |
Page 161 highlights
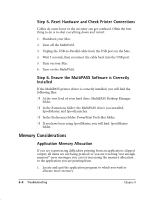
Step 5. Reset Hardware and Check Printer Connections Cables do come loose or the circuitry can get confused. Often the best thing to do is to shut everything down and restart. 1. Shutdown your Mac. 2. Turn off the MultiPASS. 3. Unplug the USB-to-Parallel cable from the USB port on the Mac. 4. Wait 5 seconds, then reconnect the cable back into the USB port. 5. Turn on your Mac. 6. Turn on the MultiPASS. Step 6. Ensure the MultiPASS Software is Correctly Installed If the MultiPASS printer driver is correctly installed, you will find the following files: ❍ At the root level of your hard drive: MultiPASS Desktop Manager folder. ❍ In the Extensions folder: the MultiPASS driver you installed, SpoolMaster, and SpoolLauncher. ❍ In the Preferences folder: PowerPrint Prefs files folder. ❍ If you have been using SpoolMaster, you will find: SpoolMaster folder. Memory Considerations Application Memory Allocation If you are experiencing difficulties printing from an application (clipped output, all items are not being printed) or you are receiving "not enough memory" error messages, you can try increasing the memory allocation to the application you are printing from. 1. Locate and quit the application program to which you wish to allocate more memory. 8-8 Troubleshooting Chapter 8
-
 1
1 -
2
-
3
-
4
-
5
-
6
-
7
-
8
-
9
-
10
-
11
-
12
-
13
-
14
-
15
-
16
-
17
-
18
-
19
-
20
-
21
-
22
-
23
-
24
-
25
-
26
-
27
-
28
-
29
-
30
-
31
-
32
-
33
-
34
-
35
-
36
-
37
-
38
-
39
-
40
-
41
-
42
-
43
-
44
-
45
-
46
-
47
-
48
-
49
-
50
-
51
-
52
-
53
-
54
-
55
-
56
-
57
-
58
-
59
-
60
-
61
-
62
-
63
-
64
-
65
-
66
-
67
-
68
-
69
-
70
-
71
-
72
-
73
-
74
-
75
-
76
-
77
-
78
-
79
-
80
-
81
-
82
-
83
-
84
-
85
-
86
-
87
-
88
-
89
-
90
-
91
-
92
-
93
-
94
-
95
-
96
-
97
-
98
-
99
-
100
-
101
-
102
-
103
-
104
-
105
-
106
-
107
-
108
-
109
-
110
-
111
-
112
-
113
-
114
-
115
-
116
-
117
-
118
-
119
-
120
-
121
-
122
-
123
-
124
-
125
-
126
-
127
-
128
-
129
-
130
-
131
-
132
-
133
-
134
-
135
-
136
-
137
-
138
-
139
-
140
-
141
-
142
-
143
-
144
-
145
-
146
-
147
-
148
-
149
-
150
-
151
-
152
-
153
-
154
-
155
-
 156
156 -
 157
157 -
 158
158 -
 159
159 -
 160
160 -
 161
161 -
 162
162 -
 163
163 -
 164
164 -
 165
165 -
 166
166 -
167
-
168
-
169
-
170
-
171
-
172
-
173
-
174
-
175
-
176
-
177
-
178
-
179
-
180
-
181
-
182
-
183
-
184
-
185
-
186
-
187
-
188
-
189
-
190
-
191
-
192
-
193
-
194
-
195
-
196
-
197
-
198
-
199
-
200
-
201
-
202
-
203
-
204
-
205
-
206
-
207
-
208
-
209
-
210
-
211
-
212
-
213
-
214
-
215
-
216
 |
 |