Canon XF705 Instruction Manual - Page 64
Light Metering Mode, elect [Light Metering]., elect the de, ired option and then pre
 |
View all Canon XF705 manuals
Add to My Manuals
Save this manual to your list of manuals |
Page 64 highlights
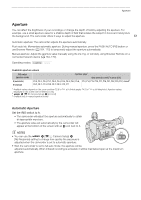
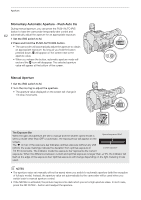
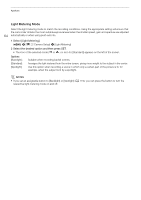
Aperture Light Metering Mode Select the light metering mode to match the recording conditions. Using the appropriate setting will ensure that the camcorder obtains the most suitable exposure level when the shutter speed, gain and aperture are adjusted 64 automatically or when using push auto iris. 1 Select [Light Metering]. > [v ! Camera Setup] > [Light Metering] 2 Select the desired option and then press SET. • The icon of the selected mode ( or , no icon for [Standard]) appears on the left of the screen. Options [Backlight]: [Standard]: [Spotlight]: Suitable when recording backlit scenes. Averages the light metered from the entire screen, giving more weight to the subject in the center. Use this option when recording a scene in which only a certain part of the picture is lit, for example, when the subject is lit by a spotlight. NOTES • If you set an assignable button to [Backlight] or [Spotlight] (A 119), you can press the button to turn the respective light metering mode on and off.
-
 1
1 -
2
-
3
-
4
-
5
-
6
-
7
-
8
-
9
-
10
-
11
-
12
-
13
-
14
-
15
-
16
-
17
-
18
-
19
-
20
-
21
-
22
-
23
-
24
-
25
-
26
-
27
-
28
-
29
-
30
-
31
-
32
-
33
-
34
-
35
-
36
-
37
-
38
-
39
-
40
-
41
-
42
-
43
-
44
-
45
-
46
-
47
-
48
-
49
-
50
-
51
-
52
-
53
-
54
-
55
-
56
-
57
-
58
-
 59
59 -
 60
60 -
 61
61 -
 62
62 -
 63
63 -
 64
64 -
 65
65 -
 66
66 -
 67
67 -
 68
68 -
 69
69 -
70
-
71
-
72
-
73
-
74
-
75
-
76
-
77
-
78
-
79
-
80
-
81
-
82
-
83
-
84
-
85
-
86
-
87
-
88
-
89
-
90
-
91
-
92
-
93
-
94
-
95
-
96
-
97
-
98
-
99
-
100
-
101
-
102
-
103
-
104
-
105
-
106
-
107
-
108
-
109
-
110
-
111
-
112
-
113
-
114
-
115
-
116
-
117
-
118
-
119
-
120
-
121
-
122
-
123
-
124
-
125
-
126
-
127
-
128
-
129
-
130
-
131
-
132
-
133
-
134
-
135
-
136
-
137
-
138
-
139
-
140
-
141
-
142
-
143
-
144
-
145
-
146
-
147
-
148
-
149
-
150
-
151
-
152
-
153
-
154
-
155
-
156
-
157
-
158
-
159
-
160
-
161
-
162
-
163
-
164
-
165
-
166
-
167
-
168
-
169
-
170
-
171
-
172
-
173
-
174
-
175
-
176
-
177
-
178
-
179
-
180
-
181
-
182
-
183
-
184
-
185
-
186
-
187
-
188
-
189
-
190
-
191
-
192
-
193
-
194
-
195
-
196
-
197
-
198
-
199
-
200
-
201
-
202
-
203
-
204
-
205
-
206
-
207
-
208
-
209
-
210
-
211
-
212
-
213
-
214
-
215
-
216
-
217
-
218
-
219
-
220
-
221
-
222
-
223
-
224
-
225
-
226
-
227
-
228
-
229
-
230
-
231
-
232
-
233
-
234
 |
 |
