Dell PowerEdge R905 Hardware Owner's Manual (PDF) - Page 107
Configuring the Boot Device, Removing a Drive Blank
 |
View all Dell PowerEdge R905 manuals
Add to My Manuals
Save this manual to your list of manuals |
Page 107 highlights
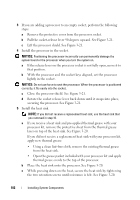
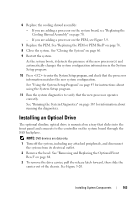
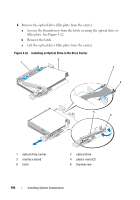
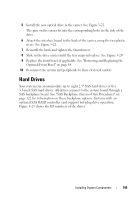
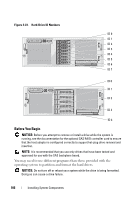
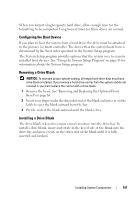
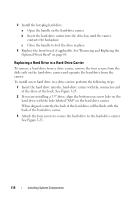
When you format a high-capacity hard drive, allow enough time for the formatting to be completed. Long format times for these drives are normal. Configuring the Boot Device If you plan to boot the system from a hard drive, the drive must be attached to the primary (or boot) controller. The device that the system boots from is determined by the boot order specified in the System Setup program. The System Setup program provides options that the system uses to scan for installed boot devices. See "Using the System Setup Program" on page 43 for information about the System Setup program. Removing a Drive Blank NOTICE: To maintain proper system cooling, all empty hard-drive bays must have drive blanks installed. If you remove a hard-drive carrier from the system and do not reinstall it, you must replace the carrier with a drive blank. 1 Remove the bezel. See "Removing and Replacing the Optional Front Bezel" on page 64. 2 Insert your finger under the shrouded end of the blank and press in on the latch to eject the blank outward from the bay. 3 Pry the ends of the blank outward until the blank is free. Installing a Drive Blank The drive blank is keyed to ensure correct insertion into the drive bay. To install a drive blank, insert and rotate in the keyed side of the blank into the drive bay and press evenly on the other end of the blank until it is fully inserted and latched. Installing System Components 107
-
 1
1 -
2
-
3
-
4
-
5
-
6
-
7
-
8
-
9
-
10
-
11
-
12
-
13
-
14
-
15
-
16
-
17
-
18
-
19
-
20
-
21
-
22
-
23
-
24
-
25
-
26
-
27
-
28
-
29
-
30
-
31
-
32
-
33
-
34
-
35
-
36
-
37
-
38
-
39
-
40
-
41
-
42
-
43
-
44
-
45
-
46
-
47
-
48
-
49
-
50
-
51
-
52
-
53
-
54
-
55
-
56
-
57
-
58
-
59
-
60
-
61
-
62
-
63
-
64
-
65
-
66
-
67
-
68
-
69
-
70
-
71
-
72
-
73
-
74
-
75
-
76
-
77
-
78
-
79
-
80
-
81
-
82
-
83
-
84
-
85
-
86
-
87
-
88
-
89
-
90
-
91
-
92
-
93
-
94
-
95
-
96
-
97
-
98
-
99
-
100
-
101
-
 102
102 -
 103
103 -
 104
104 -
 105
105 -
 106
106 -
 107
107 -
 108
108 -
 109
109 -
 110
110 -
 111
111 -
 112
112 -
113
-
114
-
115
-
116
-
117
-
118
-
119
-
120
-
121
-
122
-
123
-
124
-
125
-
126
-
127
-
128
-
129
-
130
-
131
-
132
-
133
-
134
-
135
-
136
-
137
-
138
-
139
-
140
-
141
-
142
-
143
-
144
-
145
-
146
-
147
-
148
-
149
-
150
-
151
-
152
-
153
-
154
-
155
-
156
-
157
-
158
-
159
-
160
-
161
-
162
-
163
-
164
-
165
-
166
-
167
-
168
-
169
-
170
-
171
-
172
-
173
-
174
-
175
-
176
-
177
-
178
-
179
-
180
-
181
-
182
-
183
-
184
-
185
-
186
-
187
-
188
-
189
-
190
-
191
-
192
-
193
-
194
-
195
-
196
-
197
-
198
 |
 |