Dell PowerEdge R905 Hardware Owner's Manual (PDF) - Page 66
Closing the System, of the cover are aligned with the chassis hooks. See
 |
View all Dell PowerEdge R905 manuals
Add to My Manuals
Save this manual to your list of manuals |
Page 66 highlights
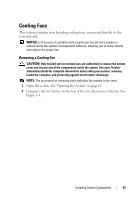
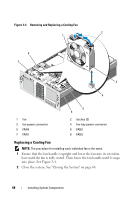
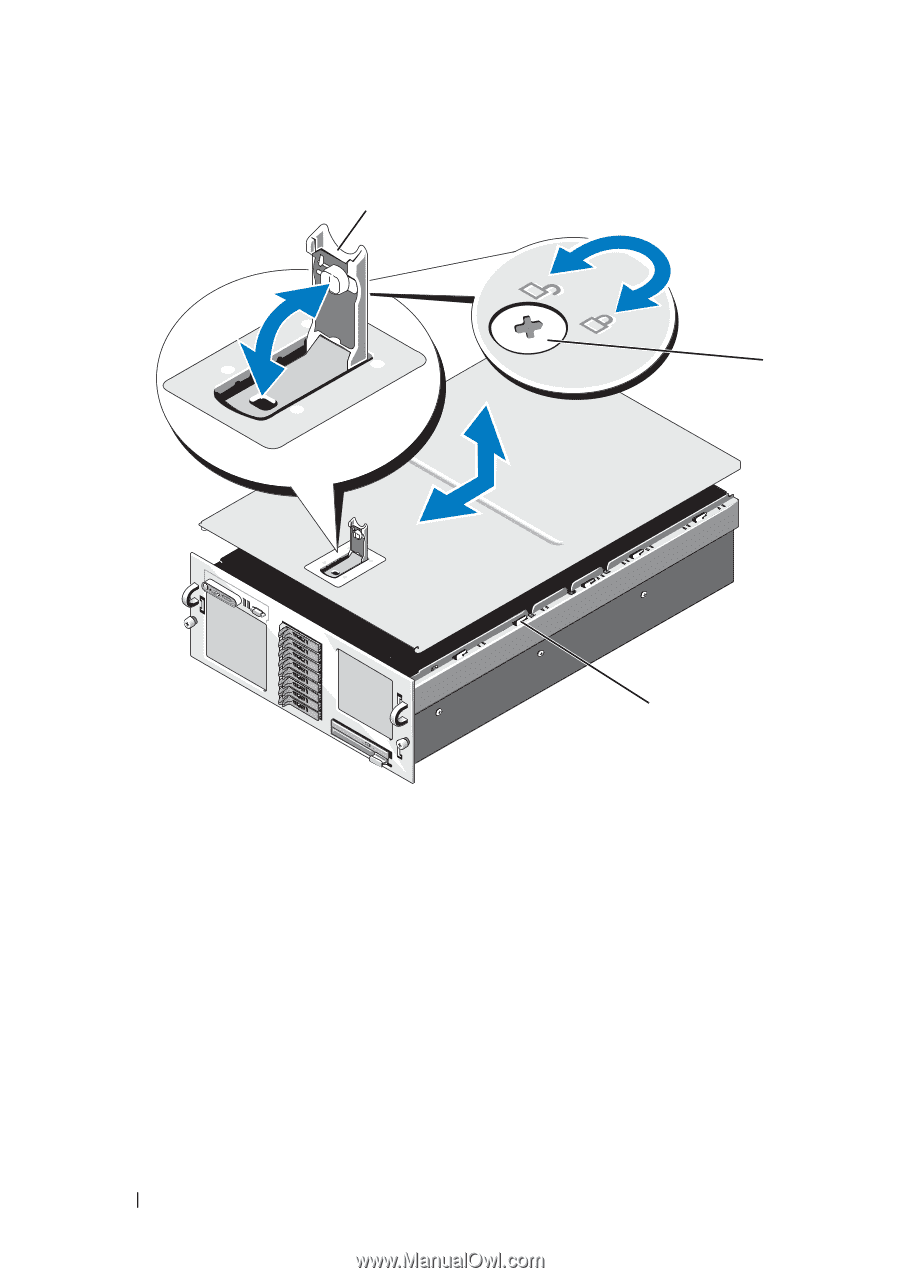
Figure 3-3. Removing and Replacing the System Cover 1 2 3 1 latch 3 chassis hooks 2 latch release lock Closing the System 1 Lift up the latch on the cover. 2 Align the cover with the left and right edges of the system and offset it slightly towards the back of the system, so that the pins on the inner edge of the cover are aligned with the chassis hooks. See Figure 3-3. 3 Lower the cover onto the chassis and close the latch. 4 Rotate the latch release lock in a clockwise direction to secure the cover. 66 Installing System Components
-
 1
1 -
2
-
3
-
4
-
5
-
6
-
7
-
8
-
9
-
10
-
11
-
12
-
13
-
14
-
15
-
16
-
17
-
18
-
19
-
20
-
21
-
22
-
23
-
24
-
25
-
26
-
27
-
28
-
29
-
30
-
31
-
32
-
33
-
34
-
35
-
36
-
37
-
38
-
39
-
40
-
41
-
42
-
43
-
44
-
45
-
46
-
47
-
48
-
49
-
50
-
51
-
52
-
53
-
54
-
55
-
56
-
57
-
58
-
59
-
60
-
 61
61 -
 62
62 -
 63
63 -
 64
64 -
 65
65 -
 66
66 -
 67
67 -
 68
68 -
 69
69 -
 70
70 -
 71
71 -
72
-
73
-
74
-
75
-
76
-
77
-
78
-
79
-
80
-
81
-
82
-
83
-
84
-
85
-
86
-
87
-
88
-
89
-
90
-
91
-
92
-
93
-
94
-
95
-
96
-
97
-
98
-
99
-
100
-
101
-
102
-
103
-
104
-
105
-
106
-
107
-
108
-
109
-
110
-
111
-
112
-
113
-
114
-
115
-
116
-
117
-
118
-
119
-
120
-
121
-
122
-
123
-
124
-
125
-
126
-
127
-
128
-
129
-
130
-
131
-
132
-
133
-
134
-
135
-
136
-
137
-
138
-
139
-
140
-
141
-
142
-
143
-
144
-
145
-
146
-
147
-
148
-
149
-
150
-
151
-
152
-
153
-
154
-
155
-
156
-
157
-
158
-
159
-
160
-
161
-
162
-
163
-
164
-
165
-
166
-
167
-
168
-
169
-
170
-
171
-
172
-
173
-
174
-
175
-
176
-
177
-
178
-
179
-
180
-
181
-
182
-
183
-
184
-
185
-
186
-
187
-
188
-
189
-
190
-
191
-
192
-
193
-
194
-
195
-
196
-
197
-
198
 |
 |
66
Installing System Components
Figure 3-3.
Removing and Replacing the System Cover
Closing the System
1
Lift up the latch on the cover.
2
Align the cover with the left and right edges of the system and offset it
slightly towards the back of the system, so that the pins on the inner edge
of the cover are aligned with the chassis hooks. See Figure 3-3.
3
Lower the cover onto the chassis and close the latch.
4
Rotate the latch release lock in a clockwise direction to secure the cover.
1
latch
2
latch release lock
3
chassis hooks
2
1
3