HP 3000dtn HP Business Inkjet 3000 series printers - (English) User Guide - Page 127
To clear jams inside the simplex unit or optional, auto-duplex unit
 |
View all HP 3000dtn manuals
Add to My Manuals
Save this manual to your list of manuals |
Page 127 highlights
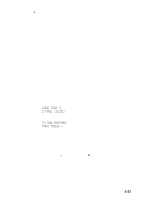
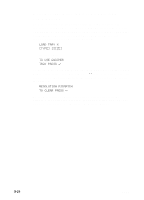
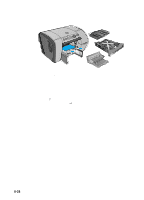
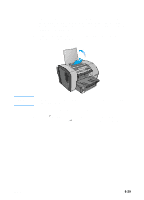
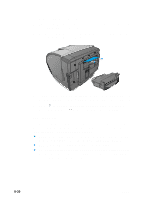
3 Look inside the printer. Grasp any jammed media with both hands and pull it gently towards you. 4 After you have cleared the jam, reinsert the tray into the printer. Use two hands to support the tray while reinserting it. 5 Press (help button) to clear the message in the LCD control panel, and then press (select button) to continue printing. To clear jams inside the simplex unit or optional auto-duplex unit 1 Remove all media from the output bin. 2 Pull out the output bin and set it aside. 3 Pull out Tray 2 and place it on a flat surface. Remove any wrinkled or curled media from the tray. 4 Remove the simplex unit or optional auto-duplex unit. To remove the simplex unit or optional auto-duplex unit, grasp the handle below the unit and pull it out of the printer. Set the unit aside. WARNING! The printer contains metal parts that might be hot. Avoid touching the metal parts inside the printer. ENWW 8-27
-
 1
1 -
2
-
3
-
4
-
5
-
6
-
7
-
8
-
9
-
10
-
11
-
12
-
13
-
14
-
15
-
16
-
17
-
18
-
19
-
20
-
21
-
22
-
23
-
24
-
25
-
26
-
27
-
28
-
29
-
30
-
31
-
32
-
33
-
34
-
35
-
36
-
37
-
38
-
39
-
40
-
41
-
42
-
43
-
44
-
45
-
46
-
47
-
48
-
49
-
50
-
51
-
52
-
53
-
54
-
55
-
56
-
57
-
58
-
59
-
60
-
61
-
62
-
63
-
64
-
65
-
66
-
67
-
68
-
69
-
70
-
71
-
72
-
73
-
74
-
75
-
76
-
77
-
78
-
79
-
80
-
81
-
82
-
83
-
84
-
85
-
86
-
87
-
88
-
89
-
90
-
91
-
92
-
93
-
94
-
95
-
96
-
97
-
98
-
99
-
100
-
101
-
102
-
103
-
104
-
105
-
106
-
107
-
108
-
109
-
110
-
111
-
112
-
113
-
114
-
115
-
116
-
117
-
118
-
119
-
120
-
121
-
 122
122 -
 123
123 -
 124
124 -
 125
125 -
 126
126 -
 127
127 -
 128
128 -
 129
129 -
 130
130 -
 131
131 -
 132
132 -
133
-
134
-
135
-
136
-
137
-
138
-
139
-
140
-
141
-
142
-
143
-
144
-
145
-
146
-
147
-
148
-
149
-
150
-
151
-
152
-
153
-
154
-
155
-
156
-
157
-
158
-
159
-
160
-
161
-
162
-
163
-
164
-
165
-
166
-
167
-
168
-
169
-
170
-
171
-
172
-
173
-
174
-
175
-
176
-
177
-
178
-
179
-
180
-
181
-
182
-
183
-
184
-
185
-
186
-
187
-
188
-
189
-
190
-
191
-
192
-
193
-
194
-
195
-
196
-
197
-
198
 |
 |
