HP 3000dtn HP Business Inkjet 3000 series printers - (English) User Guide - Page 129
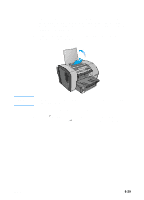
To clear jams inside the top cover, After you clear the jam, close the top cover.
 |
View all HP 3000dtn manuals
Add to My Manuals
Save this manual to your list of manuals |
Page 129 highlights
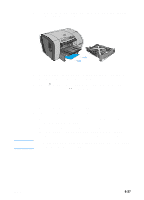
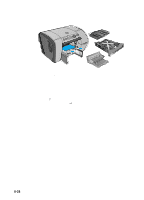
To clear jams inside the top cover 1 Open the top cover to locate the jam. When you lift the top cover, the carriage should return to its position on the left side of the printer. If the carriage does not return to this position, move the carriage to the right side. 2 Free any wrinkled media and pull the sheet slowly toward you through the top of the printer. CAUTION To prevent damage to printer parts, use care when removing jammed media. 3 After you clear the jam, close the top cover. 4 Press (help button) to clear the message in the LCD control panel, and then press (select button) to continue printing. ENWW 8-29
-
 1
1 -
2
-
3
-
4
-
5
-
6
-
7
-
8
-
9
-
10
-
11
-
12
-
13
-
14
-
15
-
16
-
17
-
18
-
19
-
20
-
21
-
22
-
23
-
24
-
25
-
26
-
27
-
28
-
29
-
30
-
31
-
32
-
33
-
34
-
35
-
36
-
37
-
38
-
39
-
40
-
41
-
42
-
43
-
44
-
45
-
46
-
47
-
48
-
49
-
50
-
51
-
52
-
53
-
54
-
55
-
56
-
57
-
58
-
59
-
60
-
61
-
62
-
63
-
64
-
65
-
66
-
67
-
68
-
69
-
70
-
71
-
72
-
73
-
74
-
75
-
76
-
77
-
78
-
79
-
80
-
81
-
82
-
83
-
84
-
85
-
86
-
87
-
88
-
89
-
90
-
91
-
92
-
93
-
94
-
95
-
96
-
97
-
98
-
99
-
100
-
101
-
102
-
103
-
104
-
105
-
106
-
107
-
108
-
109
-
110
-
111
-
112
-
113
-
114
-
115
-
116
-
117
-
118
-
119
-
120
-
121
-
122
-
123
-
 124
124 -
 125
125 -
 126
126 -
 127
127 -
 128
128 -
 129
129 -
 130
130 -
 131
131 -
 132
132 -
 133
133 -
 134
134 -
135
-
136
-
137
-
138
-
139
-
140
-
141
-
142
-
143
-
144
-
145
-
146
-
147
-
148
-
149
-
150
-
151
-
152
-
153
-
154
-
155
-
156
-
157
-
158
-
159
-
160
-
161
-
162
-
163
-
164
-
165
-
166
-
167
-
168
-
169
-
170
-
171
-
172
-
173
-
174
-
175
-
176
-
177
-
178
-
179
-
180
-
181
-
182
-
183
-
184
-
185
-
186
-
187
-
188
-
189
-
190
-
191
-
192
-
193
-
194
-
195
-
196
-
197
-
198
 |
 |
ENWW
8-29
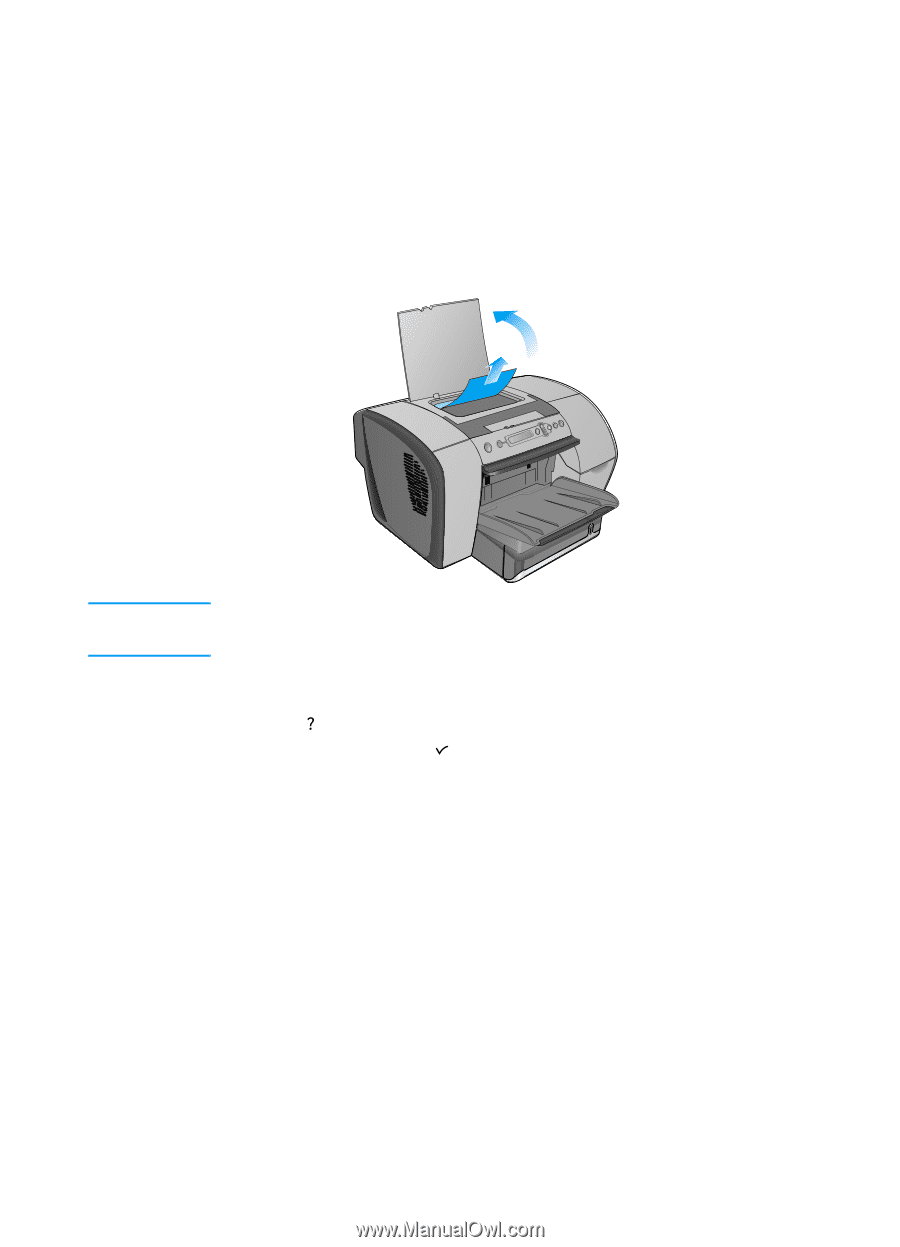
To clear jams inside the top cover
1
Open the top cover to locate the jam. When you lift the top cover,
the carriage should return to its position on the left side of the
printer. If the carriage does not return to this position, move the
carriage to the right side.
2
Free any wrinkled media and pull the sheet slowly toward you
through the top of the printer.
CAUTION
To prevent damage to printer parts, use care when removing
jammed media.
3
After you clear the jam, close the top cover.
4
Press
(help button) to clear the message in the LCD control
panel, and then press
(select button) to continue printing.