HP xw8600 HP xw8600 Workstation Service and Technical Reference Guide - Page 116
Processor heatsink, Removing the processor heatsink
 |
View all HP xw8600 manuals
Add to My Manuals
Save this manual to your list of manuals |
Page 116 highlights
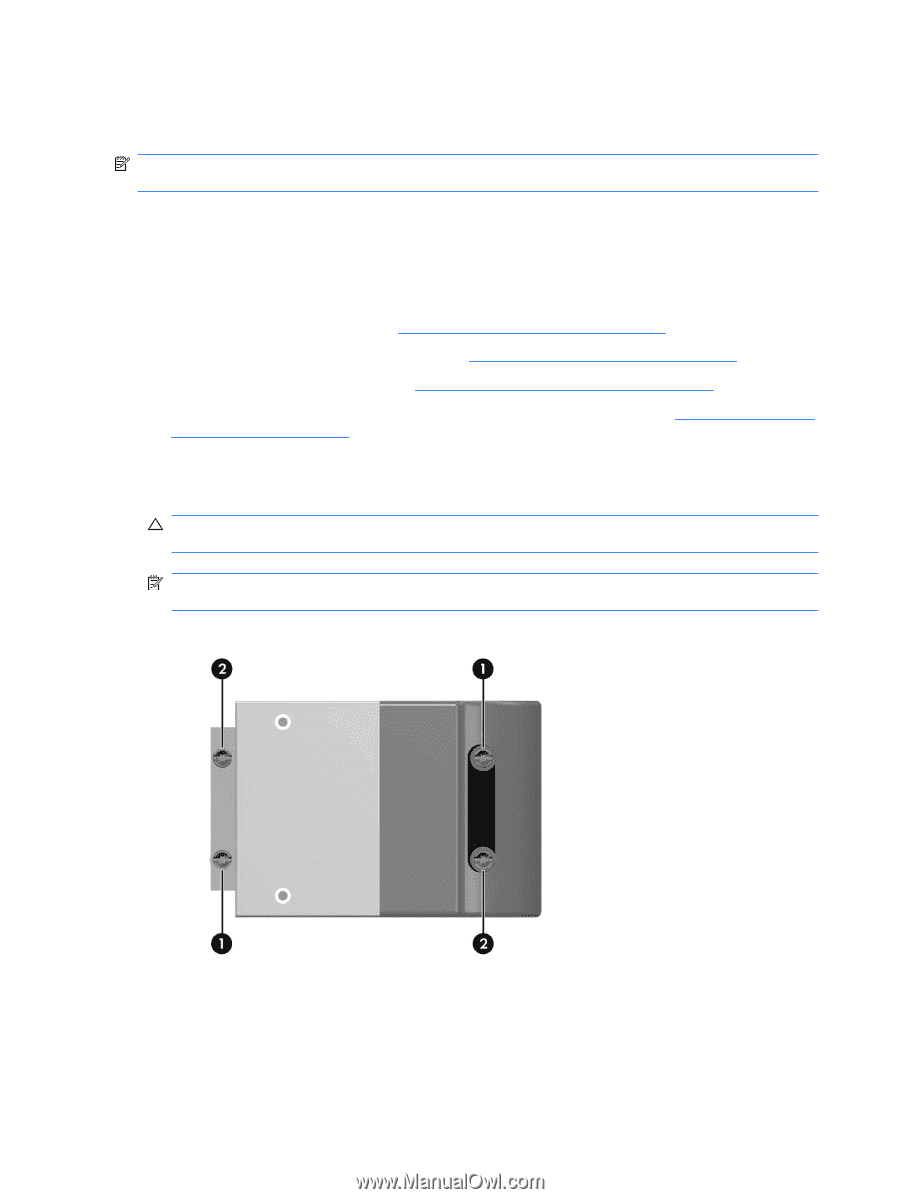
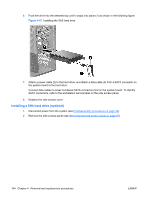
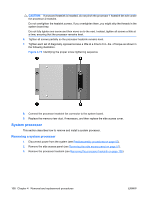
Processor heatsink This section describes how to remove and install a processor heatsink. NOTE: Not all heatsinks are the same. The heatsink shown in the following figures is an example of what might be installed in your workstation. Removing the processor heatsink Tall heatsinks are used in workstation configurations that include a memory riser or 120-watt or greater processors. All other workstation configurations use short heatsinks. To remove a heatsink: 1. Power down the workstation (see Predisassembly procedures on page 52). 2. Disconnect power from the workstation (see Predisassembly procedures on page 52). 3. Remove the side access panel (see Removing the side access panel on page 57). 4. If a memory riser assembly is installed, remove the memory riser duct (see Removing a memory riser assembly on page 78). 5. Slowly and evenly loosen one pair of diagonally opposite screws from the processor until the screw shanks disengage from the system board (1), and then loosen the remaining pair (2). (Refer to the figure below.) CAUTION: Do not fully loosen one screw, and then move on to the next. Instead, loosen all screws a little at a time, ensuring that the processor remains level. NOTE: The figure below illustrates a high power processor heatsink. Your workstation may include a low power heatsink. Figure 4-70 Identifying the proper screw loosening sequence 106 Chapter 4 Removal and replacement procedures ENWW
-
 1
1 -
2
-
3
-
4
-
5
-
6
-
7
-
8
-
9
-
10
-
11
-
12
-
13
-
14
-
15
-
16
-
17
-
18
-
19
-
20
-
21
-
22
-
23
-
24
-
25
-
26
-
27
-
28
-
29
-
30
-
31
-
32
-
33
-
34
-
35
-
36
-
37
-
38
-
39
-
40
-
41
-
42
-
43
-
44
-
45
-
46
-
47
-
48
-
49
-
50
-
51
-
52
-
53
-
54
-
55
-
56
-
57
-
58
-
59
-
60
-
61
-
62
-
63
-
64
-
65
-
66
-
67
-
68
-
69
-
70
-
71
-
72
-
73
-
74
-
75
-
76
-
77
-
78
-
79
-
80
-
81
-
82
-
83
-
84
-
85
-
86
-
87
-
88
-
89
-
90
-
91
-
92
-
93
-
94
-
95
-
96
-
97
-
98
-
99
-
100
-
101
-
102
-
103
-
104
-
105
-
106
-
107
-
108
-
109
-
110
-
 111
111 -
 112
112 -
 113
113 -
 114
114 -
 115
115 -
 116
116 -
 117
117 -
 118
118 -
 119
119 -
 120
120 -
 121
121 -
122
-
123
-
124
-
125
-
126
-
127
-
128
-
129
-
130
-
131
-
132
-
133
-
134
-
135
-
136
-
137
-
138
-
139
-
140
-
141
-
142
-
143
-
144
-
145
-
146
-
147
-
148
-
149
-
150
-
151
-
152
-
153
-
154
-
155
-
156
-
157
-
158
-
159
-
160
-
161
-
162
-
163
-
164
-
165
-
166
-
167
-
168
-
169
-
170
-
171
-
172
-
173
-
174
-
175
-
176
-
177
-
178
-
179
-
180
 |
 |