HP xw8600 HP xw8600 Workstation Service and Technical Reference Guide - Page 88
Removing a memory riser assembly, Disconnecting the riser card power cables
 |
View all HP xw8600 manuals
Add to My Manuals
Save this manual to your list of manuals |
Page 88 highlights
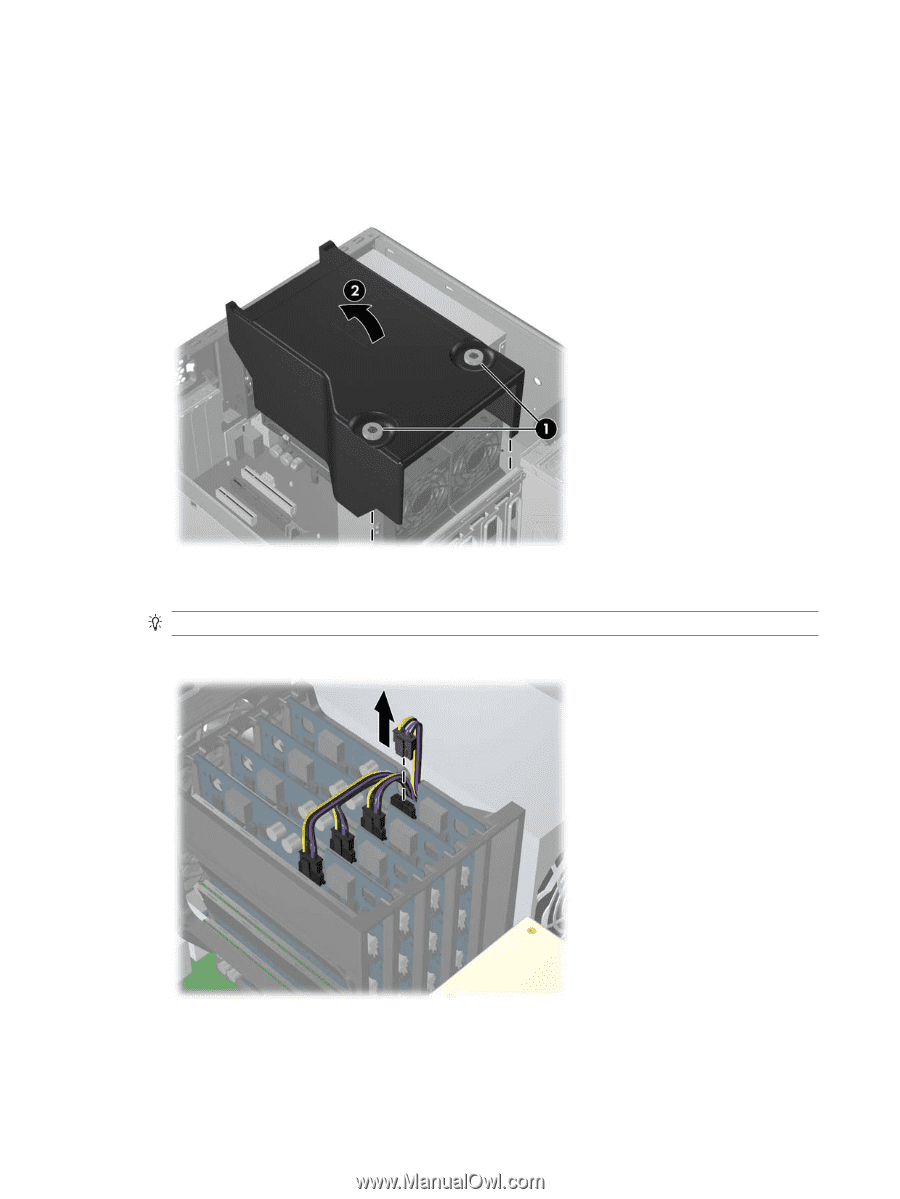
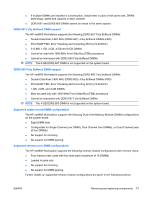
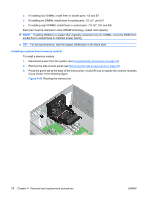
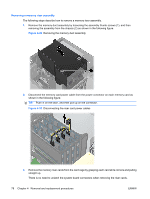
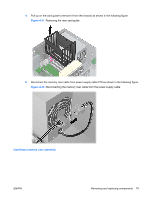
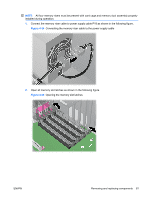
Removing a memory riser assembly The following steps describe how to remove a memory riser assembly. 1. Remove the memory duct assembly by loosening the assembly thumb screws (1), and then removing the assembly from the chassis (2) as shown in the following figure. Figure 4-29 Removing the memory duct assembly 2. Disconnect the memory card power cable from the power connector on each memory card as shown in the following figure. TIP: Push in on the latch, and then pull up on the connector. Figure 4-30 Disconnecting the riser card power cables 3. Remove the memory riser cards from the card cage by grasping each card at its corners and pulling straight up. There is no need to unlatch the system board connectors when removing the riser cards. 78 Chapter 4 Removal and replacement procedures ENWW
-
 1
1 -
2
-
3
-
4
-
5
-
6
-
7
-
8
-
9
-
10
-
11
-
12
-
13
-
14
-
15
-
16
-
17
-
18
-
19
-
20
-
21
-
22
-
23
-
24
-
25
-
26
-
27
-
28
-
29
-
30
-
31
-
32
-
33
-
34
-
35
-
36
-
37
-
38
-
39
-
40
-
41
-
42
-
43
-
44
-
45
-
46
-
47
-
48
-
49
-
50
-
51
-
52
-
53
-
54
-
55
-
56
-
57
-
58
-
59
-
60
-
61
-
62
-
63
-
64
-
65
-
66
-
67
-
68
-
69
-
70
-
71
-
72
-
73
-
74
-
75
-
76
-
77
-
78
-
79
-
80
-
81
-
82
-
 83
83 -
 84
84 -
 85
85 -
 86
86 -
 87
87 -
 88
88 -
 89
89 -
 90
90 -
 91
91 -
 92
92 -
 93
93 -
94
-
95
-
96
-
97
-
98
-
99
-
100
-
101
-
102
-
103
-
104
-
105
-
106
-
107
-
108
-
109
-
110
-
111
-
112
-
113
-
114
-
115
-
116
-
117
-
118
-
119
-
120
-
121
-
122
-
123
-
124
-
125
-
126
-
127
-
128
-
129
-
130
-
131
-
132
-
133
-
134
-
135
-
136
-
137
-
138
-
139
-
140
-
141
-
142
-
143
-
144
-
145
-
146
-
147
-
148
-
149
-
150
-
151
-
152
-
153
-
154
-
155
-
156
-
157
-
158
-
159
-
160
-
161
-
162
-
163
-
164
-
165
-
166
-
167
-
168
-
169
-
170
-
171
-
172
-
173
-
174
-
175
-
176
-
177
-
178
-
179
-
180
 |
 |