Panasonic KX-NT400 Operating Instructions - Page 121
Administrator Options, LDAP Server Settings, Details for LDAP Server Settings
 |
View all Panasonic KX-NT400 manuals
Add to My Manuals
Save this manual to your list of manuals |
Page 121 highlights
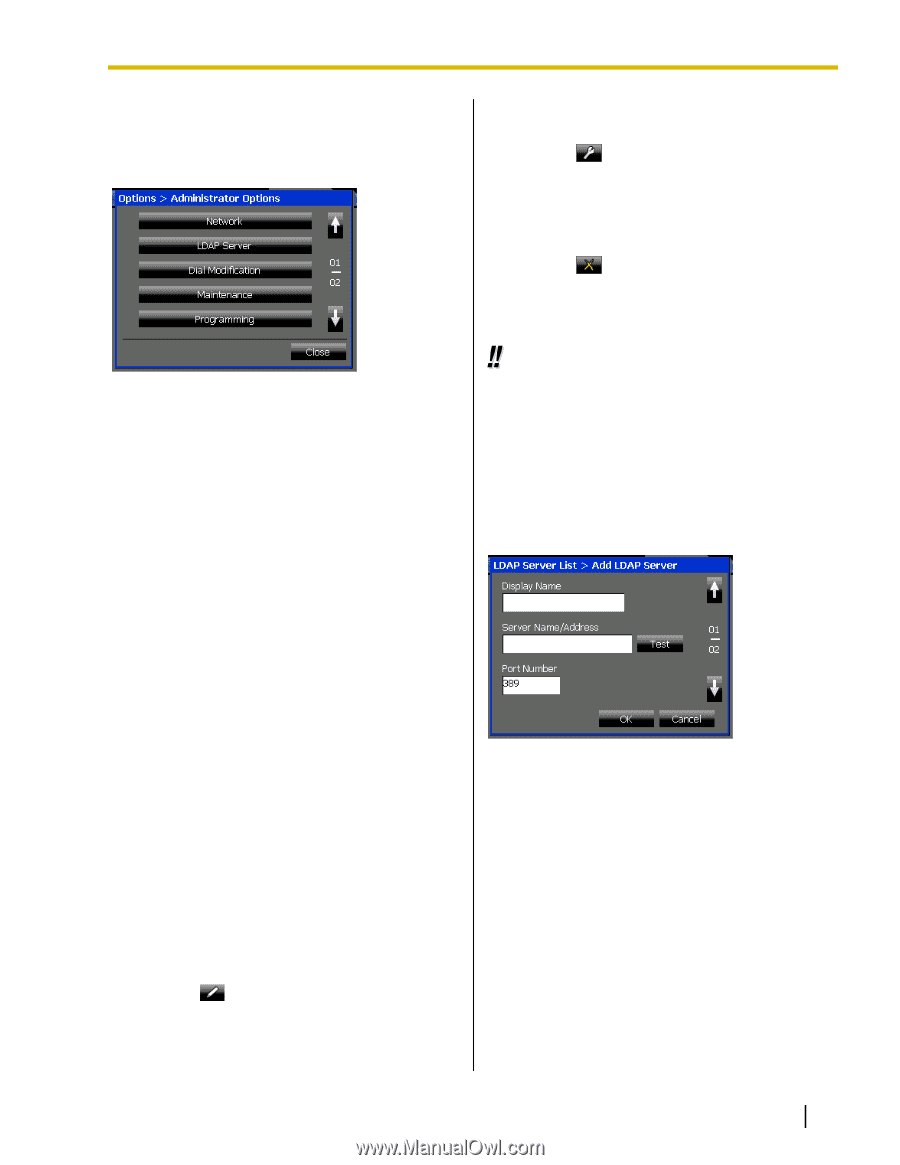
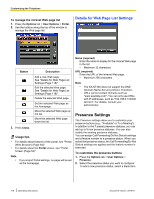
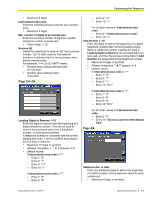
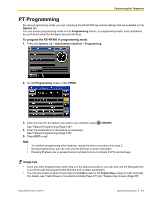
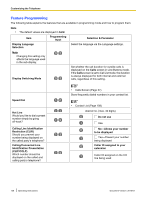
Customizing the Telephone Administrator Options This section explains some of the settings available in Administrator Options on the Options tab. To edit an LDAP server's configuration a. Select an LDAP server. b. Press . See "Details for LDAP Server Settings (Page 121)". To delete an LDAP server a. Select an LDAP server. b. Press . c. On the confirmation dialog window, press Yes. 3. Press Close. Administrator options are settings that modify network settings and telephone operations. Consult your administrator for details about the correct settings. The following settings are explained in this section: • LDAP Server Settings (Page 121) • Dial Modification Settings (Page 122) See the following sections for details about the other items on this screen: • For details about Network, see "Setting Up the KX-NT400 (Page 157)". • For details about Maintenance, see "Data Maintenance (Page 166)". • For details about Programming, see "PT Programming (Page 125)". • For details about Error Log, see "Error Messages (Page 192)". Usage tips • For details about selecting and displaying LDAP server directories, see "Making a Call from the Contact List (Page 63)". • For details about the Contacts screen, see "Contacts Screen (Page 32)". Details for LDAP Server Settings Page 1/2 LDAP Server Settings The LDAP Server settings allow you to specify the LDAP servers that you can access on the Contacts screen. You can add, edit, and delete LDAP server settings. To configure LDAP Server settings 1. Press the Options tab > Administrator Options > LDAP Server. 2. Select an operation: To add a new LDAP server a. Press . See "Details for LDAP Server Settings (Page 121)". Display Name (required) Enter the name to display for the LDAP server. • Maximum 20 characters Server Name/Address (required) Enter the IP address of the LDAP server. Press Test to verify the connection to the LDAP server. • Must be a valid IP address Port Number (required) Enter the port number that the LDAP server uses for communication. • Value range: 389, 636, 1024-65535 Document Version 2010-01 Operating Instructions 121
-
 1
1 -
2
-
3
-
4
-
5
-
6
-
7
-
8
-
9
-
10
-
11
-
12
-
13
-
14
-
15
-
16
-
17
-
18
-
19
-
20
-
21
-
22
-
23
-
24
-
25
-
26
-
27
-
28
-
29
-
30
-
31
-
32
-
33
-
34
-
35
-
36
-
37
-
38
-
39
-
40
-
41
-
42
-
43
-
44
-
45
-
46
-
47
-
48
-
49
-
50
-
51
-
52
-
53
-
54
-
55
-
56
-
57
-
58
-
59
-
60
-
61
-
62
-
63
-
64
-
65
-
66
-
67
-
68
-
69
-
70
-
71
-
72
-
73
-
74
-
75
-
76
-
77
-
78
-
79
-
80
-
81
-
82
-
83
-
84
-
85
-
86
-
87
-
88
-
89
-
90
-
91
-
92
-
93
-
94
-
95
-
96
-
97
-
98
-
99
-
100
-
101
-
102
-
103
-
104
-
105
-
106
-
107
-
108
-
109
-
110
-
111
-
112
-
113
-
114
-
115
-
 116
116 -
 117
117 -
 118
118 -
 119
119 -
 120
120 -
 121
121 -
 122
122 -
 123
123 -
 124
124 -
 125
125 -
 126
126 -
127
-
128
-
129
-
130
-
131
-
132
-
133
-
134
-
135
-
136
-
137
-
138
-
139
-
140
-
141
-
142
-
143
-
144
-
145
-
146
-
147
-
148
-
149
-
150
-
151
-
152
-
153
-
154
-
155
-
156
-
157
-
158
-
159
-
160
-
161
-
162
-
163
-
164
-
165
-
166
-
167
-
168
-
169
-
170
-
171
-
172
-
173
-
174
-
175
-
176
-
177
-
178
-
179
-
180
-
181
-
182
-
183
-
184
-
185
-
186
-
187
-
188
-
189
-
190
-
191
-
192
-
193
-
194
-
195
-
196
-
197
-
198
-
199
-
200
-
201
-
202
-
203
-
204
-
205
-
206
 |
 |