Panasonic KX-NT400 Operating Instructions - Page 160
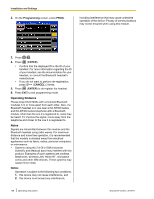
IP Port Settings, IP Port Setting screen 1/2
 |
View all Panasonic KX-NT400 manuals
Add to My Manuals
Save this manual to your list of manuals |
Page 160 highlights
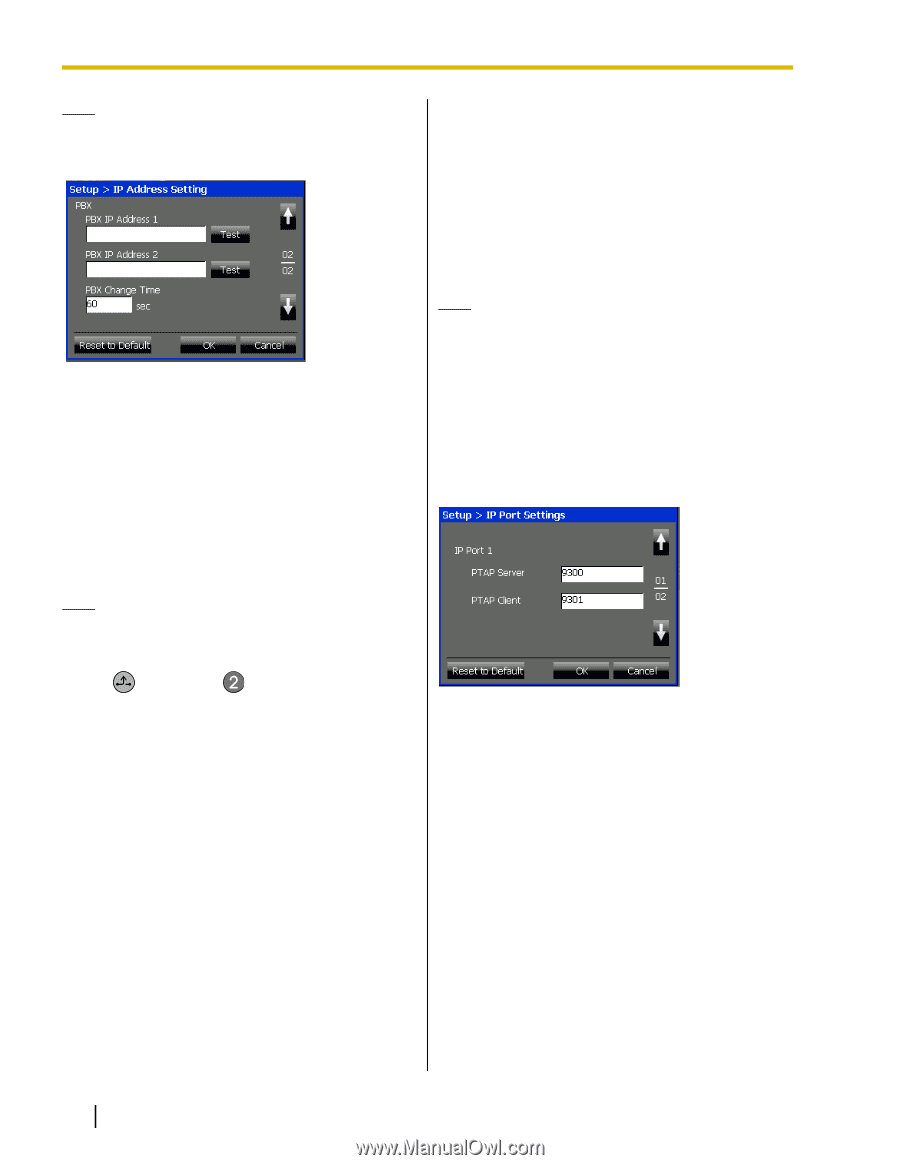
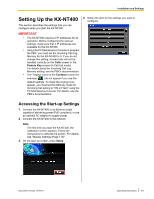
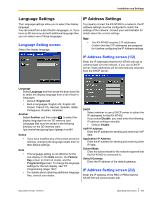
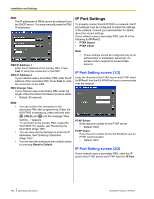
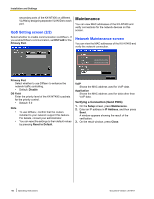
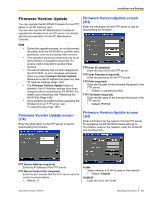
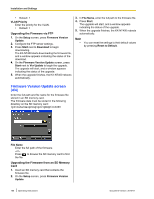
Installation and Settings Note The IP addresses of PBXs cannot be obtained from the DHCP server. You must manually enter the PBX IP addresses. PBX IP Address 1 Enter the IP address of the primary PBX. Press Test to verify the connection to the PBX. PBX IP Address 2 If your network uses a secondary PBX, enter the IP address of the secondary PBX. Press Test to verify the connection to the PBX. PBX Change Time If your network uses a secondary PBX, enter the length of the time before the failover process starts. • Default: 60 seconds Note • • • You can confirm the connection to the secondary PBX after programming. When the KX-NT400 is starting up, press and hold both (HOLD) and until the message "Now starting ..." appears. To reconnect to the primary PBX, restart the KX-NT400. For details, see "Restarting the KX-NT400 (Page 168)". You can also use the dial keys to enter the IP addresses. See "Entering Characters (Page 145)". You can reset the settings to their default values by pressing Reset to Default. IP Port Settings To properly connect the KX-NT400 to a network, the IP port settings must be configured to match the settings of the network. Consult your administrator for details about the correct settings. If your network uses a secondary PBX, also fill in the following for IP Port 2: • PTAP Server • PTAP Client Note • These settings should be configured only by an administrator or installation personnel. An access code is required to access these screens. IP Port Setting screen (1/2) Enter the IP ports of the PTAP server and PTAP client for IP Port 1 that the KX-NT400 will use to communicate over the network. PTAP Server Enter the port number for the PTAP server. • Default: 9300 PTAP Client Enter the port number for the KX-NT400 to use for PTAP communication. • Default: 9301 IP Port Setting screen (2/2) If your network uses a secondary PBX, enter the IP ports of the PTAP server and PTAP client for IP Port 160 Operating Instructions Document Version 2010-01
-
 1
1 -
2
-
3
-
4
-
5
-
6
-
7
-
8
-
9
-
10
-
11
-
12
-
13
-
14
-
15
-
16
-
17
-
18
-
19
-
20
-
21
-
22
-
23
-
24
-
25
-
26
-
27
-
28
-
29
-
30
-
31
-
32
-
33
-
34
-
35
-
36
-
37
-
38
-
39
-
40
-
41
-
42
-
43
-
44
-
45
-
46
-
47
-
48
-
49
-
50
-
51
-
52
-
53
-
54
-
55
-
56
-
57
-
58
-
59
-
60
-
61
-
62
-
63
-
64
-
65
-
66
-
67
-
68
-
69
-
70
-
71
-
72
-
73
-
74
-
75
-
76
-
77
-
78
-
79
-
80
-
81
-
82
-
83
-
84
-
85
-
86
-
87
-
88
-
89
-
90
-
91
-
92
-
93
-
94
-
95
-
96
-
97
-
98
-
99
-
100
-
101
-
102
-
103
-
104
-
105
-
106
-
107
-
108
-
109
-
110
-
111
-
112
-
113
-
114
-
115
-
116
-
117
-
118
-
119
-
120
-
121
-
122
-
123
-
124
-
125
-
126
-
127
-
128
-
129
-
130
-
131
-
132
-
133
-
134
-
135
-
136
-
137
-
138
-
139
-
140
-
141
-
142
-
143
-
144
-
145
-
146
-
147
-
148
-
149
-
150
-
151
-
152
-
153
-
154
-
 155
155 -
 156
156 -
 157
157 -
 158
158 -
 159
159 -
 160
160 -
 161
161 -
 162
162 -
 163
163 -
 164
164 -
 165
165 -
166
-
167
-
168
-
169
-
170
-
171
-
172
-
173
-
174
-
175
-
176
-
177
-
178
-
179
-
180
-
181
-
182
-
183
-
184
-
185
-
186
-
187
-
188
-
189
-
190
-
191
-
192
-
193
-
194
-
195
-
196
-
197
-
198
-
199
-
200
-
201
-
202
-
203
-
204
-
205
-
206
 |
 |