Samsung SPH-A513 User Manual (user Manual) (ver.f4.1) (English) - Page 101
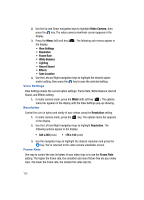
Camera Options, View Settings, Resolution
 |
View all Samsung SPH-A513 manuals
Add to My Manuals
Save this manual to your list of manuals |
Page 101 highlights
Camera 2. Using the display as a viewfinder, point the camera at your subject. 3. Press the key or the Camera key ( ) when the image that you wish to capture appears in the display. 4. To save the picture, press the Save key ( ). Note: You can change a number of the camera's settings to suit particular uses for your pictures. See "Camera Options" on page 101 for more information. Camera Options The Camera Options let you adjust the default camera settings to suite available lighting, the subject of the photo, or the purpose of the photo. To access Camera Options, do the following: 1. In standby mode, press and hold the Camera key ( ). The camera viewfinder screen appears in the display. 2. Press the Menu (left) soft key ( ). The following sub-menus appear in the display: • View Settings • Resolution • Quality • White Balance • Lighting • Effects • Set Frame • Save Location 3. Use the Left and Right navigation keys to highlight the desired option and/or setting, then press the key to save the selected setting. View Settings View Settings shows the current option settings: image Size, Quality, White Balance, and Lighting. 1. In camera mode, press the key. The options menu bar appears in the display with the View Settings pop-up showing. Resolution Control the size (in bytes) and clarity of your pictures using the Resolution setting. 1. In camera mode, press the display. key. The options menu bar appears in the SNAP 101
-
 1
1 -
2
-
3
-
4
-
5
-
6
-
7
-
8
-
9
-
10
-
11
-
12
-
13
-
14
-
15
-
16
-
17
-
18
-
19
-
20
-
21
-
22
-
23
-
24
-
25
-
26
-
27
-
28
-
29
-
30
-
31
-
32
-
33
-
34
-
35
-
36
-
37
-
38
-
39
-
40
-
41
-
42
-
43
-
44
-
45
-
46
-
47
-
48
-
49
-
50
-
51
-
52
-
53
-
54
-
55
-
56
-
57
-
58
-
59
-
60
-
61
-
62
-
63
-
64
-
65
-
66
-
67
-
68
-
69
-
70
-
71
-
72
-
73
-
74
-
75
-
76
-
77
-
78
-
79
-
80
-
81
-
82
-
83
-
84
-
85
-
86
-
87
-
88
-
89
-
90
-
91
-
92
-
93
-
94
-
95
-
 96
96 -
 97
97 -
 98
98 -
 99
99 -
 100
100 -
 101
101 -
 102
102 -
 103
103 -
 104
104 -
 105
105 -
 106
106 -
107
-
108
-
109
-
110
-
111
-
112
-
113
-
114
-
115
-
116
-
117
-
118
-
119
-
120
-
121
-
122
-
123
-
124
-
125
-
126
-
127
-
128
-
129
-
130
-
131
-
132
-
133
-
134
-
135
-
136
-
137
-
138
-
139
-
140
-
141
-
142
-
143
-
144
-
145
-
146
-
147
-
148
-
149
-
150
-
151
-
152
-
153
-
154
-
155
-
156
-
157
-
158
-
159
-
160
-
161
-
162
-
163
-
164
-
165
-
166
-
167
-
168
-
169
-
170
-
171
-
172
-
173
-
174
-
175
-
176
-
177
-
178
-
179
-
180
-
181
-
182
-
183
-
184
-
185
-
186
-
187
-
188
-
189
-
190
-
191
-
192
-
193
-
194
-
195
-
196
-
197
 |
 |
