Samsung SPH-A513 User Manual (user Manual) (ver.f4.1) (English) - Page 57
Groups
 |
View all Samsung SPH-A513 manuals
Add to My Manuals
Save this manual to your list of manuals |
Page 57 highlights
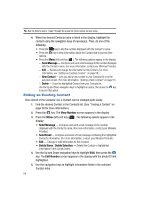
Finding a Contact 3. Use the keypad to enter the first few characters of the name of the contact as it appears in your Contacts list. Example: If you saved a contact name as "Amy Smith", begin your search for that contact by pressing for "A". Note: As you enter letters, the entry names of the closest matches (thus far) appear in the display. Tip: Use the Volume key to "page" through the Contacts list, four names per key press. 4. When the desired Contacts entry is listed in the display, highlight the Contact using the navigation keys. Then, do one of the following: • Press the key to dial the number displayed with the Contact's name. • Press the key to view information about the Contact and to access other options. • Press the Menu (left) soft key ( ). The following options appear in the display: - Send Message - Compose and send a text message to the number displayed with the Contact's name. (For more information, contact your Wireless Provider.) - Send Email - Compose and send a Email message containing the highlighted Contact's information. (For more information, contact your Wireless Provider.) - Edit - Review and change the information for this Contact. (For more information, see "Editing an Existing Contact" on page 58.) - New Contact - Lets you add a new number to your Contacts list or to the selected contact. (For more information, "Adding a New Contact" on page 51.) - Delete - Erase the highlighted Contact from your Contacts list. Use the Up and Down navigation keys to highlight an option, then press the key to launch that option. Groups This option lets you find a particular Contact within a list of Contacts assigned to the same Group. 1. In standby mode, press the MENU (left) soft key ( ), then press (for CONTACT) and for Groups. The Groups list appears in the display. 2. Use the Up and Down navigation keys to highlight the name of the group you wish to search, then press the key. 3. Use the Up and Down navigation keys to scroll through the selected group and highlight the name of each Contact. The number, Speed Dial number, and photo ID for the selected Contact appear at the top of the Groups list. Understanding CONTACT 57
-
 1
1 -
2
-
3
-
4
-
5
-
6
-
7
-
8
-
9
-
10
-
11
-
12
-
13
-
14
-
15
-
16
-
17
-
18
-
19
-
20
-
21
-
22
-
23
-
24
-
25
-
26
-
27
-
28
-
29
-
30
-
31
-
32
-
33
-
34
-
35
-
36
-
37
-
38
-
39
-
40
-
41
-
42
-
43
-
44
-
45
-
46
-
47
-
48
-
49
-
50
-
51
-
 52
52 -
 53
53 -
 54
54 -
 55
55 -
 56
56 -
 57
57 -
 58
58 -
 59
59 -
 60
60 -
 61
61 -
 62
62 -
63
-
64
-
65
-
66
-
67
-
68
-
69
-
70
-
71
-
72
-
73
-
74
-
75
-
76
-
77
-
78
-
79
-
80
-
81
-
82
-
83
-
84
-
85
-
86
-
87
-
88
-
89
-
90
-
91
-
92
-
93
-
94
-
95
-
96
-
97
-
98
-
99
-
100
-
101
-
102
-
103
-
104
-
105
-
106
-
107
-
108
-
109
-
110
-
111
-
112
-
113
-
114
-
115
-
116
-
117
-
118
-
119
-
120
-
121
-
122
-
123
-
124
-
125
-
126
-
127
-
128
-
129
-
130
-
131
-
132
-
133
-
134
-
135
-
136
-
137
-
138
-
139
-
140
-
141
-
142
-
143
-
144
-
145
-
146
-
147
-
148
-
149
-
150
-
151
-
152
-
153
-
154
-
155
-
156
-
157
-
158
-
159
-
160
-
161
-
162
-
163
-
164
-
165
-
166
-
167
-
168
-
169
-
170
-
171
-
172
-
173
-
174
-
175
-
176
-
177
-
178
-
179
-
180
-
181
-
182
-
183
-
184
-
185
-
186
-
187
-
188
-
189
-
190
-
191
-
192
-
193
-
194
-
195
-
196
-
197
 |
 |
