Samsung SPH-A513 User Manual (user Manual) (ver.f4.1) (English) - Page 62
Speed Dial Numbers
 |
View all Samsung SPH-A513 manuals
Add to My Manuals
Save this manual to your list of manuals |
Page 62 highlights
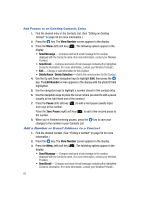
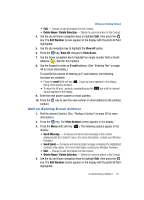
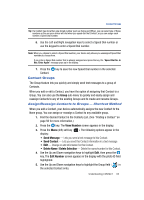
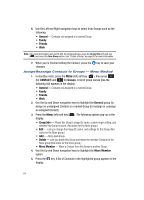
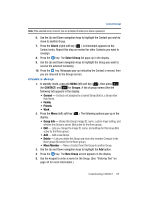
5. Use the Up and Down navigation keys to highlight the E-mail field (labeled with the icon). 6. Use the keypad to edit the E-mail address. (See "Entering Text" on page 44 for more information.) To simplify the process of entering an E-mail address, the following functions are available: • Press the email (left) soft key ( ). A pop-up menu appears in the display listing some popular domains. • To insert the @ and . symbols, repeatedly press the symbol appears in the display. key until the desired 7. Press the key to save your changes. Speed Dial Numbers When you add or edit a Contact, you have the option of assigning a Speed Dial number to any of the Contact's numbers or of changing any of the Contact's currently assigned Speed Dial numbers. 1. Find the desired Contact. (See "Finding a Contact" on page 56 for more information.) Tip: You can also assign a Speed Dial number when creating a new Contacts List entry. See "Adding a New Contact" on page 51 for more information. 2. Press the key. The View Number screen appears in the display. 3. Press the Menu (left) soft key ( ). The following options appear in the display: • Send Message - Compose and send a text message to the number displayed with the Contact's name. (For more information, contact your Wireless Provider.) • Send Email - Compose and send a Email message containing the highlighted Contact's information. (For more information, contact your Wireless Provider.) • Edit - Change or add information for this Contact. • Delete Name / Delete Selection - Delete the name/number for this Contact. 4. Use the Up and Down navigation keys to highlight Edit, then press the key. The Edit Number screen appears in the display with the photo ID field highlighted. 5. Use the Up and Down navigation keys to highlight a Speed Dial number field ( ) for this Contact. 62
-
 1
1 -
2
-
3
-
4
-
5
-
6
-
7
-
8
-
9
-
10
-
11
-
12
-
13
-
14
-
15
-
16
-
17
-
18
-
19
-
20
-
21
-
22
-
23
-
24
-
25
-
26
-
27
-
28
-
29
-
30
-
31
-
32
-
33
-
34
-
35
-
36
-
37
-
38
-
39
-
40
-
41
-
42
-
43
-
44
-
45
-
46
-
47
-
48
-
49
-
50
-
51
-
52
-
53
-
54
-
55
-
56
-
 57
57 -
 58
58 -
 59
59 -
 60
60 -
 61
61 -
 62
62 -
 63
63 -
 64
64 -
 65
65 -
 66
66 -
 67
67 -
68
-
69
-
70
-
71
-
72
-
73
-
74
-
75
-
76
-
77
-
78
-
79
-
80
-
81
-
82
-
83
-
84
-
85
-
86
-
87
-
88
-
89
-
90
-
91
-
92
-
93
-
94
-
95
-
96
-
97
-
98
-
99
-
100
-
101
-
102
-
103
-
104
-
105
-
106
-
107
-
108
-
109
-
110
-
111
-
112
-
113
-
114
-
115
-
116
-
117
-
118
-
119
-
120
-
121
-
122
-
123
-
124
-
125
-
126
-
127
-
128
-
129
-
130
-
131
-
132
-
133
-
134
-
135
-
136
-
137
-
138
-
139
-
140
-
141
-
142
-
143
-
144
-
145
-
146
-
147
-
148
-
149
-
150
-
151
-
152
-
153
-
154
-
155
-
156
-
157
-
158
-
159
-
160
-
161
-
162
-
163
-
164
-
165
-
166
-
167
-
168
-
169
-
170
-
171
-
172
-
173
-
174
-
175
-
176
-
177
-
178
-
179
-
180
-
181
-
182
-
183
-
184
-
185
-
186
-
187
-
188
-
189
-
190
-
191
-
192
-
193
-
194
-
195
-
196
-
197
 |
 |