Samsung SPH-A513 User Manual (user Manual) (ver.f4.1) (English) - Page 52
Using the Contacts Add Option, Entering, Entering Text
 |
View all Samsung SPH-A513 manuals
Add to My Manuals
Save this manual to your list of manuals |
Page 52 highlights
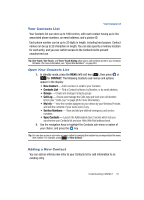
Using the Contacts Add Option 1. In standby mode, press the MENU (left) soft key ( ), then press or (for CONTACT) and for New Contact. The New Contact screen appears in the display with the Enter Name field highlighted. Tip: You can also launch the New Contact screen from standby mode by pressing the CONTACTS (right) soft key ( ), the Menu (left) soft key ( ), and then for New Contact. 2. Enter a name or phrase to associate with the number(s) using the keypad. (See "Entering Text" on page 44 for more information.) 3. Use the Up and Down navigation keys to highlight each field. 4. Enter one or more phone numbers in the Mobile, Home, Office, Other, or Fax fields for the new Contact. Note: You can also add numbers to existing Contacts. See "Add a Number or E-mail Address to a Contact" on page 60 for more information. Speed Dial: 5. To assign a Speed Dial location to a phone number: • Press the Up navigation key to highlight the field. • Use the Left and Right navigation keys to scroll through the list of available Speed Dial locations. Note: You can assign Speed Dial locations to any or all phone numbers for a Contact. E-mail Address: 6. To add an E-mail address to this Contact: • Use the Up and Down navigation keys to highlight the field. • Enter an E-mail address using the keypad. (For more information, see "Entering Text" on page 44.) Anniversary: 7. To enter an anniversary date for this Contact: • Use the Up and Down navigation keys to highlight the field. • Enter a date using the keypad. (For more information, see "Entering Text" on page 44.) Ringtone: 8. To select a unique, identifying Ringtone for this new Contact: 52
-
 1
1 -
2
-
3
-
4
-
5
-
6
-
7
-
8
-
9
-
10
-
11
-
12
-
13
-
14
-
15
-
16
-
17
-
18
-
19
-
20
-
21
-
22
-
23
-
24
-
25
-
26
-
27
-
28
-
29
-
30
-
31
-
32
-
33
-
34
-
35
-
36
-
37
-
38
-
39
-
40
-
41
-
42
-
43
-
44
-
45
-
46
-
 47
47 -
 48
48 -
 49
49 -
 50
50 -
 51
51 -
 52
52 -
 53
53 -
 54
54 -
 55
55 -
 56
56 -
 57
57 -
58
-
59
-
60
-
61
-
62
-
63
-
64
-
65
-
66
-
67
-
68
-
69
-
70
-
71
-
72
-
73
-
74
-
75
-
76
-
77
-
78
-
79
-
80
-
81
-
82
-
83
-
84
-
85
-
86
-
87
-
88
-
89
-
90
-
91
-
92
-
93
-
94
-
95
-
96
-
97
-
98
-
99
-
100
-
101
-
102
-
103
-
104
-
105
-
106
-
107
-
108
-
109
-
110
-
111
-
112
-
113
-
114
-
115
-
116
-
117
-
118
-
119
-
120
-
121
-
122
-
123
-
124
-
125
-
126
-
127
-
128
-
129
-
130
-
131
-
132
-
133
-
134
-
135
-
136
-
137
-
138
-
139
-
140
-
141
-
142
-
143
-
144
-
145
-
146
-
147
-
148
-
149
-
150
-
151
-
152
-
153
-
154
-
155
-
156
-
157
-
158
-
159
-
160
-
161
-
162
-
163
-
164
-
165
-
166
-
167
-
168
-
169
-
170
-
171
-
172
-
173
-
174
-
175
-
176
-
177
-
178
-
179
-
180
-
181
-
182
-
183
-
184
-
185
-
186
-
187
-
188
-
189
-
190
-
191
-
192
-
193
-
194
-
195
-
196
-
197
 |
 |