Samsung SPH-A513 User Manual (user Manual) (ver.f4.1) (English) - Page 60
Add Pauses to an Existing Contacts Entry, Add a Number or E-mail Address to a Contact
 |
View all Samsung SPH-A513 manuals
Add to My Manuals
Save this manual to your list of manuals |
Page 60 highlights
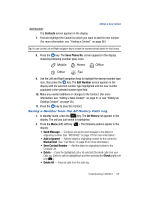
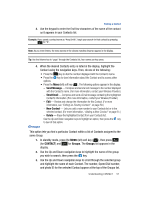
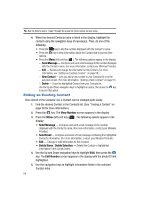
Add Pauses to an Existing Contacts Entry 1. Find the desired entry in the Contacts List. (See "Editing an Existing Contact" on page 58 for more information.) 2. Press the key. The View Number screen appears in the display. 3. Press the Menu (left) soft key ( ). The following options appear in the display: • Send Message - Compose and send a text message to the number displayed with the Contact's name. (For more information, contact your Wireless Provider.) • Send Email - Compose and send a Email message containing the highlighted Contact's information. (For more information, contact your Wireless Provider.) • Edit - Change or add information for this Contact. • Delete Name / Delete Selection - Delete the name/number for this Contact. 4. Use the Up and Down navigation keys to highlight Edit, then press the key. The Edit Number screen appears in the display with the photo ID field highlighted. 5. Use the navigation keys to highlight a number stored in this contact entry. 6. Use the navigation keys to place the cursor where you want to add a pause (usually at the right-hand end of the number). 7. Press the Pause (left) soft key ( ) to add a hard pause (awaits input from you) to the number. Press the 2sec Pause (right) soft key ( ) to add a two-second pause to the number. 8. When you're finished entering pauses, press the key to save your changes to the number in your Contacts List. Add a Number or E-mail Address to a Contact 1. Find the desired Contact. (See "Finding a Contact" on page 56 for more information.) 2. Press the key. The View Number screen appears in the display. 3. Press the Menu (left) soft key ( ). The following options appear in the display: • Send Message - Compose and send a text message to the number displayed with the Contact's name. (For more information, contact your Wireless Provider.) • Send Email - Compose and send a Email message containing the highlighted Contact's information. (For more information, contact your Wireless Provider.) 60
-
 1
1 -
2
-
3
-
4
-
5
-
6
-
7
-
8
-
9
-
10
-
11
-
12
-
13
-
14
-
15
-
16
-
17
-
18
-
19
-
20
-
21
-
22
-
23
-
24
-
25
-
26
-
27
-
28
-
29
-
30
-
31
-
32
-
33
-
34
-
35
-
36
-
37
-
38
-
39
-
40
-
41
-
42
-
43
-
44
-
45
-
46
-
47
-
48
-
49
-
50
-
51
-
52
-
53
-
54
-
 55
55 -
 56
56 -
 57
57 -
 58
58 -
 59
59 -
 60
60 -
 61
61 -
 62
62 -
 63
63 -
 64
64 -
 65
65 -
66
-
67
-
68
-
69
-
70
-
71
-
72
-
73
-
74
-
75
-
76
-
77
-
78
-
79
-
80
-
81
-
82
-
83
-
84
-
85
-
86
-
87
-
88
-
89
-
90
-
91
-
92
-
93
-
94
-
95
-
96
-
97
-
98
-
99
-
100
-
101
-
102
-
103
-
104
-
105
-
106
-
107
-
108
-
109
-
110
-
111
-
112
-
113
-
114
-
115
-
116
-
117
-
118
-
119
-
120
-
121
-
122
-
123
-
124
-
125
-
126
-
127
-
128
-
129
-
130
-
131
-
132
-
133
-
134
-
135
-
136
-
137
-
138
-
139
-
140
-
141
-
142
-
143
-
144
-
145
-
146
-
147
-
148
-
149
-
150
-
151
-
152
-
153
-
154
-
155
-
156
-
157
-
158
-
159
-
160
-
161
-
162
-
163
-
164
-
165
-
166
-
167
-
168
-
169
-
170
-
171
-
172
-
173
-
174
-
175
-
176
-
177
-
178
-
179
-
180
-
181
-
182
-
183
-
184
-
185
-
186
-
187
-
188
-
189
-
190
-
191
-
192
-
193
-
194
-
195
-
196
-
197
 |
 |
