Samsung SPH-A513 User Manual (user Manual) (ver.f4.1) (English) - Page 66
Edit a Group, For the Group ID
 |
View all Samsung SPH-A513 manuals
Add to My Manuals
Save this manual to your list of manuals |
Page 66 highlights
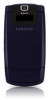
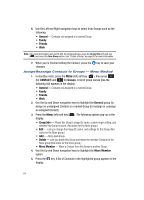
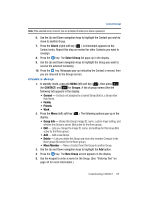
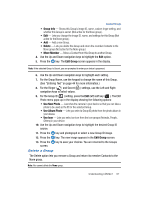
Note: You must enter a name for the new Group before your device will let you make the other settings. 6. Use the Up and Down navigation keys to highlight each setting. 7. For the Ringer ( ) and Secret ( ) settings, use the Left and Right navigation keys to select values. 8. For the Group ID ( ) setting, press the Edit (left) soft key ( ). The Edit Photo menu pops-up in the display showing the following options: • Use New Photo - Launches the camera in your device so that you can take a photo to be used as the ID for the selected Group. • Use Album Photo - Lets you select a Group ID photo from the photo album in your device. • Use Icon - Lets you select an icon from the icon groups (Animals, People, Others) in your device. 9. Use the Up and Down navigation keys to highlight the desired Group ID source. 10. Press the key and photograph or select a Group ID image. 11. Press the key. The selected image appears in the New Group screen. 12. Press the key to save your choices. You are returned to the Groups screen. Edit a Group The Edit option lets you change the name of a Group and its settings. Note: You cannot rename the None group. 1. In standby mode, press the MENU (left) soft key ( ), then press (for CONTACT) and for Groups. A list of group names (like the following list) appears in the display: • General - Contacts not assigned to a named Group. • Family • Friends • Work 2. Use the Up and Down navigation keys to highlight the None group (to assign an unassigned Contact) or a named Group (to reassign or unassign an assigned Contact). 3. Press the Menu (left) soft key ( ). The following options pop-up in the display: 66
-
 1
1 -
2
-
3
-
4
-
5
-
6
-
7
-
8
-
9
-
10
-
11
-
12
-
13
-
14
-
15
-
16
-
17
-
18
-
19
-
20
-
21
-
22
-
23
-
24
-
25
-
26
-
27
-
28
-
29
-
30
-
31
-
32
-
33
-
34
-
35
-
36
-
37
-
38
-
39
-
40
-
41
-
42
-
43
-
44
-
45
-
46
-
47
-
48
-
49
-
50
-
51
-
52
-
53
-
54
-
55
-
56
-
57
-
58
-
59
-
60
-
 61
61 -
 62
62 -
 63
63 -
 64
64 -
 65
65 -
 66
66 -
 67
67 -
 68
68 -
 69
69 -
 70
70 -
 71
71 -
72
-
73
-
74
-
75
-
76
-
77
-
78
-
79
-
80
-
81
-
82
-
83
-
84
-
85
-
86
-
87
-
88
-
89
-
90
-
91
-
92
-
93
-
94
-
95
-
96
-
97
-
98
-
99
-
100
-
101
-
102
-
103
-
104
-
105
-
106
-
107
-
108
-
109
-
110
-
111
-
112
-
113
-
114
-
115
-
116
-
117
-
118
-
119
-
120
-
121
-
122
-
123
-
124
-
125
-
126
-
127
-
128
-
129
-
130
-
131
-
132
-
133
-
134
-
135
-
136
-
137
-
138
-
139
-
140
-
141
-
142
-
143
-
144
-
145
-
146
-
147
-
148
-
149
-
150
-
151
-
152
-
153
-
154
-
155
-
156
-
157
-
158
-
159
-
160
-
161
-
162
-
163
-
164
-
165
-
166
-
167
-
168
-
169
-
170
-
171
-
172
-
173
-
174
-
175
-
176
-
177
-
178
-
179
-
180
-
181
-
182
-
183
-
184
-
185
-
186
-
187
-
188
-
189
-
190
-
191
-
192
-
193
-
194
-
195
-
196
-
197
 |
 |