Samsung SPH-A513 User Manual (user Manual) (ver.f4.1) (English) - Page 158
Sending a Picture Message
 |
View all Samsung SPH-A513 manuals
Add to My Manuals
Save this manual to your list of manuals |
Page 158 highlights
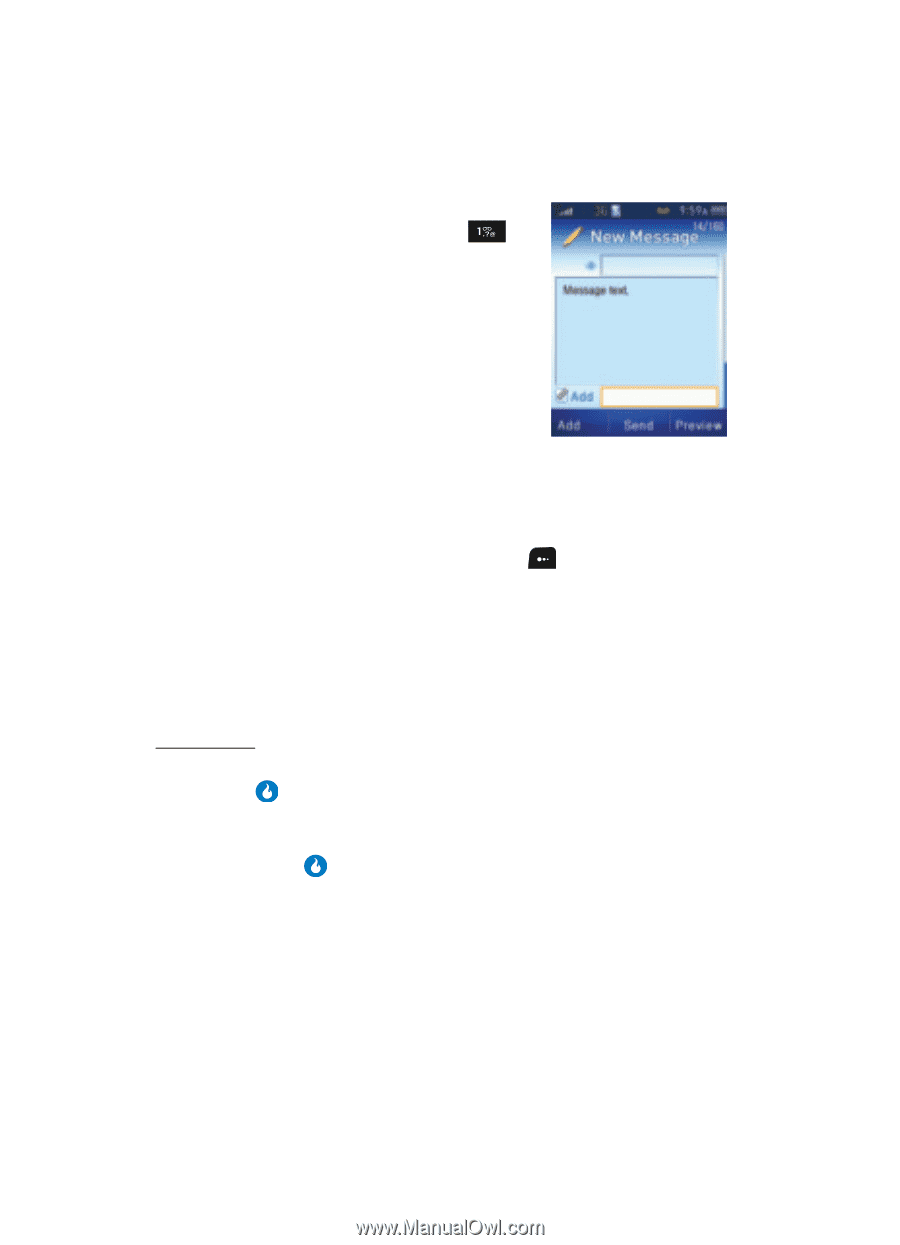
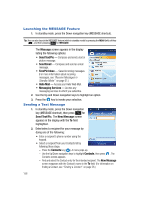
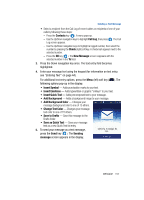
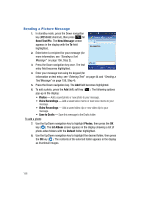
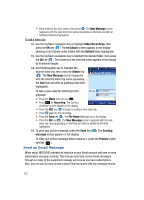
Sending a Picture Message 1. In standby mode, press the Down navigation key (MESSAGE shortcut), then press for Send Text/Pic. The New Message screen appears in the display with the To field highlighted. 2. Enter/select a recipient for your message (for more information, see "Sending a Text Message" on page 156, Step 2). 3. Press the Down navigation key once. The text entry field becomes highlighted. 4. Enter your message text using the keypad (for information on text entry, see "Entering Text" on page 44 and "Sending a Text Message" on page 156, Step 4). 5. Press the Down navigation key. The Add field becomes highlighted. 6. To add a photo, press the Add (left) soft key ( ). The following options pop-up in the display: • Photos - Add a saved photo or new photo to your message. • Voice Recordings - Add a saved voice memo or new voice memo to your message. • Video Recordings - Add a saved video clip or new video clip to your message. • Save to Drafts - Save this message to the Drafts folder. To add a photo: 7. Use the Up/Down navigation key to highlight Photos, then press the OK key ( ). The Int Album screen appears in the display showing a list of photo-video folders with the Default folder highlighted. 8. Use the Up/Down navigation key to highlight the desired folder, then press the OK key ( ). The contents of the selected folder appears in the display as thumbnail images. 158
-
 1
1 -
2
-
3
-
4
-
5
-
6
-
7
-
8
-
9
-
10
-
11
-
12
-
13
-
14
-
15
-
16
-
17
-
18
-
19
-
20
-
21
-
22
-
23
-
24
-
25
-
26
-
27
-
28
-
29
-
30
-
31
-
32
-
33
-
34
-
35
-
36
-
37
-
38
-
39
-
40
-
41
-
42
-
43
-
44
-
45
-
46
-
47
-
48
-
49
-
50
-
51
-
52
-
53
-
54
-
55
-
56
-
57
-
58
-
59
-
60
-
61
-
62
-
63
-
64
-
65
-
66
-
67
-
68
-
69
-
70
-
71
-
72
-
73
-
74
-
75
-
76
-
77
-
78
-
79
-
80
-
81
-
82
-
83
-
84
-
85
-
86
-
87
-
88
-
89
-
90
-
91
-
92
-
93
-
94
-
95
-
96
-
97
-
98
-
99
-
100
-
101
-
102
-
103
-
104
-
105
-
106
-
107
-
108
-
109
-
110
-
111
-
112
-
113
-
114
-
115
-
116
-
117
-
118
-
119
-
120
-
121
-
122
-
123
-
124
-
125
-
126
-
127
-
128
-
129
-
130
-
131
-
132
-
133
-
134
-
135
-
136
-
137
-
138
-
139
-
140
-
141
-
142
-
143
-
144
-
145
-
146
-
147
-
148
-
149
-
150
-
151
-
152
-
 153
153 -
 154
154 -
 155
155 -
 156
156 -
 157
157 -
 158
158 -
 159
159 -
 160
160 -
 161
161 -
 162
162 -
 163
163 -
164
-
165
-
166
-
167
-
168
-
169
-
170
-
171
-
172
-
173
-
174
-
175
-
176
-
177
-
178
-
179
-
180
-
181
-
182
-
183
-
184
-
185
-
186
-
187
-
188
-
189
-
190
-
191
-
192
-
193
-
194
-
195
-
196
-
197
 |
 |