Samsung SPH-A513 User Manual (user Manual) (ver.f4.1) (English) - Page 116
Point, Click, and Send Pictures, Print Photos, screen appears
 |
View all Samsung SPH-A513 manuals
Add to My Manuals
Save this manual to your list of manuals |
Page 116 highlights
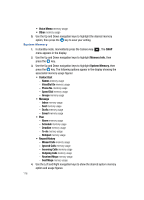
3. Use the Up and Down navigation keys to highlight Auto Save, then press the key. The following options appear in the display: • On - Your picture or video clip is automatically saved when you take a picture or end recording of a video clip. • Off - You are given the option to SEND or Save a picture or video clip when you take a picture or end recording of a video clip. 4. Use the Up and Down navigation keys to highlight the automatic save setting of your choice, then press the key. You're returned to the Settings menu. Point, Click, and Send Pictures Take a picture and send it to anyone with a compatible device in a few easy steps. 1. In standby mode, momentarily press the Camera key ( ). The SNAP menu appears in the display. 2. Use the Up and Down navigation keys to highlight Camera, then press the key. 3. Press the key or the Camera key ( ) to take a picture. 4. Press the SEND (left) soft key ( ). The File Name pop-up appears in the display. 5. Press the key to accept the automatically assigned file name, or enter a new file name and press the key. The New Message screen appears in the display. 6. Enter the message text, then press the key. (For more information, see "MESSAGE" on page 155.) 7. Enter the recipient phone number(s) or email address(es) using the keypad. 8. Press the key to save the address(es) and to send the Picture message to the intended recipients. Print Photos The Print Photos feature allows you to send a Photo to a USB or Bluetooth printer. 1. Connect the device to a USB or Bluetooth printer. Note: To connect the device to a USB printer use the USB data cable (included in the box). For more information about Bluetooth mode, see "Bluetooth" on page 92. 1. In standby mode, momentarily press the Camera key ( ). The SNAP menu appears in the display. 116
-
 1
1 -
2
-
3
-
4
-
5
-
6
-
7
-
8
-
9
-
10
-
11
-
12
-
13
-
14
-
15
-
16
-
17
-
18
-
19
-
20
-
21
-
22
-
23
-
24
-
25
-
26
-
27
-
28
-
29
-
30
-
31
-
32
-
33
-
34
-
35
-
36
-
37
-
38
-
39
-
40
-
41
-
42
-
43
-
44
-
45
-
46
-
47
-
48
-
49
-
50
-
51
-
52
-
53
-
54
-
55
-
56
-
57
-
58
-
59
-
60
-
61
-
62
-
63
-
64
-
65
-
66
-
67
-
68
-
69
-
70
-
71
-
72
-
73
-
74
-
75
-
76
-
77
-
78
-
79
-
80
-
81
-
82
-
83
-
84
-
85
-
86
-
87
-
88
-
89
-
90
-
91
-
92
-
93
-
94
-
95
-
96
-
97
-
98
-
99
-
100
-
101
-
102
-
103
-
104
-
105
-
106
-
107
-
108
-
109
-
110
-
 111
111 -
 112
112 -
 113
113 -
 114
114 -
 115
115 -
 116
116 -
 117
117 -
 118
118 -
 119
119 -
 120
120 -
 121
121 -
122
-
123
-
124
-
125
-
126
-
127
-
128
-
129
-
130
-
131
-
132
-
133
-
134
-
135
-
136
-
137
-
138
-
139
-
140
-
141
-
142
-
143
-
144
-
145
-
146
-
147
-
148
-
149
-
150
-
151
-
152
-
153
-
154
-
155
-
156
-
157
-
158
-
159
-
160
-
161
-
162
-
163
-
164
-
165
-
166
-
167
-
168
-
169
-
170
-
171
-
172
-
173
-
174
-
175
-
176
-
177
-
178
-
179
-
180
-
181
-
182
-
183
-
184
-
185
-
186
-
187
-
188
-
189
-
190
-
191
-
192
-
193
-
194
-
195
-
196
-
197
 |
 |