Samsung SPH-A513 User Manual (user Manual) (ver.f4.1) (English) - Page 164
Messaging Services, Email Setup Information, Setting Up an Email Account
 |
View all Samsung SPH-A513 manuals
Add to My Manuals
Save this manual to your list of manuals |
Page 164 highlights
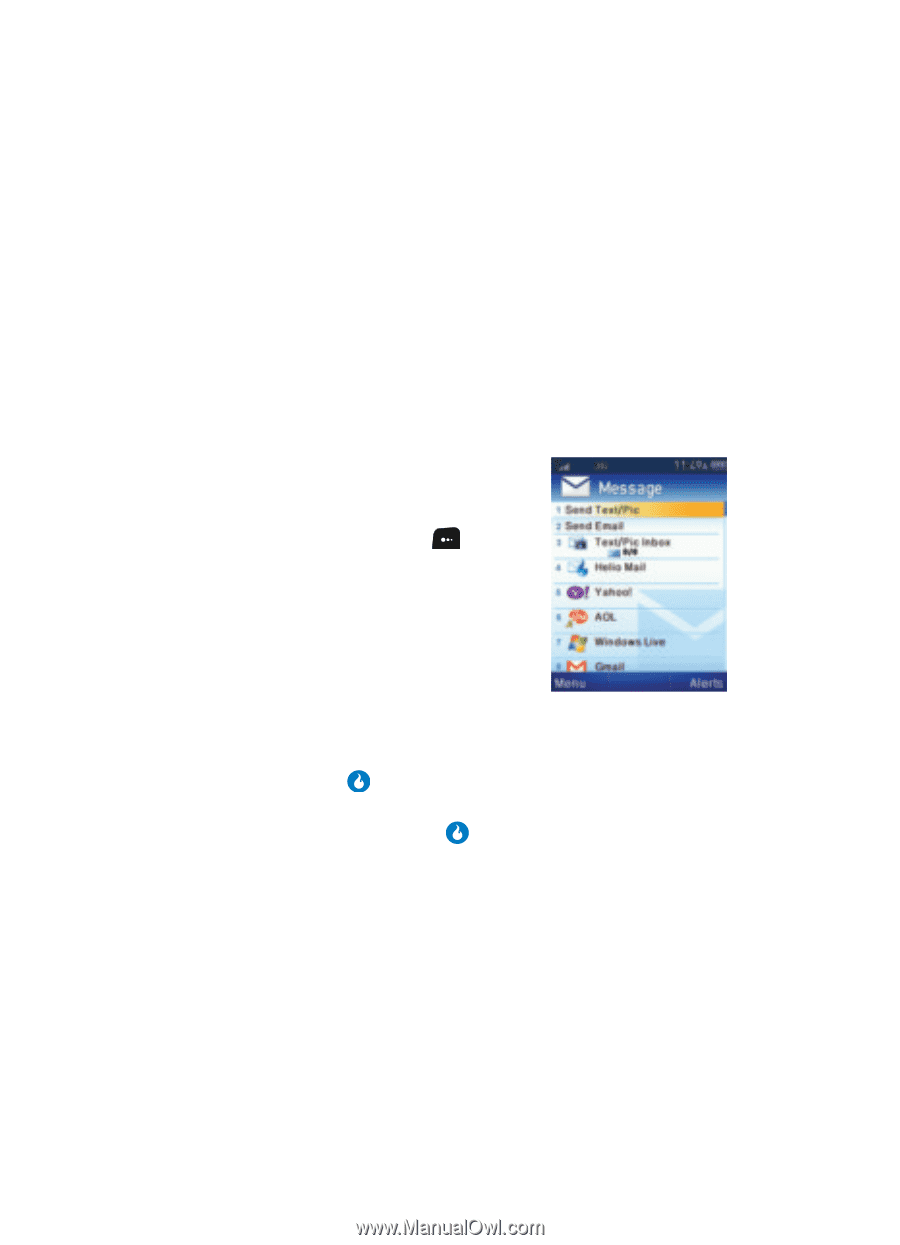
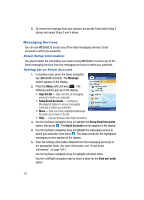
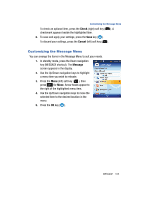
5. To remove the message from your handset, access the Trash folder (Step 2 above) and repeat Steps 3 and 4 above. Messaging Services You can use MESSAGE to access any of the listed messaging services' Email accounts to which you subscribe. Email Setup Information You should obtain the information you need to setup MESSAGE to access any of the listed messaging services from the messaging service(s) to which you subscribe. Setting Up an Email Account 1. In standby mode, press the Down navigation key (MESSAGE shortcut). The Message screen appears in the display. 2. Press the Menu (left) soft key ( ). The following options pop-up in the display: • Sign Out All - Sign out from all messaging services to which you subscribe. • Setup Email Accounts - Configures Message list options to access messaging service(s) to which you subscribe. • Move - Lets you move a highlighted Message list option up or down in the list. • Help - Lets you browse online help information. 3. Use the Up/Down navigation keys to highlight the Setup Email Accounts option, then press . The Email Accounts screen appears in the display. 4. Use the Up/Down navigation keys to highlight the messaging service to which you subscribe, then press . The setup screen for the highlighted messaging service appears in the display. 5. Enter the settings information obtained from the messaging service(s) in the appropriate fields. (For more information, see "Email Setup Information" on page 164.) Use the Up/Down navigation keys to highlight individual fields. Use the Left/Right navigation keys to select a value for the Date sort order option. 164
-
 1
1 -
2
-
3
-
4
-
5
-
6
-
7
-
8
-
9
-
10
-
11
-
12
-
13
-
14
-
15
-
16
-
17
-
18
-
19
-
20
-
21
-
22
-
23
-
24
-
25
-
26
-
27
-
28
-
29
-
30
-
31
-
32
-
33
-
34
-
35
-
36
-
37
-
38
-
39
-
40
-
41
-
42
-
43
-
44
-
45
-
46
-
47
-
48
-
49
-
50
-
51
-
52
-
53
-
54
-
55
-
56
-
57
-
58
-
59
-
60
-
61
-
62
-
63
-
64
-
65
-
66
-
67
-
68
-
69
-
70
-
71
-
72
-
73
-
74
-
75
-
76
-
77
-
78
-
79
-
80
-
81
-
82
-
83
-
84
-
85
-
86
-
87
-
88
-
89
-
90
-
91
-
92
-
93
-
94
-
95
-
96
-
97
-
98
-
99
-
100
-
101
-
102
-
103
-
104
-
105
-
106
-
107
-
108
-
109
-
110
-
111
-
112
-
113
-
114
-
115
-
116
-
117
-
118
-
119
-
120
-
121
-
122
-
123
-
124
-
125
-
126
-
127
-
128
-
129
-
130
-
131
-
132
-
133
-
134
-
135
-
136
-
137
-
138
-
139
-
140
-
141
-
142
-
143
-
144
-
145
-
146
-
147
-
148
-
149
-
150
-
151
-
152
-
153
-
154
-
155
-
156
-
157
-
158
-
 159
159 -
 160
160 -
 161
161 -
 162
162 -
 163
163 -
 164
164 -
 165
165 -
 166
166 -
 167
167 -
 168
168 -
 169
169 -
170
-
171
-
172
-
173
-
174
-
175
-
176
-
177
-
178
-
179
-
180
-
181
-
182
-
183
-
184
-
185
-
186
-
187
-
188
-
189
-
190
-
191
-
192
-
193
-
194
-
195
-
196
-
197
 |
 |