Sony XDSPD2000 User Manual (XDS-PD1000 and XDS-PD2000 Operation Manual for Fir - Page 18
Display/menu control VARIABLE audio level adjustment selector, switch, PRESET
 |
View all Sony XDSPD2000 manuals
Add to My Manuals
Save this manual to your list of manuals |
Page 18 highlights
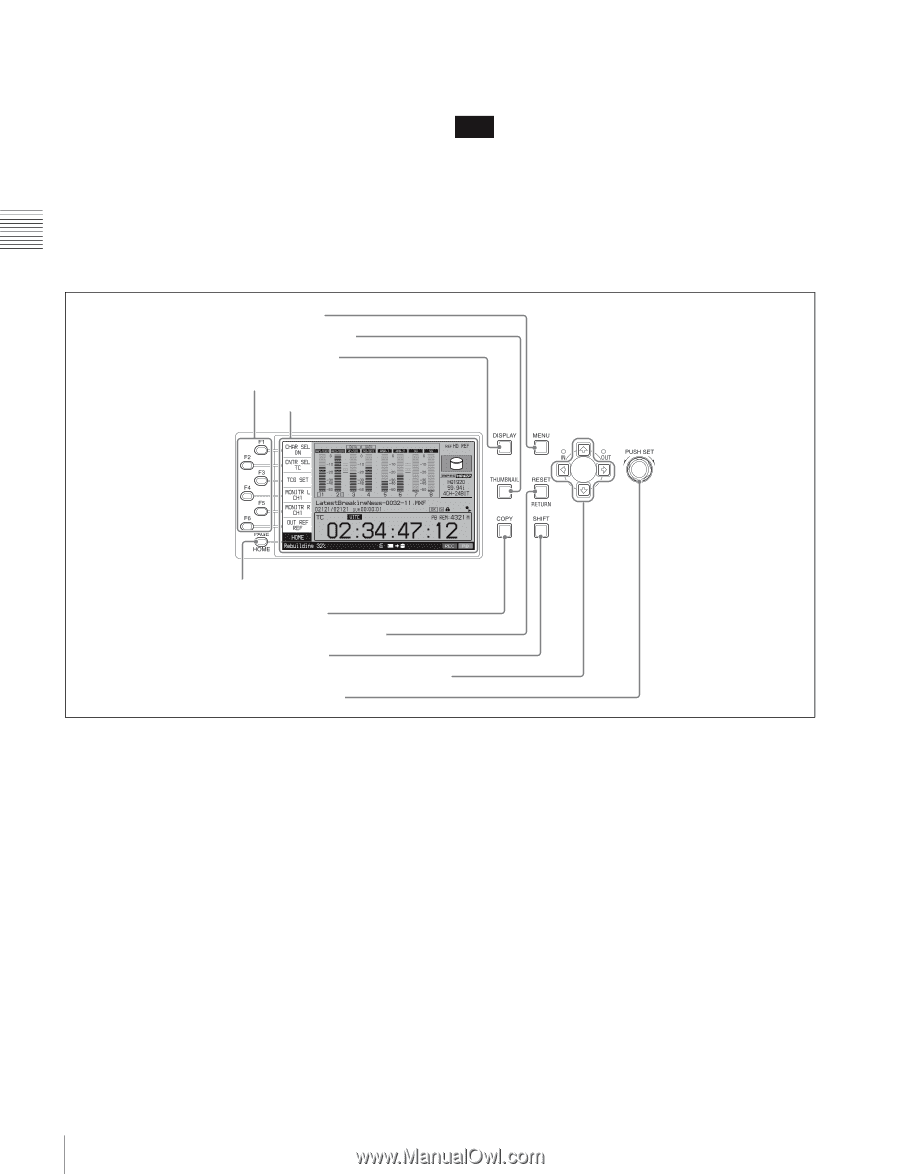
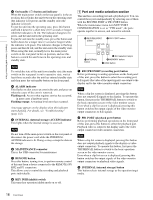
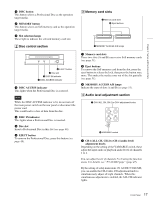
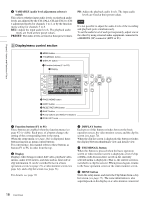
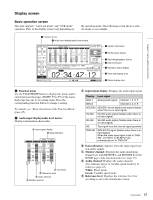
b VARIABLE (audio level adjustment selector) switch This selects whether input audio levels or playback audio levels are adjusted by the CH-1/ALL CH and CH-2 to CH4 adjustment knobs for channels 1 to 4, or by the function menu setting for channels 5 to 8. REC: Adjust the input audio levels. The playback audio levels are fixed at their preset values. PRESET: The audio levels are fixed at their preset values. PB: Adjust the playback audio levels. The input audio levels are fixed at their preset values. Note It is not possible to adjust the audio levels of the recording and playback ports simultaneously. To set the audio level of each port separately, adjust one or the other by using external audio equipment connected to a REMOTE (9P) connector (R/P2 or P1). 5 Display/menu control section 5 MENU button 4 THUMBNAIL button 3 DISPLAY button 1 Function buttons (F1 to F6) 2 Display Chapter 2 Names and Functions of Parts 6 PAGE/HOME button 7 COPY button 8 RESET/RETURN button 9 SHIFT button q; Arrow buttons and IN/OUT indicators qa PUSH SET knob a Function buttons (F1 to F6) These buttons are enabled when the function menu (see page 45) is visible. Each press of a button changes the setting of the corresponding item in the menu. When the setup menu (see page 104) is displayed, these buttons function as menu control buttons. For convenience, this manual refers to these buttons as buttons F1 to F6, in order from the top. b Display Displays video being recorded, E-E video, playback video, menus, audio level meters, and data such as timecode or clip information. It can be switched between a basic operation screen (see page 21), a video monitor screen (see page 24), and a clip list screen (see page 71). For details, see page 70. c DISPLAY button Each press of this button switches between the basic operation screen, the video monitor screen, and the clip list screen (see page 70). When the clip list screen is displayed, this button switches the display between thumbnails view and details view. d THUMBNAIL button When this button is pressed when the basic operation screen or video monitor screen is displayed, a list of clips or EDLs (edit decision lists) saved on the currently selected media is displayed. (That is, the current screen is switched to a clip list screen.) When pressed again, returns to the basic operation screen or the video monitor screen. e MENU button Starts the setup menu, and starts the Clip Menu from a clip list screen (see page 75). The same information is also superimposed on the display on a video monitor connected 18 Front Panel
-
 1
1 -
2
-
3
-
4
-
5
-
6
-
7
-
8
-
9
-
10
-
11
-
12
-
 13
13 -
 14
14 -
 15
15 -
 16
16 -
 17
17 -
 18
18 -
 19
19 -
 20
20 -
 21
21 -
 22
22 -
 23
23 -
24
-
25
-
26
-
27
-
28
-
29
-
30
-
31
-
32
-
33
-
34
-
35
-
36
-
37
-
38
-
39
-
40
-
41
-
42
-
43
-
44
-
45
-
46
-
47
-
48
-
49
-
50
-
51
-
52
-
53
-
54
-
55
-
56
-
57
-
58
-
59
-
60
-
61
-
62
-
63
-
64
-
65
-
66
-
67
-
68
-
69
-
70
-
71
-
72
-
73
-
74
-
75
-
76
-
77
-
78
-
79
-
80
-
81
-
82
-
83
-
84
-
85
-
86
-
87
-
88
-
89
-
90
-
91
-
92
-
93
-
94
-
95
-
96
-
97
-
98
-
99
-
100
-
101
-
102
-
103
-
104
-
105
-
106
-
107
-
108
-
109
-
110
-
111
-
112
-
113
-
114
-
115
-
116
-
117
-
118
-
119
-
120
-
121
-
122
-
123
-
124
-
125
-
126
-
127
-
128
-
129
-
130
-
131
-
132
-
133
-
134
-
135
-
136
-
137
-
138
-
139
-
140
-
141
-
142
-
143
-
144
-
145
-
146
-
147
-
148
-
149
-
150
-
151
-
152
-
153
-
154
-
155
-
156
-
157
-
158
-
159
-
160
-
161
 |
 |